Encrypt with Data Transform
This article explains how to encrypt data using the in-place data transformation, which is also known as dataxform.
At a high level, you will:
Shut down the database software
Place a transformation policy in the directory
Implement encryption
Remove the transformation policy
Add the operational policy
Restart the database software
During this process, the database software will shut down, which means access to the files in the database will be prevented.
Armor recommends that you use the Copy Method for encryption because this method:
Reduces the amount of time spent setting the customized Dataxform policy on the GuardPoints on the DSM
Prevents any user error when you enter the text command to rekey the data
Ensures that the encrypted files are accessible before you remove the non-encrypted / original files
Prerequisites
Before you begin, you must have:
General understanding of the Vormetric product
Strong understanding of how to create GuardPoints in DSM
Strong understanding of how to create policies in DSM
A production key available to use
Encrypt with Data Transform
Log into your DSM as a Security Administrator.
In the top menu bar, click Policies.
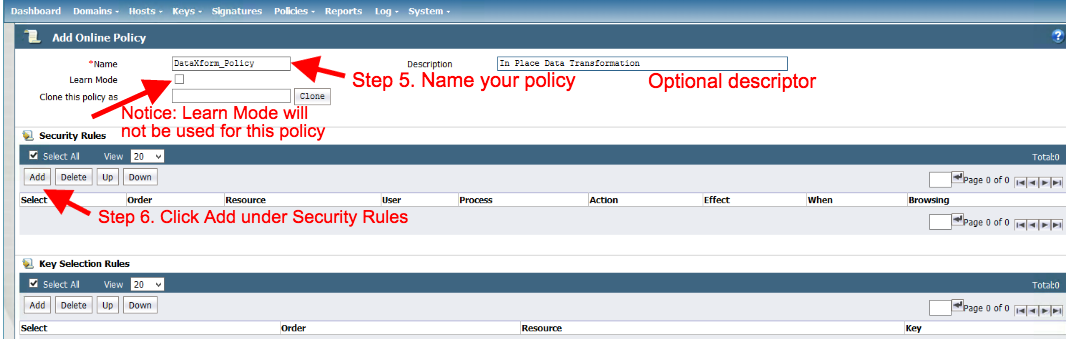
Click Add Online Policies.
For Name, enter DataXform_Policy.
(Optional) For Description, enter In Place Data Transformation Policy.
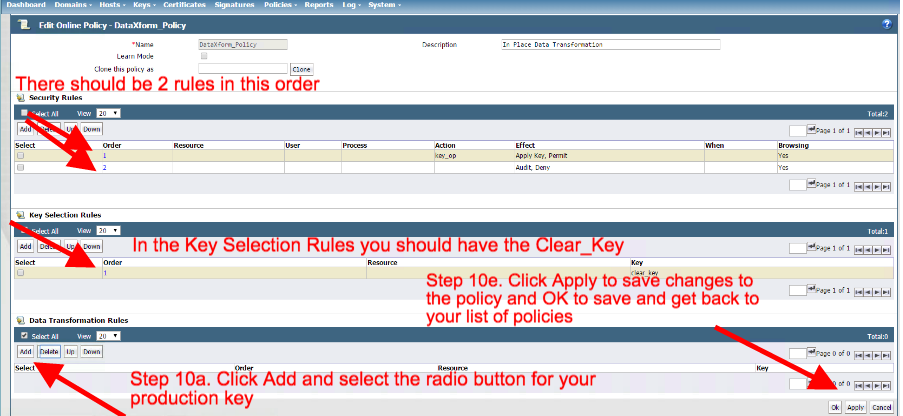
Under Security Rules, click Add.

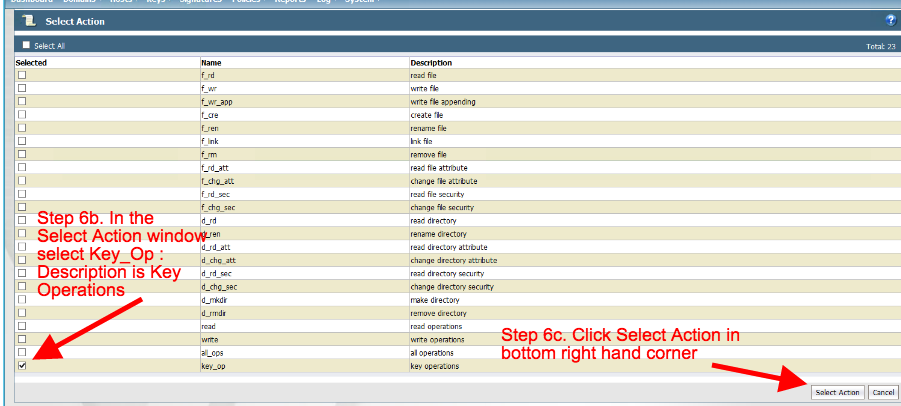
Next to Action, click Select.
At the bottom of the table, next to the kep_op entry, mark the box.
Click Select Actions. This step will populate the Action field with key_op.
Locate the Effect field.
Click Select.
Mark the box for Apply Key and Audit.
Click Select Effect.
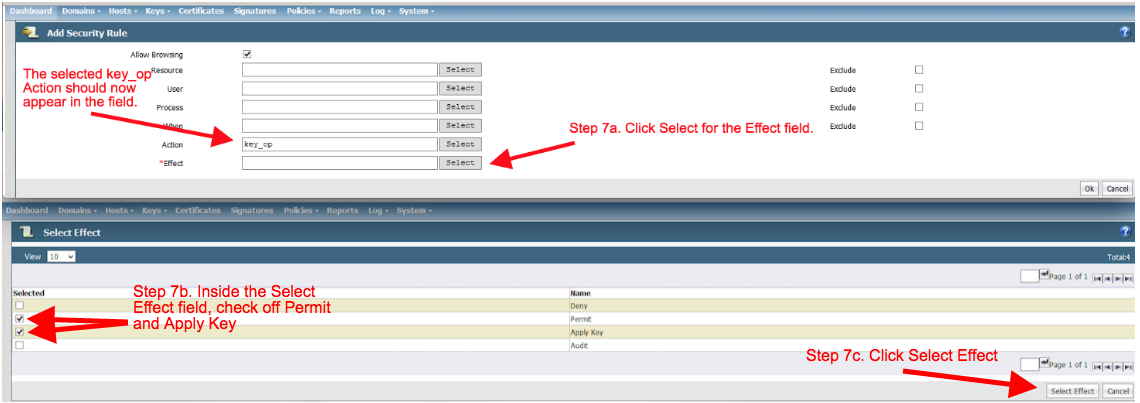
This will populate the Effect field.
Click Ok to add the rule to the policy.

In the Add Online Policy screen, click Add to add a second rule.
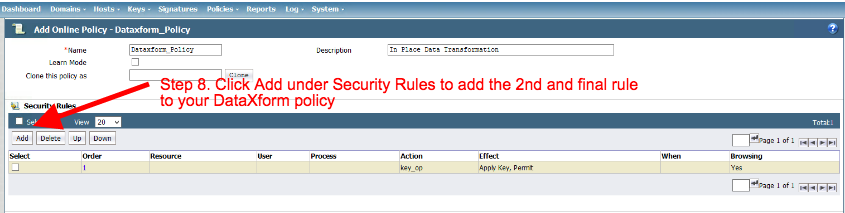
This action will take you to the Add Security Rule screen.
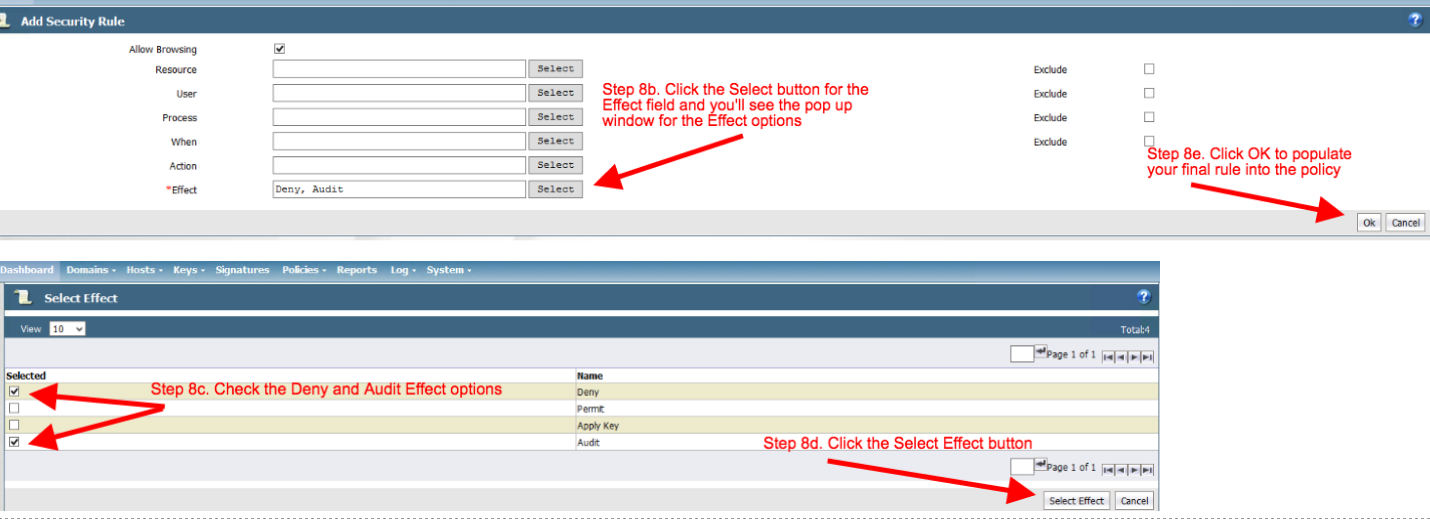
Next to Effect, click Select.
Mark the box for Deny and Audit.
Click Select Effect.
Click Ok.
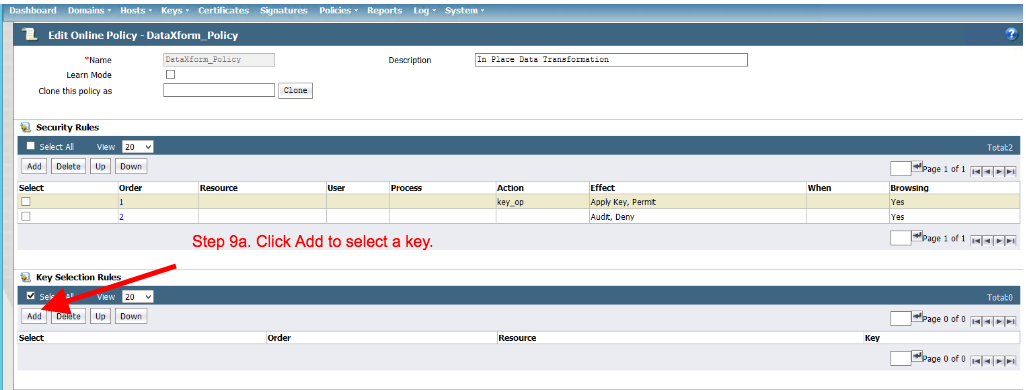
Under Key Section Rules, click Add.
This action will take you to the Add Key Rule screen.
Next to Key, click Select.
Mark the box for clear_key.
Click Select Key.
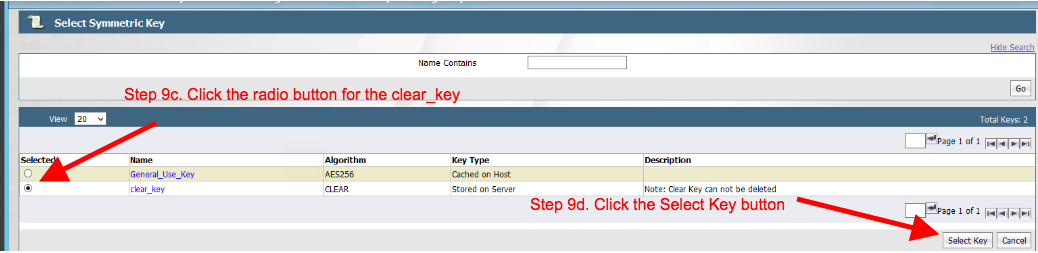
In the Add Key Rule screen, click Ok.

Locate the Data Transformation Rules section.
Click Add.
Next to Key, click Select.

Mark the box for the production key.
Click Select Key. This action will populate the Key field.
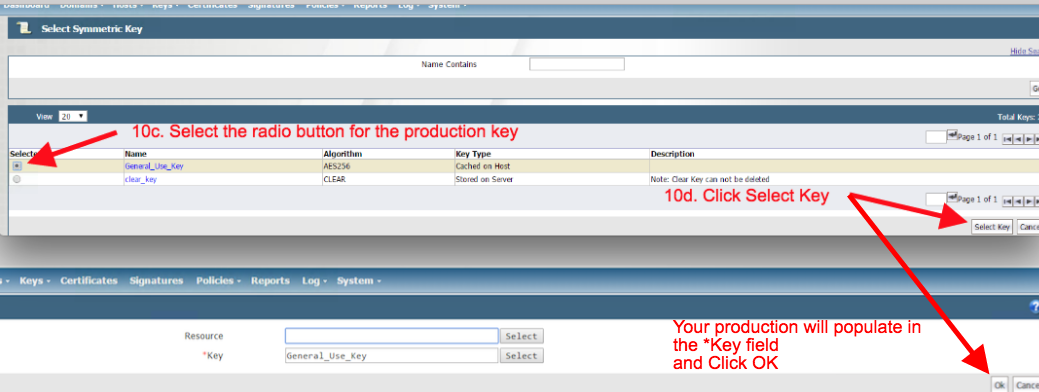
Click Ok. This action will display two rules.

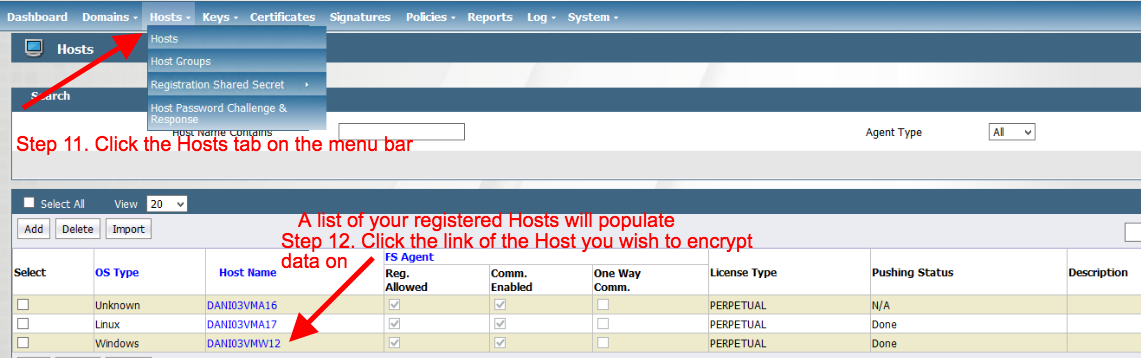
In the top menu bar, click Hosts.
Under Host Name, select the host you want to encrypt.
Verify that no services or users are trying to access the intended GuardPoint. You can accomplish this by shutting down the database service, and then confirming that there are no users in the working directory.
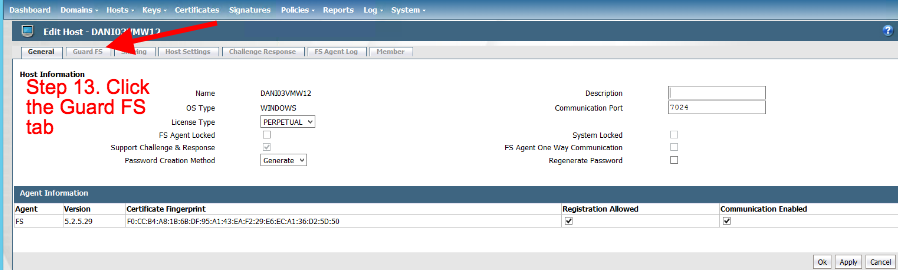
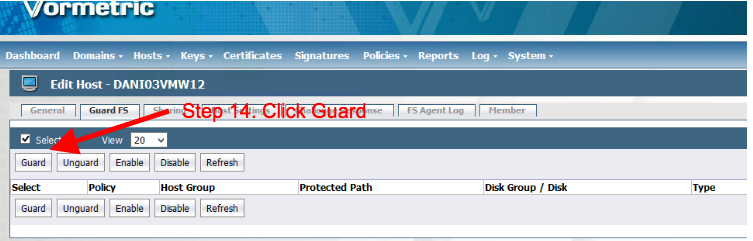
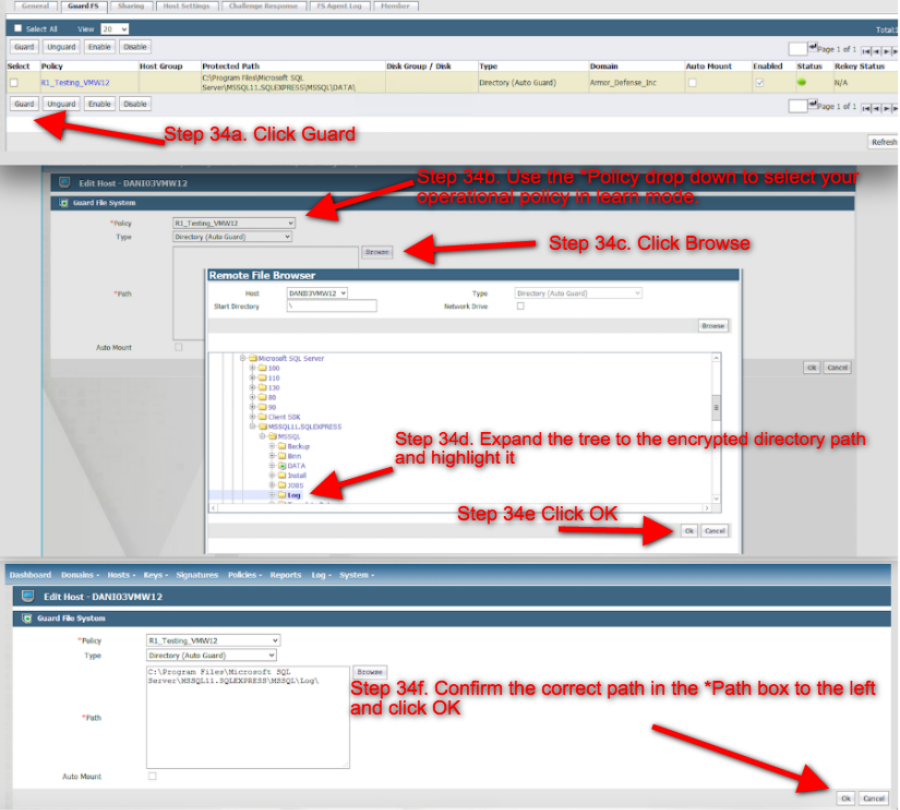
Click the Guard FS tab.
Click the Guard button.
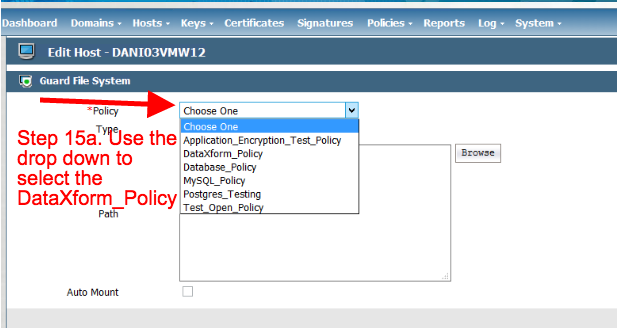
In the Guard File System screen, click the Policy drop-down menu.
Select DataXform_Policy.
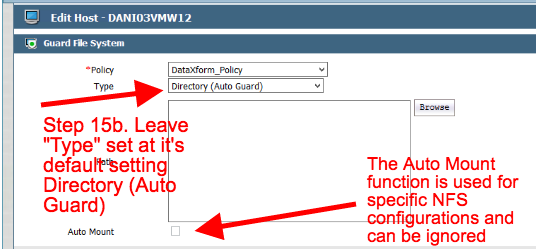
Do not modify the Type field. This field should display Directory (Auto Guard).
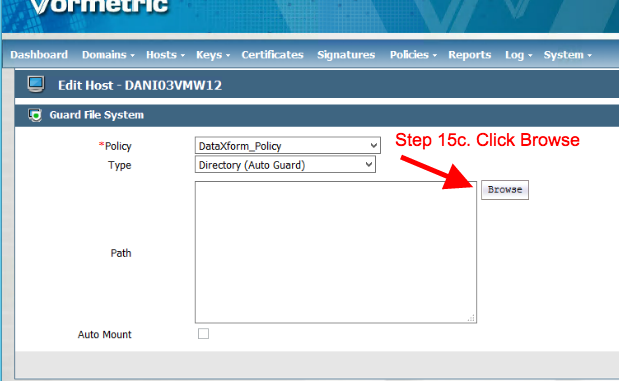
Click Browse.
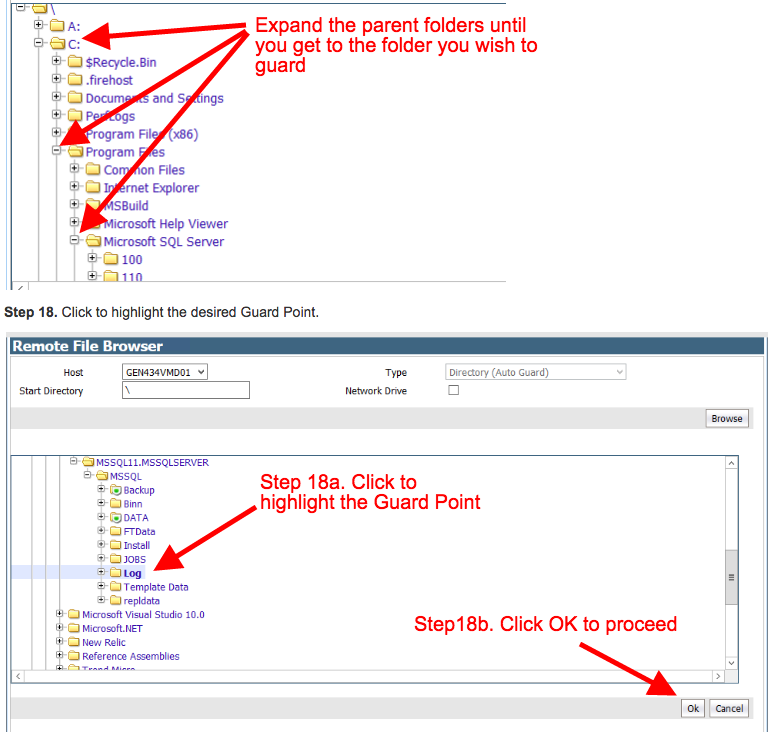
In the window that appears, expand the folder directory.
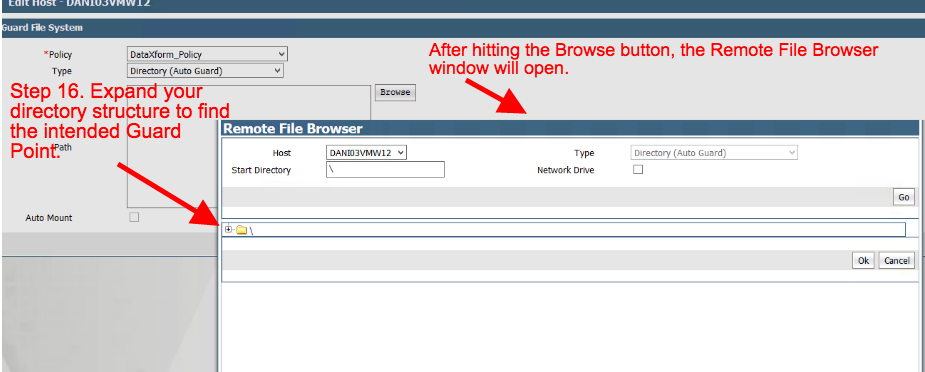
Locate and select the desired path that you want to protect.
In the image below, the sample GuardPoint is: C:\Program Files\Microsoft SQL Server\MSSQL11.MSSQLSERVER\MSSQL\Log\
Select the desired GuardPoint.
Click Ok.
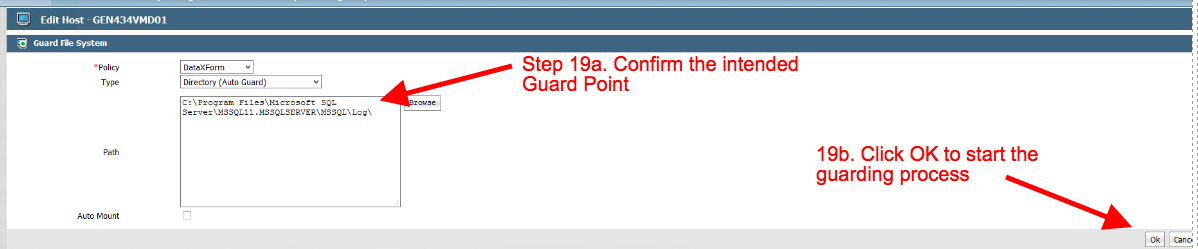
The GuardPoint you selected will populate the Path field.
Confirm the intended path.
Click Ok.
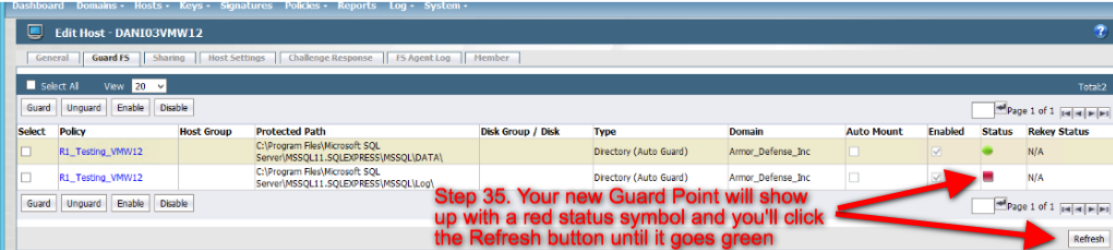
Under Status, click the refresh button for the newly created GuardPoint.
You may need refresh several times.

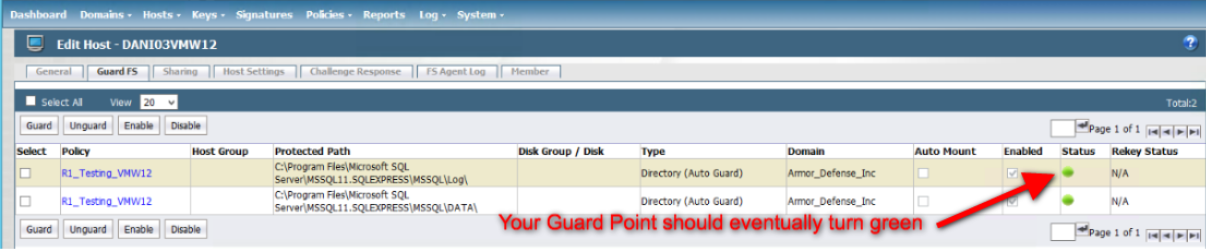
Confirm the status turns green.

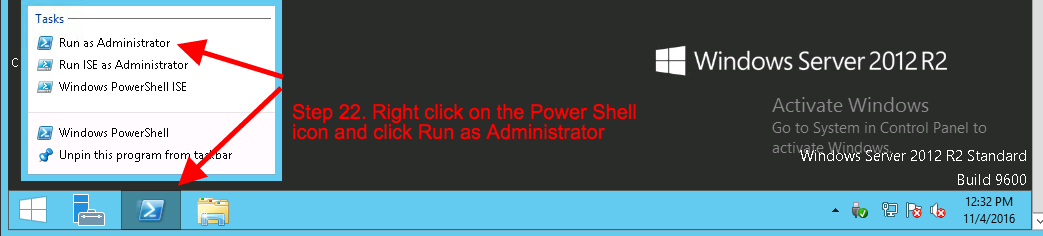
On the Windows server where you are going to apply the GuardPoint, right-click on the PowerShell icon, and then select Run as Administrator.
Before you can run the encryption command, you must change into the directory where the Vormetric dataXform utility is located (C:\Program Files\).
Change the directory path where the utility is located (C:\Program Files\Vometric\DataSecurityExpert\agent\vmd\bin).
The utility has a feature that allows you to scan the indended GuardPoint before you run the DataXform command, which can be useful to verify that the GuardPoint can be encrypted and also to offer an estimate on how long the encryption configuration will take.
The DataXform data command function is: .\dataxform ••--deep_scan ••--gp <guard point path>

When you are in the DataXform utility path, you can run the DataXform command with various added arguments. The standard command is: .\dataxform --rekey --gp <directory path>
You can add the .\dataxform --rekey flag to read data with the clear key and write back in with the production key (encrypting the data in place).
You can add --print_state to retrieve a printout of how many files are going to be encrypted and periodic updates of how much data has been encrypted so far.
The command would be .\dataxform --rekey --print_stat --gp <directory path>
You can add the --cleanup_on_success flag to clean up the temporary files created during the DataXform process and are not necessarily needed in the future.
The command would be: .\dataxform --rekey --print_stat --cleanup_on_success —gp <direcotry path>
You can add the --preserve_modified_time flag to preserve the current time stamp of the files being encrypted, instead of changing the time stamp to when DataXform ran.
The command would be: .\dataxform ••--rekey ••--print_stat --cleanup_on_success --
preserve_modified_time--gp <directory>
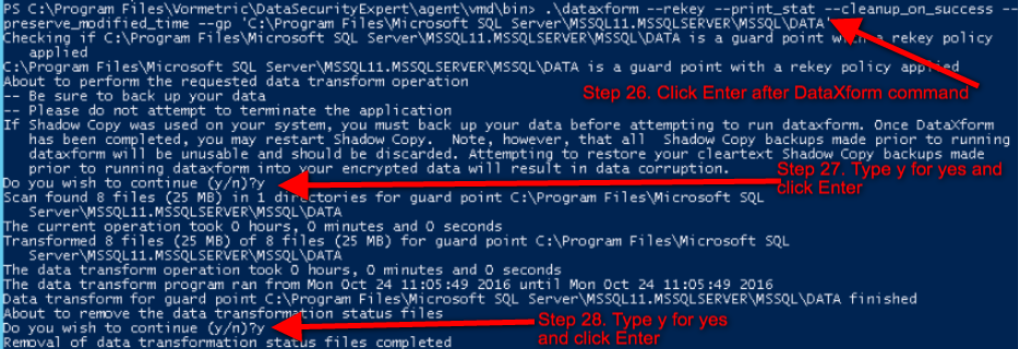
After you enter the command, press Enter.
If successful, you will see a text output similar to the screenshot below.
If unsuccessful, make sure there are two dashes before each flag and that the words are spelled correctly.
Assuming your data is already backed up, then press y to continue.
To remove the data transformation status files created earlier, press y, and then press Enter.
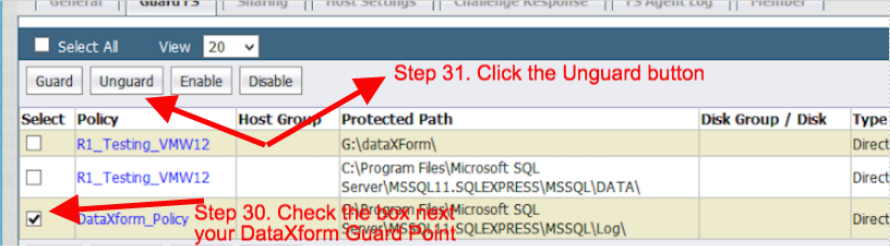
Return to the DSM console, and mark the box for the GuardPoint that contains the DataXform policy.
If you are logged out of the DSM console, after you login, click the Hosts tab, select the desired Host Name, and then click Guard FS.
Mark the box next to DataXForm_Policy.
Select the Unguard button.
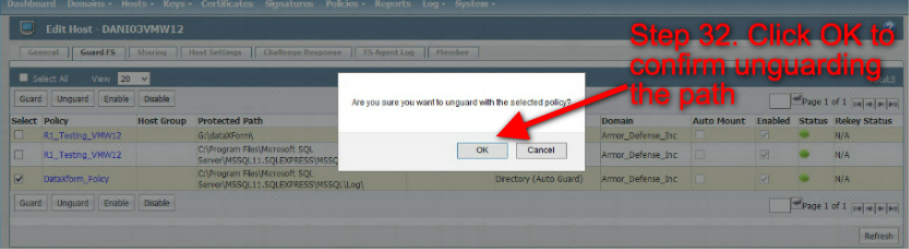
Click OK.
Click the Refresh button.
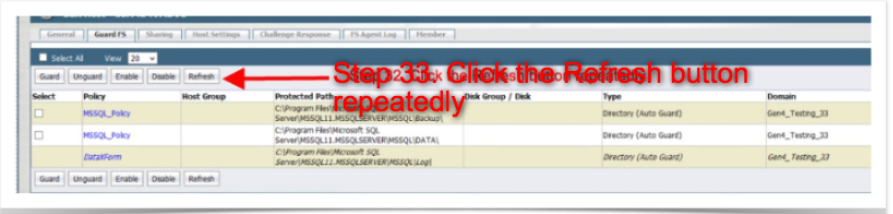
You may need to click Refresh several times before the GuardPoint disappears.
When the GuardPoint disappears, click Guard.
In the pop-up window, in the Policy drop-down menu, select your operational policy in learn mode. (In the screenshots below, the example is R1_Testing_VMW12.
Expand the directory to the path, and then highlight the path you previously encrypted. (In the screenshots below, the example is C:\Program Files\Microsoft SQL Server\MSSQL11.MSSQLSERVER\MSSQ\Log.
Click Ok.
Click the Refresh button.
You may need to click Refresh several times before the GuardPoint turns green.
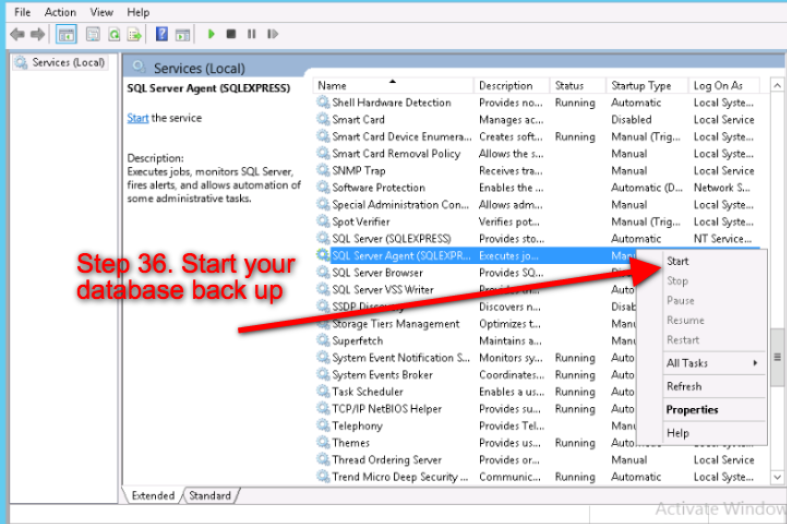
Restart your database.