Upgrade Your Vormetric Environment for Generation 4
Before you begin:
You must have system administrator credentials to access the Vormetric DSM
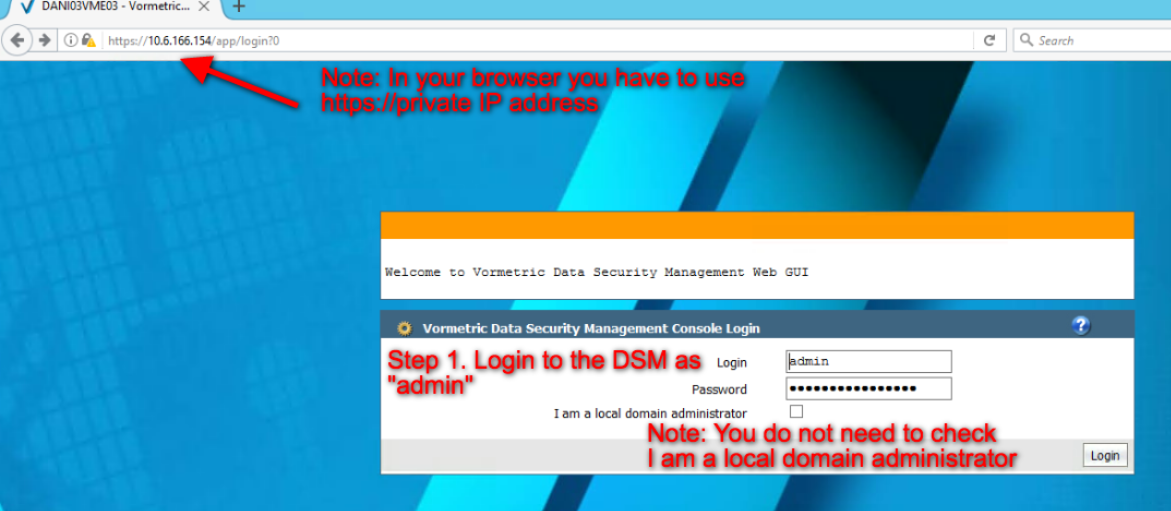
You must be able to connect to your Cisco AnyConnect VPN client in order to reach the DSM's public IP address over an https:// connection.
Use this document to create a backup file of your data security manager (DSM).
Before you upgrade to Generation 4, Armor recommends that you create a backup file. This backup file will include:
Embedded databases
Agent/server certificates
Encryption keys and key groups
Hosts and host groups
Domains
High-availability configuration
Administrators
Policies
Log settings
At a high level, to create, save, and upload a backup file, you must:
Create a new wrapper key custodian
Create and export the wrapper key
Download the encrypted DSM configuration file
Restore the wrapper key and configuration file
In this step, you will access the DSM under the Generation 4 platform.
Upload the DSM configuration file
In this step, you will access the DSM under the Generation 4 platform.
Step 1: Create a new wrapper key custodian
Log into the DSM console as the system administrator (admin).
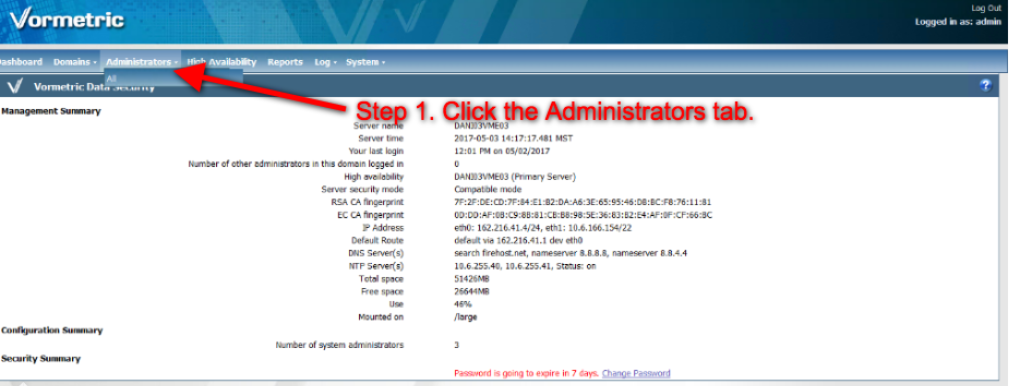
Click the Administrators tab. (You can ignore the drop-down menu that appears.)
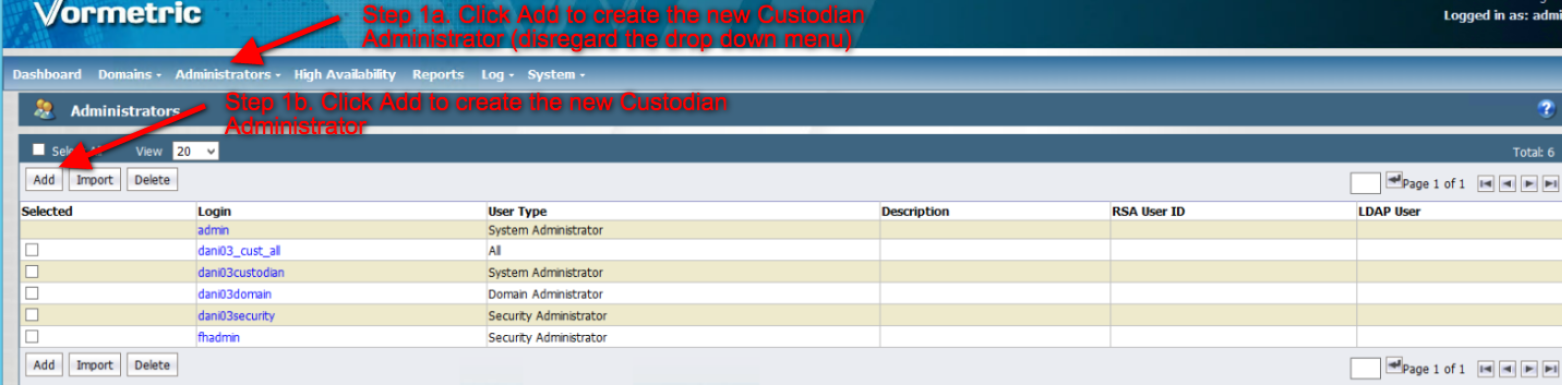
Click Add to create a new administrator.
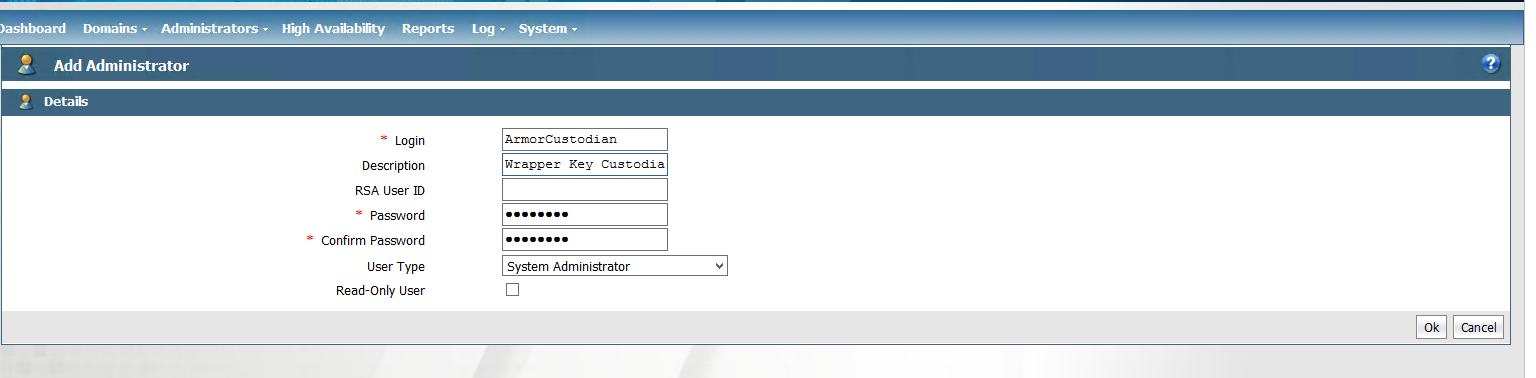
In Login, enter a user name that you will use to log into the DSM.
(Optional) In Description, enter an easily identifiable description.
You can leave the RSA User ID field blank.
In Password and Confirm Password, enter a password.
Armor recommends that you enter a temporary password because after you log into the DSM as the system administrator, you will be asked to change your password.
In User Type, select System Administrator.
Make sure the Read-Only User box is unmarked.
Click Ok.
Step 2: Create and export a wrapper key
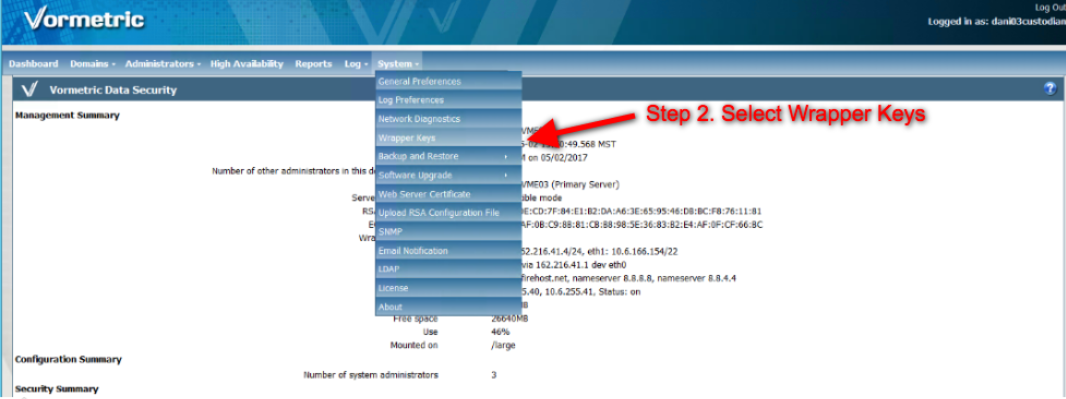
In the top menu bar, select System.
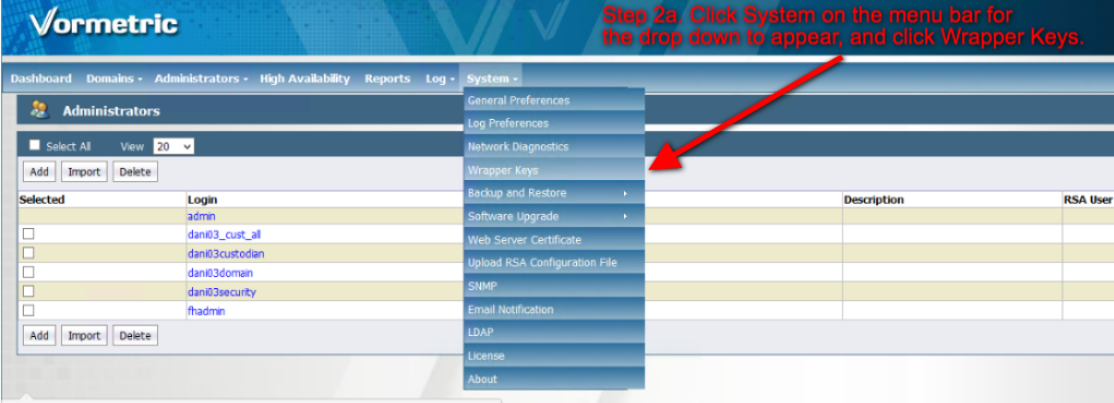
In the drop down menu, select Wrapper Keys.
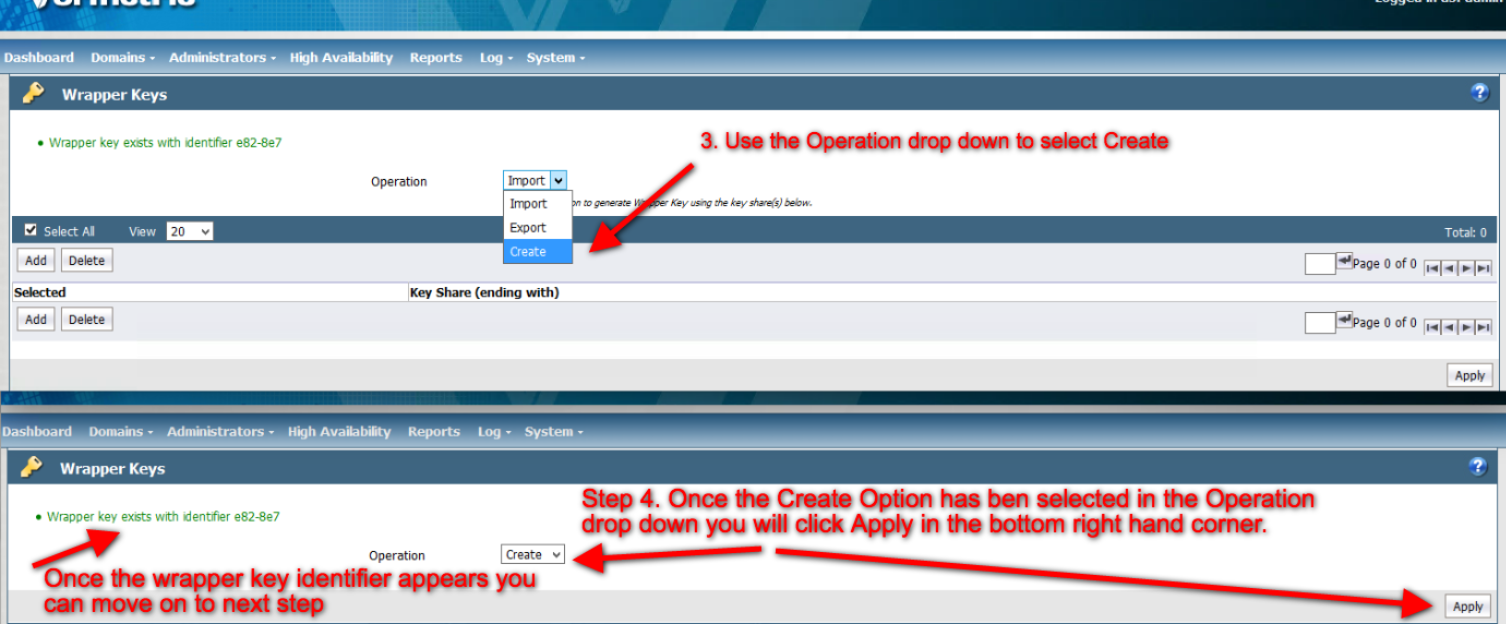
In Operation drop-down menu, select Create.
Click Apply.
Next to Operation, in the drop-down menu, select Export.

Once you select Export, a new window will appear.
In the window that appears, for Minimum Custodians Needed, enter 1.
InTotal number of Custodians, enter 1.
In the table, mark the newly created Wrapper Key Custodian.
Click Apply. The Wrapper Key has now been exported to the Wrapper Key Custodian.
Log out the DSM as the admin, and then log into the DSM as the Wrapper Key Custodian.
Once you log in, you will be asked to change your password.
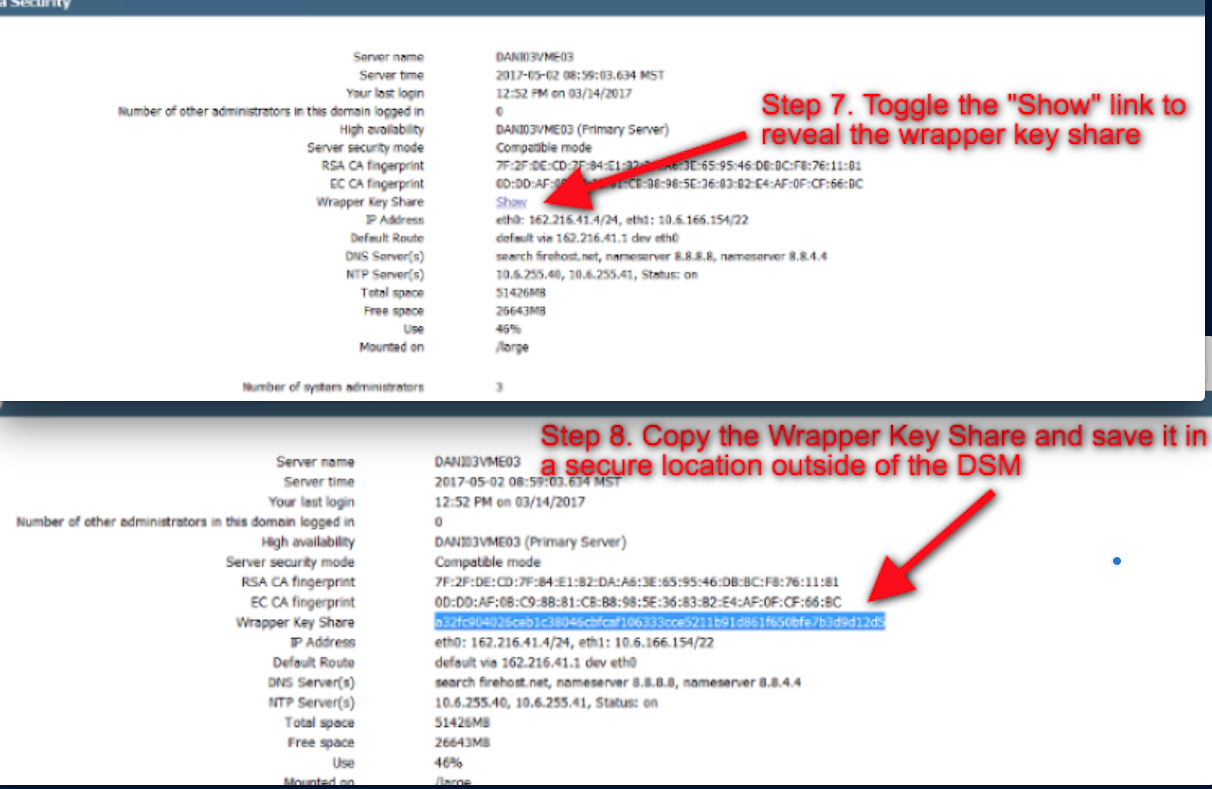
Next to Wrapper Key Share, click Show.
The Wrapper Key Share will appear.
Copy the Wrapper Key Share, and then store the information in a secure place outside of the DSM. You will need this information in a later step in order to decrypt the DSM configuration file during a file restore.
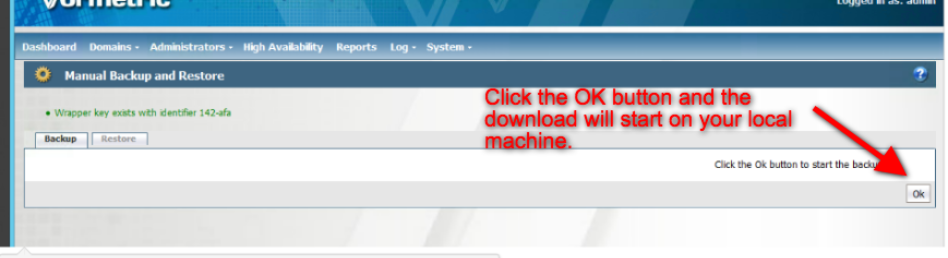
Step 3: Download the encrypted DSM configuration file
Log out of the DSM as the Wrapper Key Custodian, and then log into the DSM as the admin.
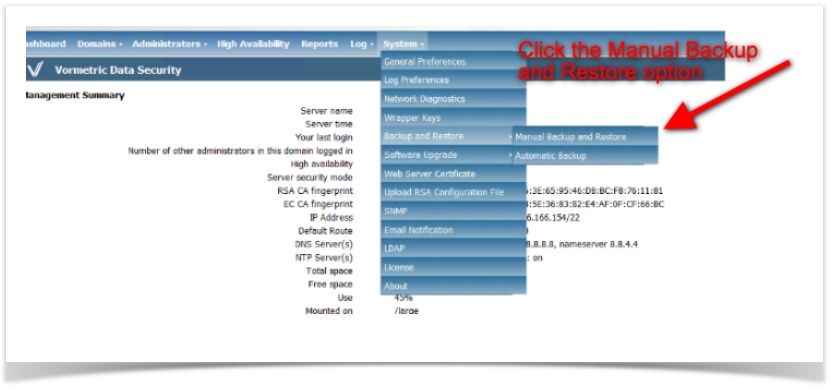
In the top menu bar, click Systems.
Click Backup and Restore, and then select Manual Backup and Restore.
Click Ok. The backup configuration file will download to your local machine.
Step 4: Restore the wrapper key and configuration file in the Generation 4 DSM
In this step, you will access the DSM under the Generation 4 platform.
Access and log into the DSM for Generation 4 as the system administrator (admin).
You must connect via the Cisco AnyConnect VPN client for Generation 4.
To learn how to download the SSL VPN client for Generation 4, see SSL VPN.
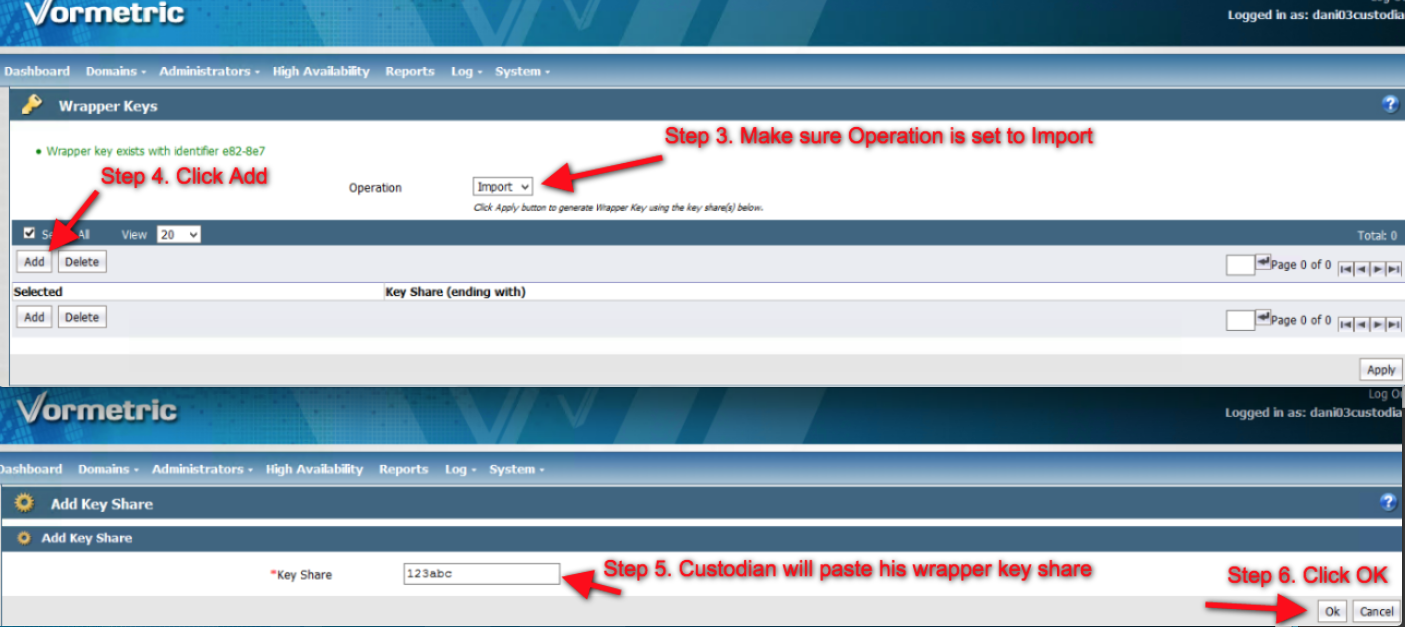
In the top bar, click Systems, and then select Wrapper Keys.
Next to Operation, in the drop-down menu, select Import.
Click Add.
In the window that appears, in Key Share, enter the Wrapper Key Share you copied from Step 2.8.
Click Ok.
In the window that appears, the wrapper key share will populate the field. For this wrapper key share, mark the Selected column.
Click Apply.
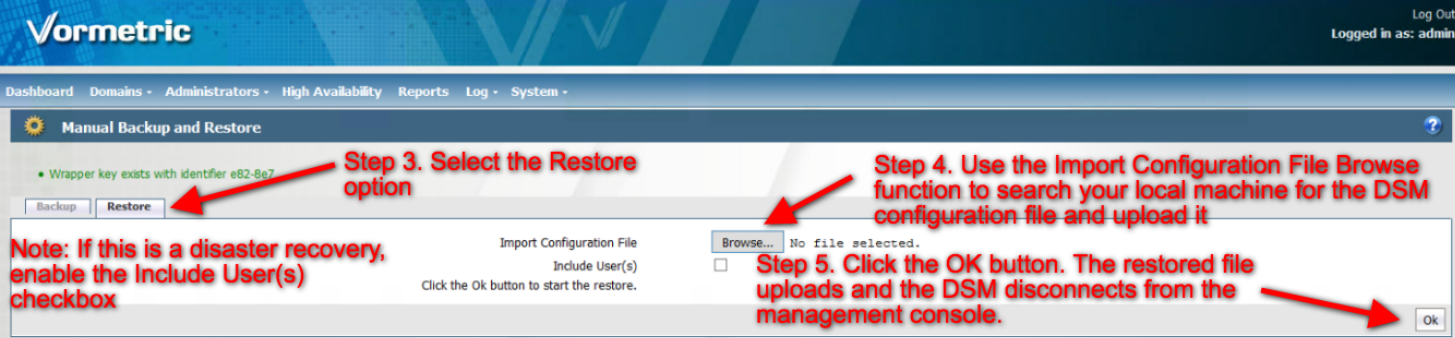
Step 5: Upload the DSM configuration file
In this step, you will continue to use the DSM under the Generation 4 platform.
In the top menu, click Systems.
Select Backup and Restore, and then select Manual Backup and Restore.
Click Restore.
Click Browse to locate and select the DSM configuration file.
Click OK.
After you click OK, you will be logged out of the DSM.
The DSM will restart, which will automatically log out.
Log into the DSM as the security administrator (admin), and then verify the DSM configuration has been restored correctly.