Create a Starter Policy with Learn Mode
This article explains what the Learn Mode is and how to create a starter policy with the Learn Mode function enabled.
Video Tutorial
Prerequisites
Before you begin, you must:
Have a basic understanding of the Vormetric product
Have a basic understanding of how to access the Data Security Manager (DSM) and the administrative accounts
Complete the Create Encryption Key step
What is Learn Mode?
A Vormetric policy dictates what users or processes are allowed into a GuardPoint based on a list of rules and the order of those rules. Any attempts to access a Vormetric GuardPoint will be filtered by these rules in the policy. For example, a specific user or process cannot access a GuardPoint unless there a rule in a policy that specifically offers access. Without a specific rule for access, the attempt will be denied and logged.
As you create these rules in a policy, it is very unlikely that you will be familiar with every critical user or process that needs access to a GuardPoint, which is why the Learn Mode can be handy.
In the Learn Mode, a deny statement in a rule becomes a permit. This means that any activity that would have typically been denied by a policy rule is instead permitted and logged. In order to capture these logs in the DSM, a specific catch-all rule with a deny statement will need to be added at the bottom of every rule set. The DSM logs will then allow you to analyze and determine which authorized users and processes are trying to access a GuardPoint. With this information, you can decide whether or not to allow these users and processes access by whitelisting them in the policy.
For your reference, a deny statement in the Effect field must include Apply_Key when Learn Mode is enabled.
Creating an Online Learn Mode Policy
Log into your DSM as a Security Administrator.
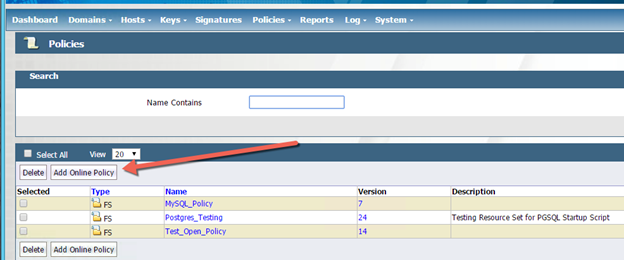
At the top, click Policies to create a new policy and to see a list of existing policies. For the purpose of this exercise, you can disregard the drop-down menu items.

Click Add Online Policy, as shown below. Please note, the appliance will not let you create a policy until you first create a key.
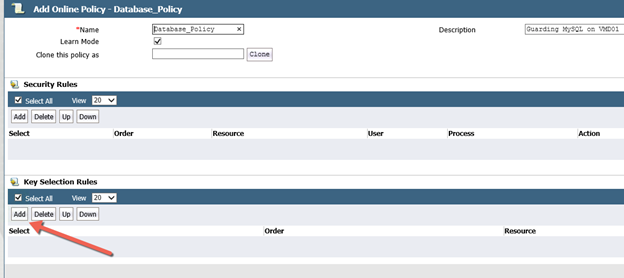
In Name, enter a descriptive name for your policy. Please note that you cannot change the name of a policy after the name has been created.

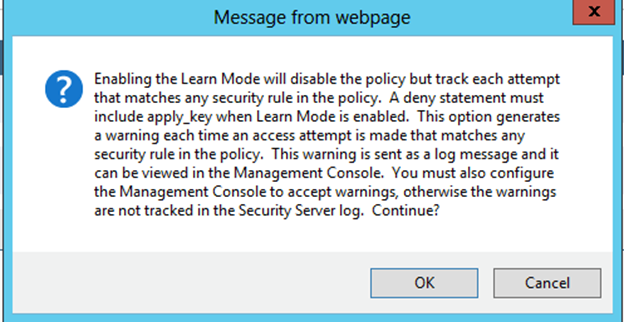
Mark the Learn Mode box, review the message in the pop-up window, and then click OK in the pop-up window.
Under Key Selection Rules, click Add. This is the production key that will be used to encrypt and decrypt data being guarded by this policy.
For your reference, the image below shows a new policy that has been named with a descriptor and the Learn Mode enabled. No key or security rules have been added yet.
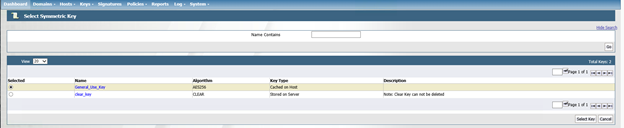
Next to Key, click Select to browse your list of keys.

Under Selected, mark the button that corresponds to newly created production key, and then Select Key.
The production key you selected will populate the Key field. Click OK.

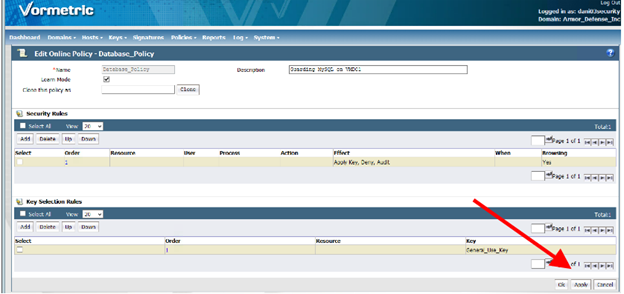
The production key will partly populate the Add Online Policy window. Under Security Rules, click Add to add the catch-all rule.

Next to Effect, click Select.

Mark Deny, Audit, and Apply Keys, and then click Select Effect.

Your selections will populate the Effect field. Click OK. This is now your catch-all rule.

Click Apply to save your newly created catch-all rule, and then click OK.
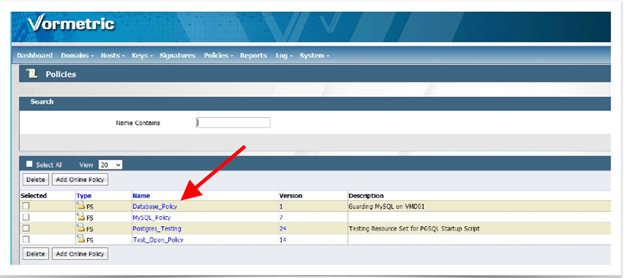
For your reference, when you click OK, any changes will be saved, and you will be redirected to the list of existing policies.
Review your newly created policy in the list.


Next Step: Introduction to Policy Rules