Vulnerability Scanning (ASV Scans)
Qualys PCI ASV Scans - Customer Portal
Coalfire has been officially depreciated in favor of moving to ASV Scanning provided by Qualys.
All customers utilizing Coalfire scanning on their environment must configure scanning via the Qualys PCI Merchant Portal if they wish to continue their PCI scanning through Armor Defense.
Onboarding of Users
Upon configuration of your Qualys scanning services, Armor will create an initial Administrator account in the Qualys merchant portal for you to initialize your scanning.
Qualys PCI Merchant Portal login..png?inst-v=7f1cc948-8ecd-47fa-9a86-d8d2202d80cd)
Customers will log into the portal using the same email used to access Nexus.
Users may also utilize a Username which abstracts the email (firstlast@company)..png?inst-v=7f1cc948-8ecd-47fa-9a86-d8d2202d80cd)
The homepage will allow access to the many functionalities of the PCI Portal, including:
Asset Review and Additions
Scan results
Vulnerability information
False Positive submission
.png?inst-v=7f1cc948-8ecd-47fa-9a86-d8d2202d80cd)
Adding New Users
NOTE:
Due to conflicts between Qualys and Safelink software, users signing up for new accounts or receiving password resets must utilize Safelink Decoders to retrieve the direct hyperlinks; if not done, signup and reset links will be rendered invalid upon opening.
Examples of hyperlink decoders available (not affiliated with Armor or its subsidiaries):
The initial admin user may then access their client portal to add new users as necessary for review and remediation of scan results.
From the homepage, select Account → Users.
Above the Current User Listing, select New User.
New users must include the following information:
First/Last Name
Email Address
Job Title
Phone Number
Username
.png?inst-v=7f1cc948-8ecd-47fa-9a86-d8d2202d80cd)
.png?inst-v=7f1cc948-8ecd-47fa-9a86-d8d2202d80cd)
Adding Assets
Once new users have been added, you must add your assets before scanning can occur.
From the homepage:
Select Account → IP Assets.
On the right-hand side of the screen, select Walk Me Through Wizard.
Confirm on Adding New IPs.
Confirm on Adding New Domains (if any are in use within your environment).
Confirm on use of potential Load-Balancers within your environment.
.png?inst-v=7f1cc948-8ecd-47fa-9a86-d8d2202d80cd)
Firewall Rules
Qualys PCI ASV scanning includes a Discovery Phase which tests 30 common ports to see if a response is received, thus validating that the system is alive. After which, Qualys then moves onto the Scanning Phase to complete your ASV scans.
To ensure that the Qualys Scanner Appliance is able to reach your systems for testing, and to prevent a "Host Not Alive" error (wherein the appliance cannot find your systems), Armor recommends opening the following ports in your firewall before processing new ASV Scans:
TCP: 21-23, 25, 53, 80, 88, 110-111, 135, 139, 443, 445
UDP: 53, 111, 135, 137, 161, 500
ICMP: On
If customers are still receiving "Host Not Alive" errors when scanning after the above ports are enabled, the direct Scanner Appliance may be whitelisted by including 64.39.96.0/20 (64.39.96.1-64.39.111.254) in the firewall before re-running scans.
New Scans
Any user may start a new Discovery scan to check ongoing compliance status and current vulnerabilities.
To do so, from the homepage:
Select Network → Discovery or Network → New Scan.
Confirm in new window on Scan configuration.
Scan Title
Bandwidth of scan (The bandwidth level you select will affect overall scan performance and scan time)
Asset Type
Launch window (Immediate vs Scheduled)
Once scans are complete, navigate to Network → Scan Results to download or rerun scans.
.png?inst-v=7f1cc948-8ecd-47fa-9a86-d8d2202d80cd)
Scheduling Scans
Any user may start a Discovery Scan to check ongoing compliance status and current vulnerabilities.
To do so, from the homepage:
Select Network → Scheduled Scans → New Scan.
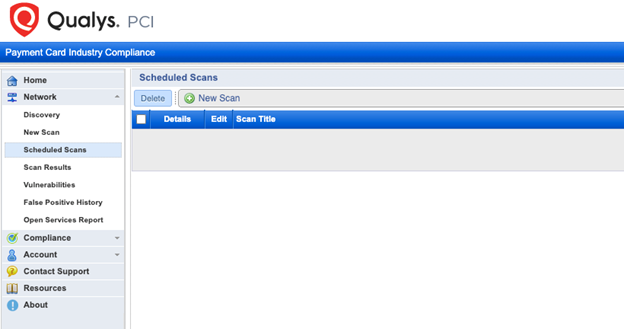
Confirm in new window on Scan configuration.
Scan Title
Bandwidth of Scan (bandwidth selected will affect overall scan performance and scan time)
Asset Type
Set Launch Window to Scheduled
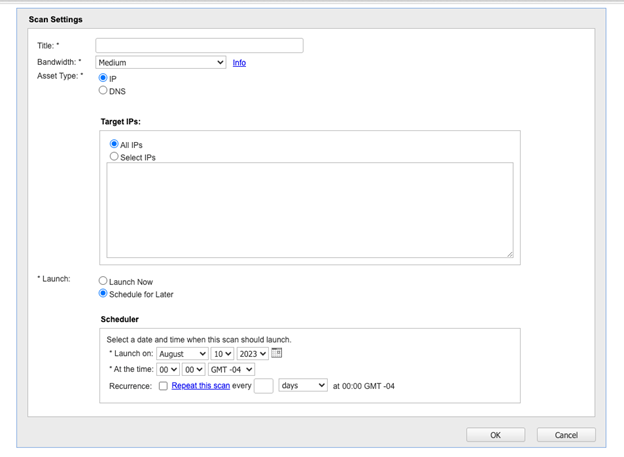
Enter the desired frequency of the scan in the Scheduler Window and click OK. Your scan has now been scheduled.
Vulnerabilities & Remediation
Once scans have completed, vulnerabilities will be listed with information on remediation provided by Qualys and availability for False Positive Submission.
To view current vulnerabilities and false positive submission:
Navigate to Network → Vulnerabilities.
Vulnerabilities will be listed by QID and scan detection date.
False Positives may be submitted for vulnerabilities that are considered out of scope or acceptable risks for the organization.
False Positives must be submitted for review and approval by Qualys.
If approved, Network → False Positive History will contain information on any False Positive submissions that have been accepted by Qualys and removed from Compliance Scanning.
.png?inst-v=7f1cc948-8ecd-47fa-9a86-d8d2202d80cd)
Compliance Scanning
Regular scans are utilized within Qualys to track vulnerability count, False Positive submission and remediation efforts. Scans will have a compliance status of PASS or FAIL, indicating if vulnerability are still detected that would fail the PCI Report attestation.
Once a scan has been completed with a status of PASS, a PCI Report may be generated for submission to Qualys for review and official attestation.
Navigate to Compliance → Compliance Status to view current vulnerability listings that would prevent a clean report generation.
If a clean scan is found, with all associated Asset Hosts in COMPLIANT status, a report may be generated.
In the Actions section, select the Generate Report This will start the Report Generation Wizard.
Fill out any required Special Notes for the report.
Special Notes identify the presence of certain software that may pose a risk to your environment due to insecure implementation rather than an exploitable vulnerability. This software may include remote access software and point-of-sale (POS) software.
Special Notes (if any are found by Qualys) must be filled out before reports may be submitted.
Confirm the generation of the report with title and date via the Report Wizard.
The report will be generated and automatically sent to Qualys for review and final attestation.
If the report is successfully validated by Qualys, you may find the reports in Compliance → Submitted Reports, with both Executive and Technical reports available for consumption and dispensation..png?inst-v=7f1cc948-8ecd-47fa-9a86-d8d2202d80cd)