Azure Application Gateway
An application gateway is a web traffic load balancer that enables you to manage traffic to your web application. Learn more about application gateway
An application gateway is a dedicated deployment in your virtual network. Within your virtual network, a dedicated subnet is required for the application gateway. More information Azure virtual network and dedicated subnet
Prerequisites:
An Azure account with an active subscription
Azure Event Hubs connection string and an Azure Storage Account connection string. To learn more about how to create and configure Event Hub and Storage account, see the article Event Hub and Storage Account Creation
An External log source is created for Azure. To learn more about how to create external log source refer to this article Microsoft Azure Log Source
Create an Application Gateway
You can use these instructions to configure the application gateway.
Sign in to the Azure portal with your Azure account.
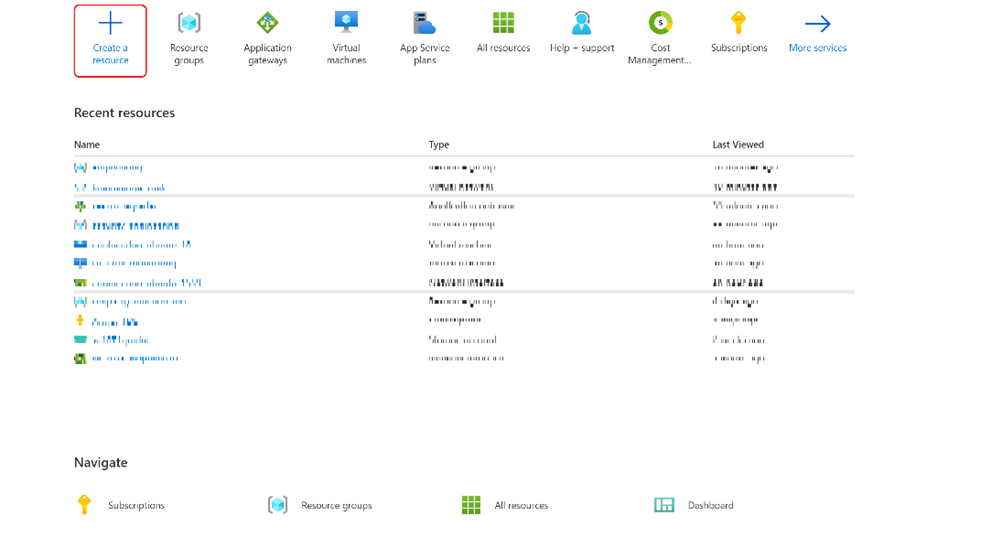
On the Azure portal menu or from the Homepage, select Create a resource. The New window appears.
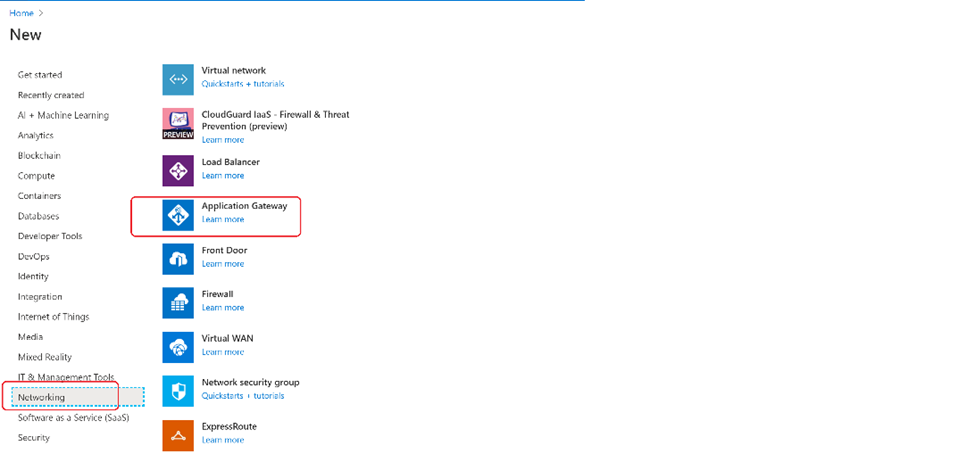
Select Networking and then select the Application Gateway in the Featured list.
Basics tab
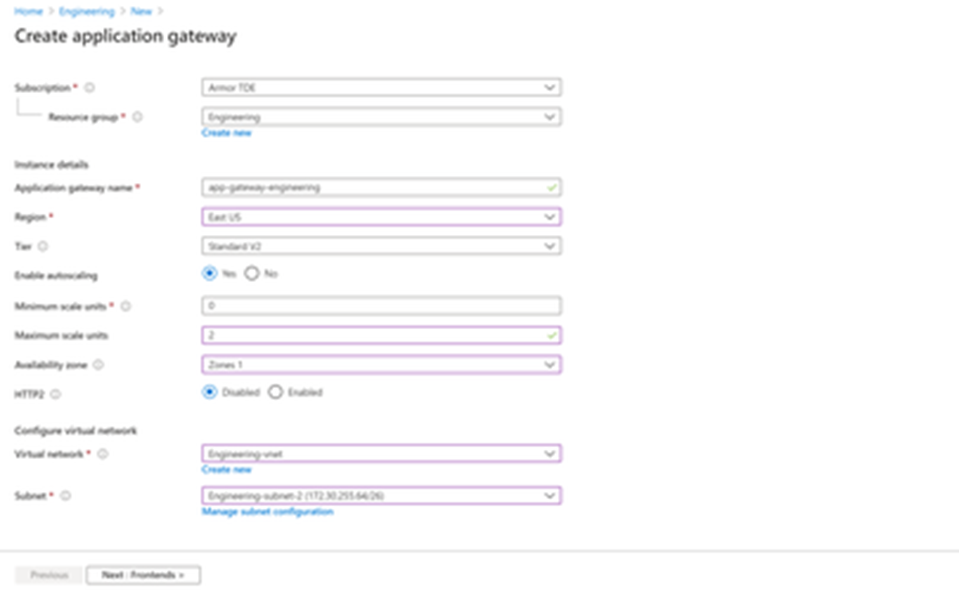
On the Basics tab, enter the following application gateway settings:
Subscription: your subscription that will be charged for the resource(s)
Resource Group: The resource group containing your resources
Application gateway name: descriptive name to identify this resource (app-gateway-engineering)
Region: The region to deploy this resource into
Tier: Standard V2 (determined by risk - V2 includes auto-scaling, WAF includes web-application firewall - this can be changed after initial deployment)

Enable autoscaling: Yes (determined by risk and cost)
minimum scale units: 0
maximum scale units: 2
Availability zone: Zones 1
HTTP2: Disabled (default - HTTP2 may lead to some additional application development or service troubleshooting)
Virtual network: Engineering-subnet-2 (this virtual network must multiple subnets where one is dedicated to application gateway(s))
Subnet: security_engineering-public02 (dedicated subnet)
Select Next: Frontends to continue
Frontends Tab
On the Frontends tab, verify, Frontend IP address type is set to Public (maybe Public, Private, Both - dependent on implementation and routing)
Add new if you do not have a free public IP (this may incur additional costs)
For the Application Gateway v2 SKU, there must be a Public frontend IP configuration. You can still have both a Public and a Private frontend IP configuration, but Private only frontend IP configuration (Only ILB mode) is currently not enabled for the v2 SKU.
Choose Create new for the Public IP address and enter following for the public IP address name, and then select OK.
Name: engineering-app-gateway-public-ip
SKU: Standard (Basic, Standard - may not be able to choose)
Assignment: Static (Dynamic, Static - may not be able to choose)
Availability zone: 1 (limited to those that are chosen in Basic settings)
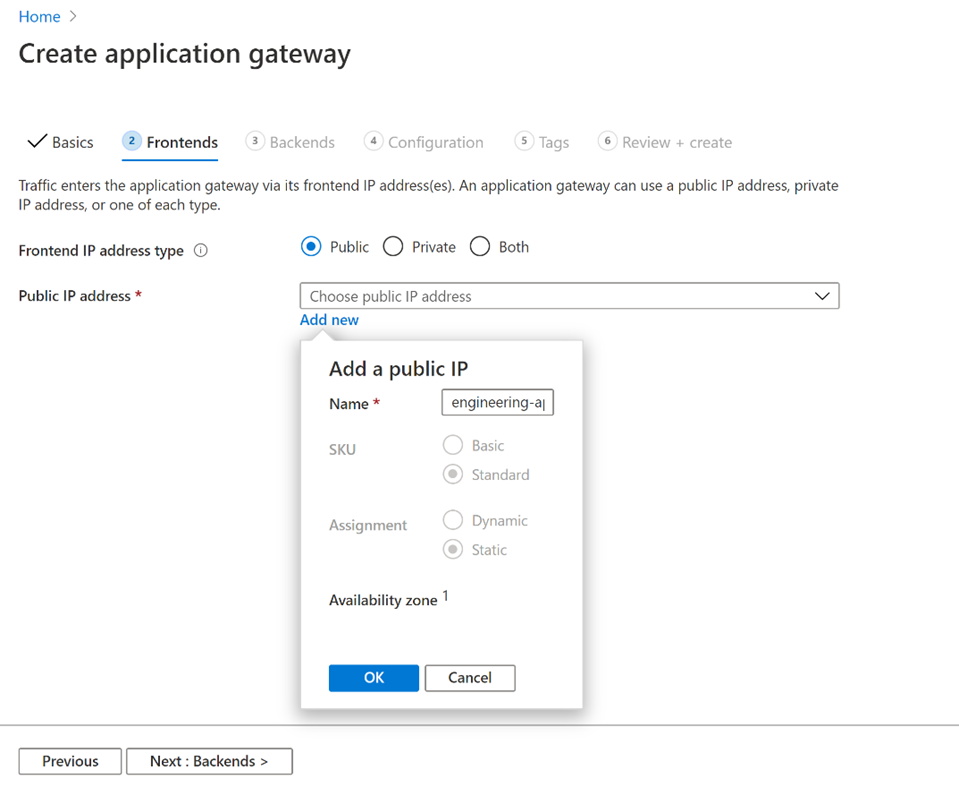
Select Next: Backends to continue
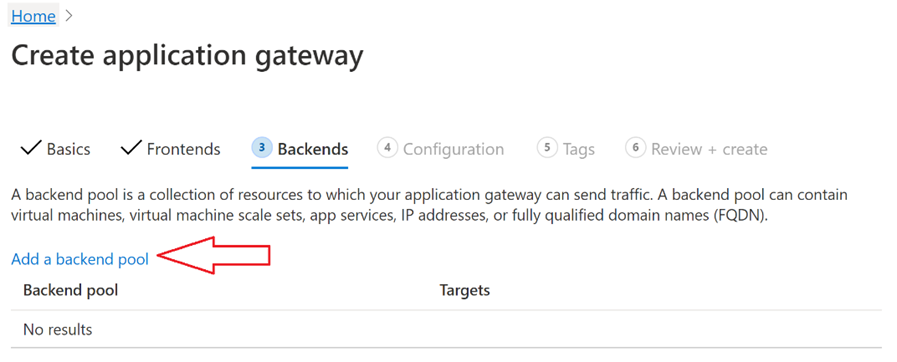
Backends tab
The backend pool is used to route requests to the backend servers that serve the request. Backend pools can be composed of NICs, virtual machine scale sets, public IPs, internal IPs, fully qualified domain names (FQDN), and multi-tenant back-ends like Azure App Service.
In this example, you'll add a virtual machine (VM) as the target backend with your application gateway. If you don't have any existing VM provisioned, you can follow the Microsoft docs link here to create VM and test application gateway.
On the Backends tab, Add a backend pool
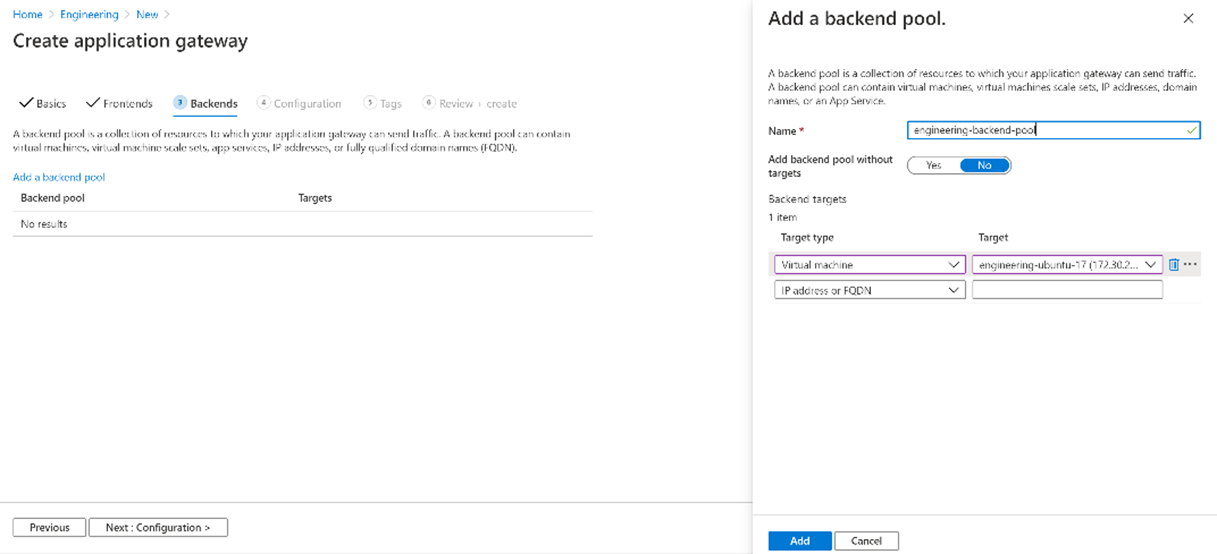
In the Add a backend pool window that opens, enter the following values to create a backend pool:
Name: engineering-backend-pool
Add backend pool without targets: No
Backend targets:
Virtual machine: name of your virtual machine (multiple if available)
In the Add a backend pool window, select Add to save the backend pool configuration and return to the Backends tab
Backend pool: engineering-backend-pool
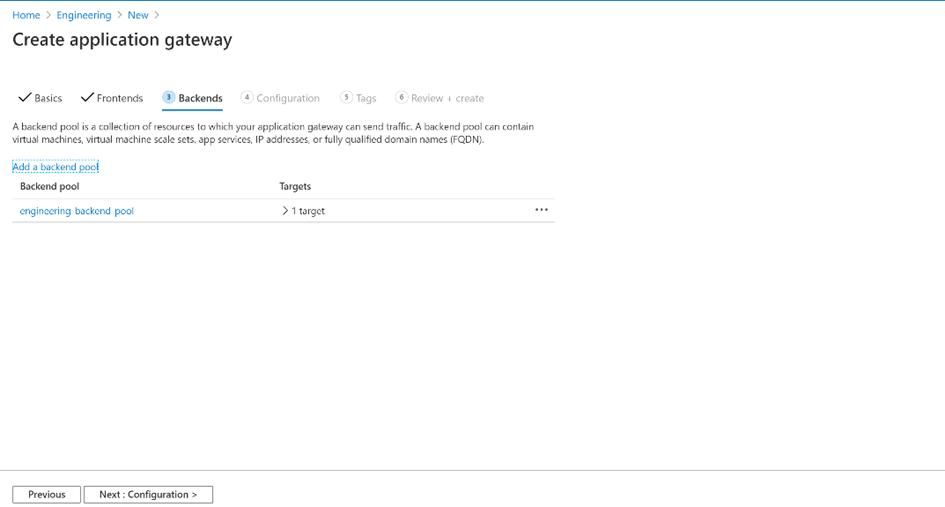
On the Backends tab, select Next: Configuration.
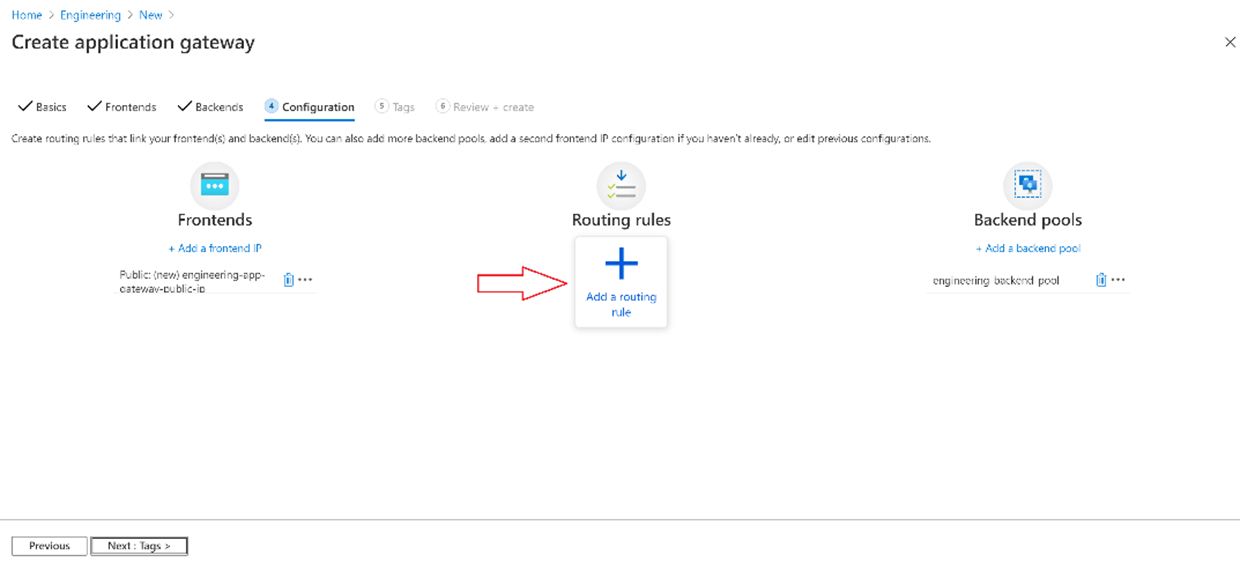
Configuration tab
On the Configuration tab, you'll connect the frontend and backend pool you created using a routing rule.
Select Add a rule in the Routing rules
In the Add a routing rule window that opens, enter the following
Rule name: app-gateway-route-rule-http
Listener:
Listener name: app-gateway-route-http-listener
Frontend IP: Public
Protocol: HTTP (should be HTTPS for production)
Port: 80 (should be 443 for production)
Listener type: Basic
Error page url: No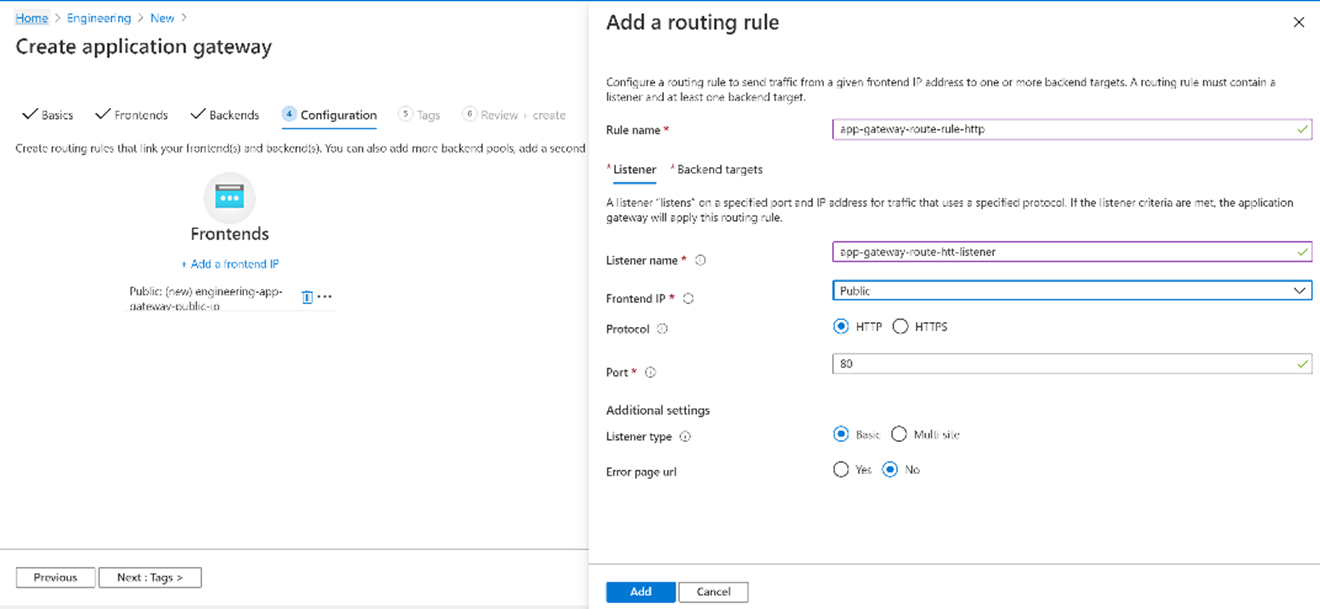
On the Backend targets tab, to enter the following details
Target type: Backend pool
Backend target: engineering-backend-pool
For the HTTP setting, enter the following details
Select Create new to create a new HTTP setting
HTTP Settings name:
app-gateway-http-setting
Backend protocol: HTTP (should be HTTPS in production)
Backend port: 80 (should be 443 in production)
Cookie-based affinity: Disable (depends on application state management)
Connection draining Disable (depends on application state management)
Request time-out (seconds): 20
Override backend path: <leave blank>
Override with new hostname: No (depends on the application for routing requests)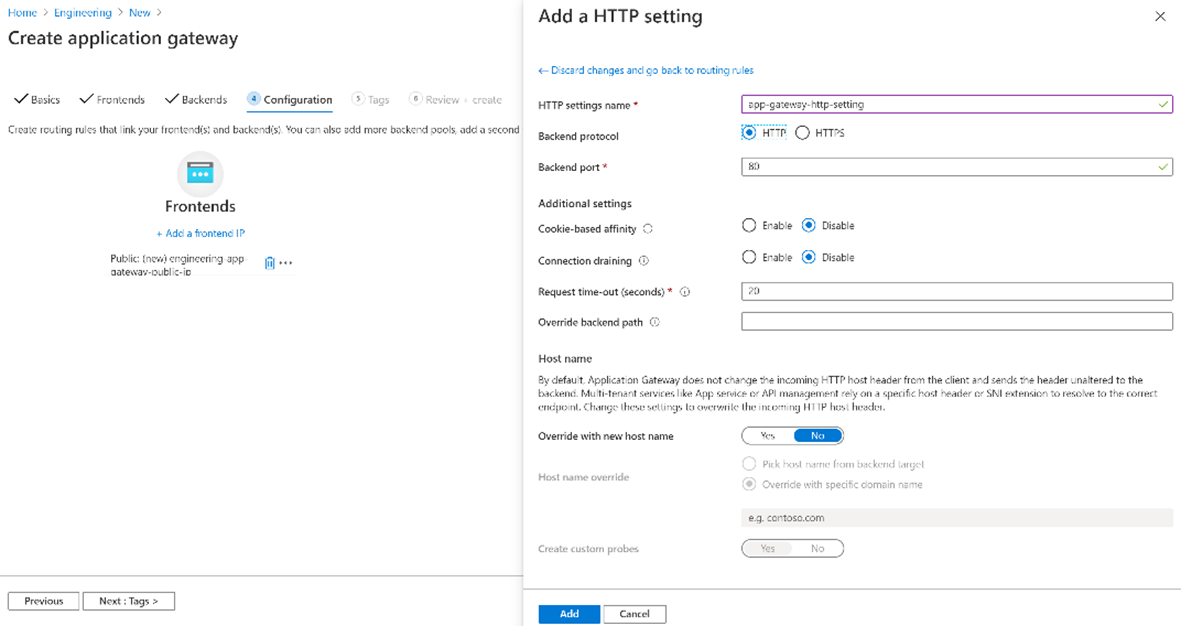
On the Add a routing rule window, select Add to save the routing rule and return to the Configuration tab.

Select Next: Tags to continue
Tags
Tags are name/value pairs that enable you to categorize resources and view consolidated billing by applying the same tag to multiple resources and resource groups
Enter following details
Name: app-gateway-engineering
team: Engineering
cost_center: engineering
owner: <email>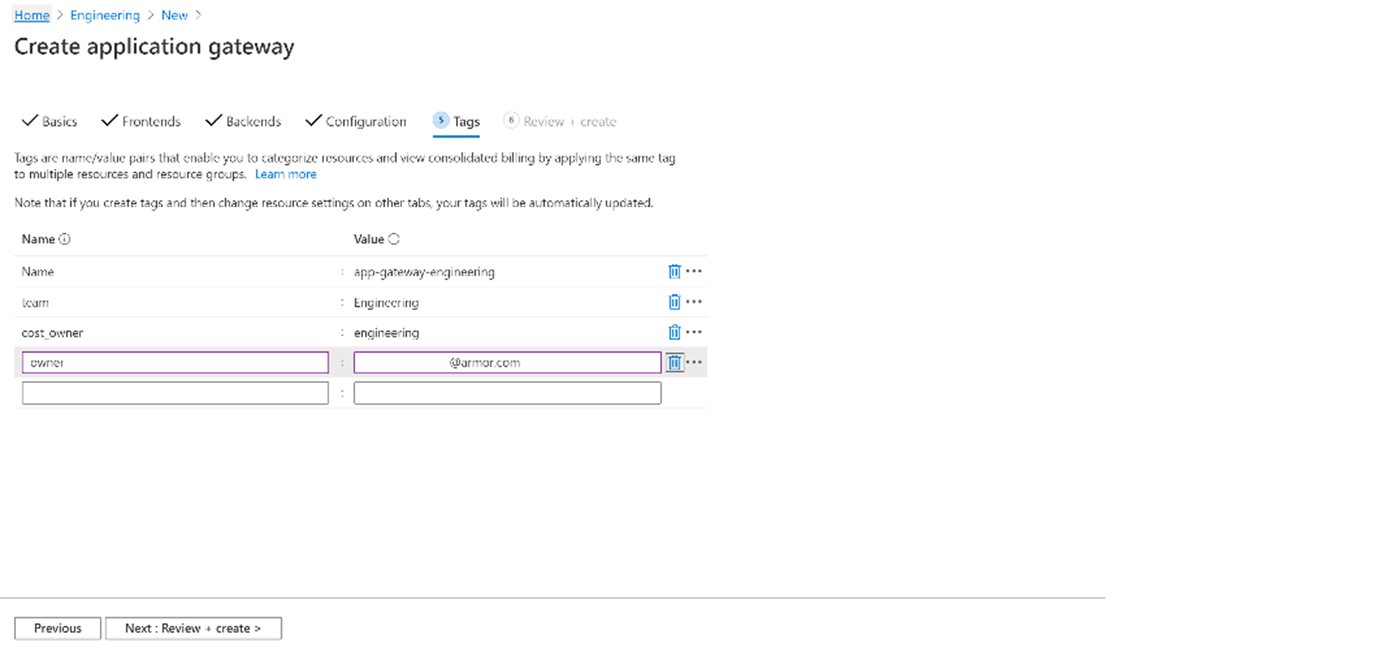
Select Next: Review + create
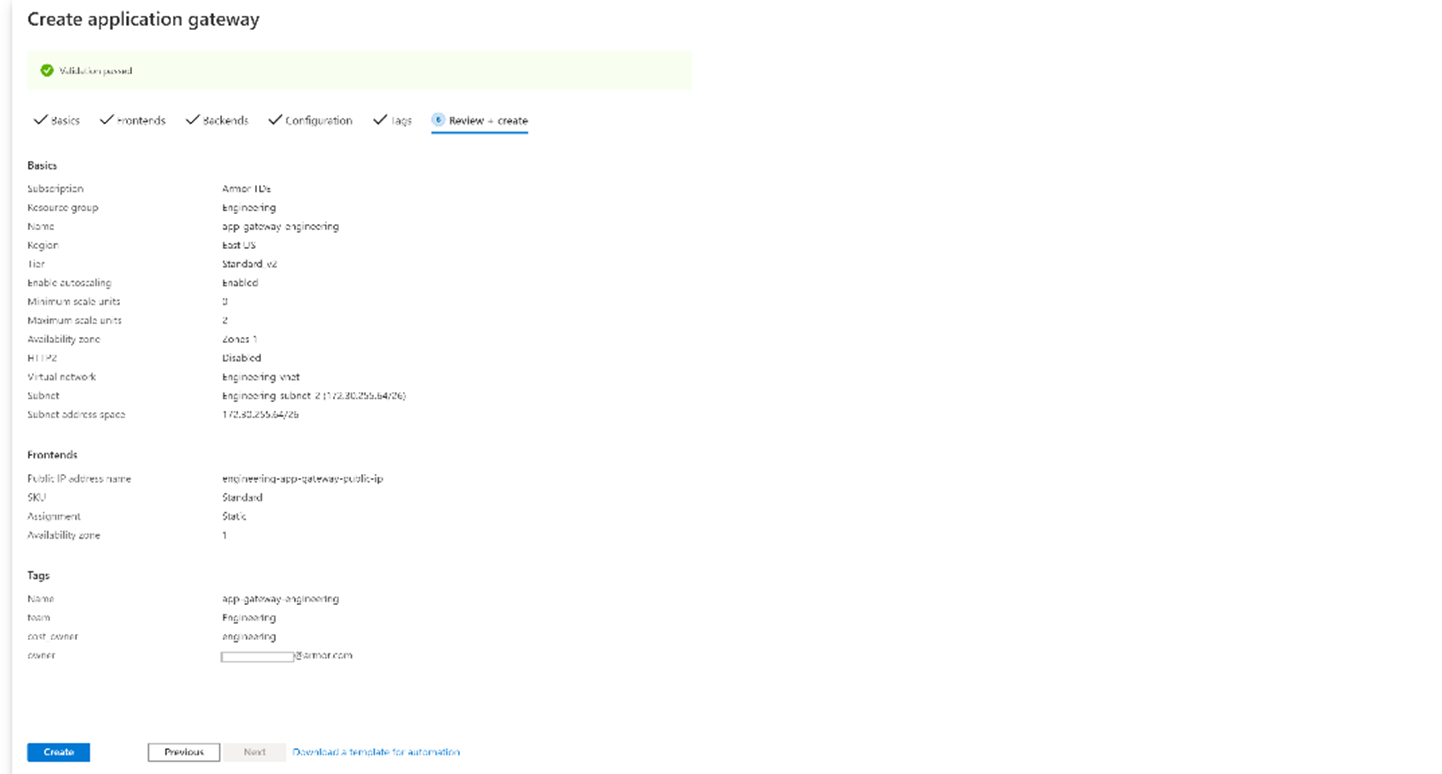
Review + create
Review the settings on the Review + create tab, and then select Create to create the virtual network, the public IP address, and the application gateway.
It may take several minutes for Azure to create the application gateway. Wait until the deployment finishes successfully before moving on to the next section.
Resources successfully created.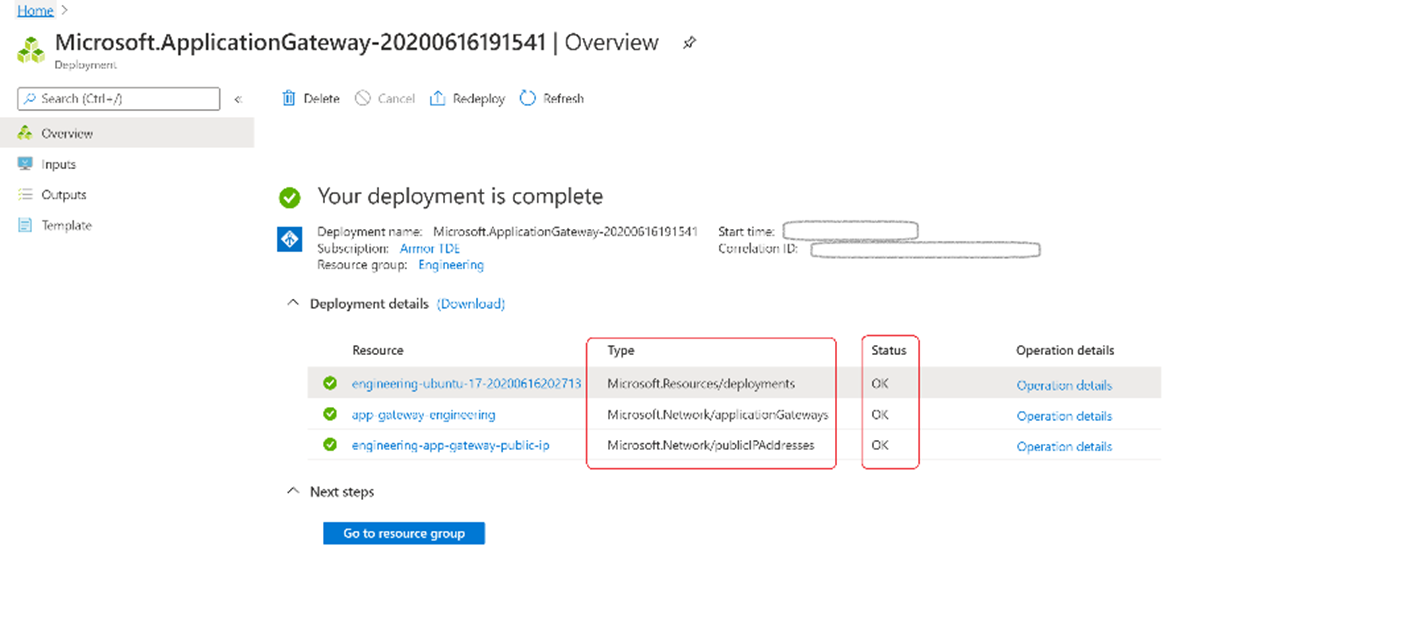
Microsoft.Resources/deployments: OK
Microsoft.Network/applicationGateways: OK
Microsoft.Network/publicIPAddresses: OK
Application gateway with a Web Application Firewall (WAF)
You can also create an application gateway with a Web Application Firewall (WAF). Follow the Microsoft docs link here.
Enable Event Hub
Navigate to the resource
Click on Add Diagnostic settings
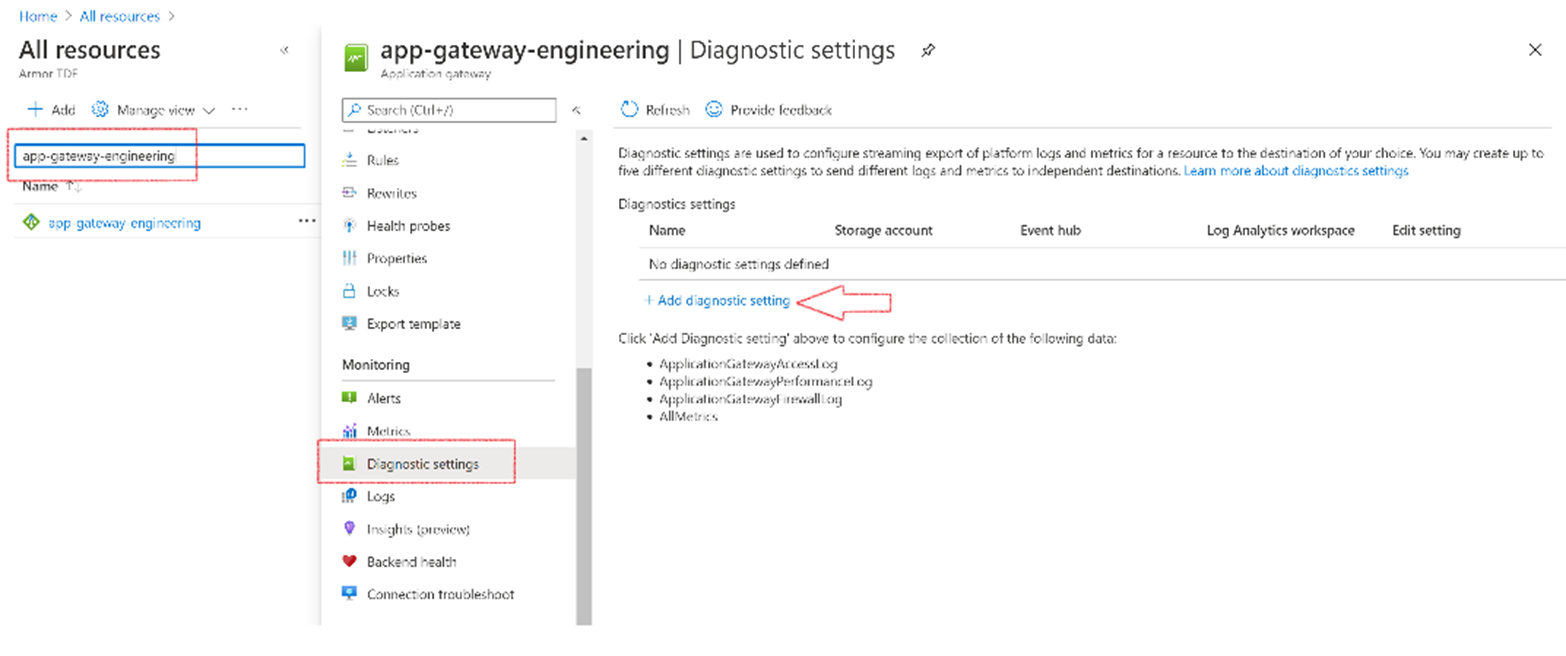
Enter Diagnostic settings name engineering_logs
From Category details section, under the log, select below option:
ApplicationGatewayAccessLog
ApplicationGatewayPerformanceLog
ApplicationGatewayFirewallLog
Choose option Stream to an event hub and select below information
Subscription: Armor TDE (where this resource will be billed to)
Event hub namespace: armoreventhubnamespace (the name of the event hub namespace
Event hub name: armor-logs
Event hub policy name: armor-logs (depends on risk and permissions - this may be defined by another user/group within your organization)

Verify Connection
To learn more about "Search For Collected Logs In Kibana (BETA)" see the article here
In Nexus, hover over Threat Management
 on the left-side nav.
Click Log Search.
Then click Log Search tab on the top of the page.
Wait for the SSO.
Click Discover to take you to the log search screen.
Armor platform assigned a unique identifier to each log source. For e.g 1024-event_hub_name-consumer_group. Search with this unique identifier
Webhook Tagging:
To learn more about Webhook Tagging, see the article here.
Cloud-based logs (e.g. Azure Application Gateway) are assigned unique identifiers from the Armor platform and require a log into Nexus to gain access to them. The identifiers can be accessed from the "HOSTNAME" column at https://threat-management.nexus.armor.com/log-search 
The tags endpoint is then called with a unique identifier. e.g. (1024-event_hub_name-consumer_group)
POST /tags/1024-event_hub_name-consumer_group
//Request Body:
{
    "tags":
        [
            {"Key":"id","Value":"companyX"},
            {"Key":"index","Value":"production"}
        ]
}
If the full resourceId (1024-event_hub_name-consumer_group) is not found, the Organization Id (1024) is referenced for tags information.
If no tag resourceId is found, then add_dynamic_tag will not add any fields to the webhook payload.
Troubleshooting common issues
Validate logs are flowing for the Application Gateway. Refer below steps from Microsoft docs to verify application gateway