Create a Cloud Connection for AWS Security Hub
Topics Discussed
To fully use this feature, you must have the following permissions in your account:
Read Cloud Connections
Write Cloud Connections
You can use these instructions to sync your AWS account with your Nexus account. Specifically, this action will sync your account with AWS Security Hub where Armor will send security updates.
To complete these instructions, you must be able to access your AWS console.
Review Pre-Deployment Considerations
Before you configure your Nexus and AWS account, review the following pre-deployment considerations:
Security Findings
When you sync your Nexus account with AWS Security Hub, Armor will send the following information to AWS Security Hub:
SECURITY DATA | DESCRIPTION | NUMBER OF SECURITY FINDINGS |
|---|---|---|
Malware | In relation to malware, Armor communicates with AWS Security Hub on an hourly basis. If Armor detects a malware event, this information will be sent to AWS Security Hub within an hour. To learn more about Malware Protection, see Malware Protection. | The number of security findings is based on the number of virtual machines, as well as the security posture of those virtual machines. Malware is a seldom event, with only a couple events reported per day. |
Vulnerability Scanning | In relation to vulnerability scanning, Armor communicates with AWS Security Hub on a weekly basis. If Armor detects a vulnerability, this information will be sent to AWS Security Hub within a week. For vulnerabilities, Armor will only send vulnerabilities that are critical or high, based on the CVSS scoring structure. In these cases, Armor will only send vulnerabilities that contain a score of 5.5 or higher. To learn more about Vulnerability Scanning, see Vulnerability Scanning. | The number of security findings is based on the number of virtual machines, as well as the security posture of those virtual machines. For large enterprise customers, the number of vulnerabilities can range from 100 to 1,000 within a weekly time frame. |
Exchanging Account Information
To properly sync your Nexus account with AWS, the Armor AWS Account will assume a role in your AWS account. To accomplish this, in Nexus you will copy the Armor AWS account number and a unique external ID, and then paste into your AWS account. Afterwards, you will receive an AWS-generated ARN from the role, which you will then paste into Nexus.
ASFF Types
The following table describes the ASFF-formatted finding types for the security finding that are sent to AWS Security Hub.
Scoring Types
The following table describes the Severity.Product scores and the Severity.Normalized scores for the security findings that are sent to AWS Security Hub.
FINDINGS | SEVERITY.PRODUCT | SEVERITY.NORMALIZED | NOTES |
|---|---|---|---|
Vulnerabilities | While scores 0 - 10 are available to be sent, currently, Armor will only send scores 5.5 and higher. | While scores 0 - 30 are available, Armor will only send scores 5.5 and higher (5.5 * 3) | Calculation: CVSS score * 3. Armor will only send critical and high scores. |
Malware | Scores 0 -10 is available. | Scores 31 - 61 are available. | Calculation: (Severity score * 3) + 31 |
Updated Fields for Findings
The following fields will be updated:
The recordState will change to archived if the vulnerability or malware is no longer valid.
The updatedAt will reflect the most recent timestamp that the finding was updated.
Create a Cloud Connection account for AWS
You can use the Cloud Connections screen to sync your AWS public cloud environment with Nexus.
To complete these instructions, you must be able to access your AWS console.
Armor will generate an External ID for every new Cloud Connection account. As result, an incomplete cloud connection account will be listed in the table as (Pending Connection). You can click this entry in order to continue with the cloud connection creation process.
Step 1: Add your AWS account:
In Nexus, in the left-side navigation, hover-over Infrastructure
 .
. Click Connectors
Then Cloud Connections.
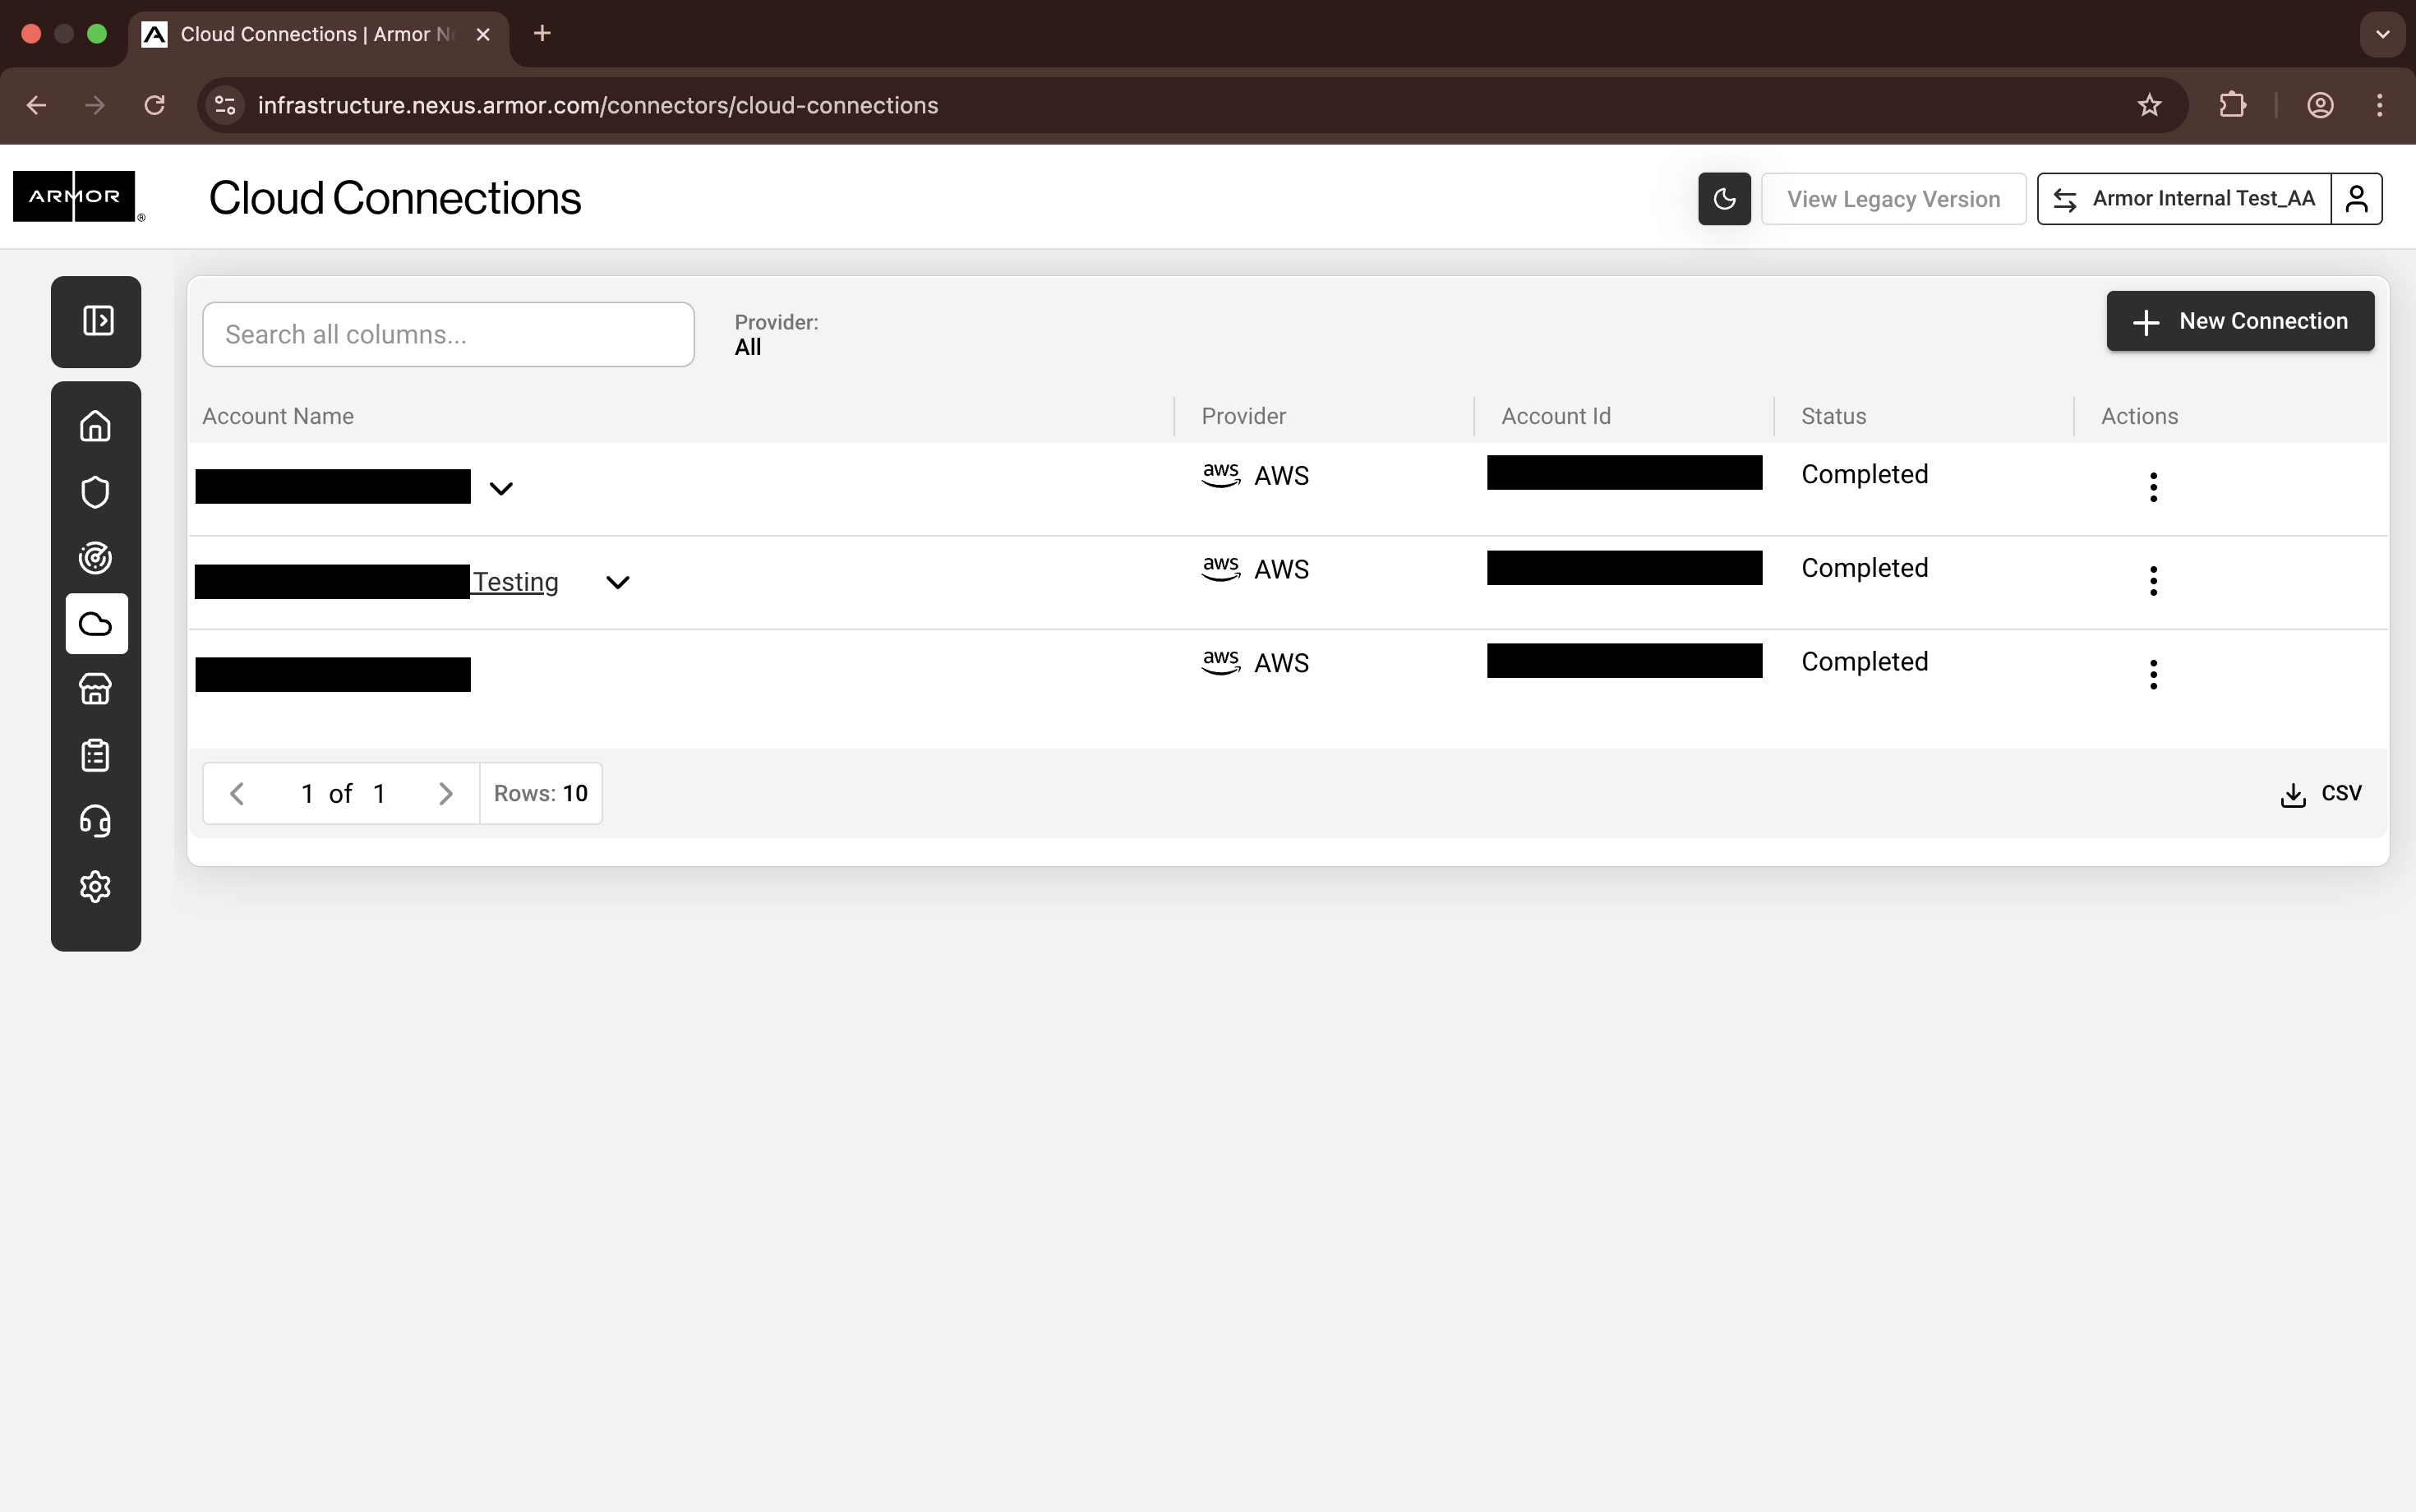
Nexus - Cloud Connections screen
Click + New Connection

Nexus - New Cloud Connection
In Account Name, enter a descriptive name.
In Description, enter a short description.
In Services, select the desired services.
To have Armor send security findings to your AWS Security Hub, mark Security Hub.
This action will automatically select additional services; these services must be selected.
In IAM Role, copy the External ID. You will need this information at a later step.
The Armor's AWS Account Number and External ID fields are pre-populated.
Armor will generate an External ID for every new Cloud Connection you create.
In a later step, you will locate the information to complete the IAM Role ARN field.
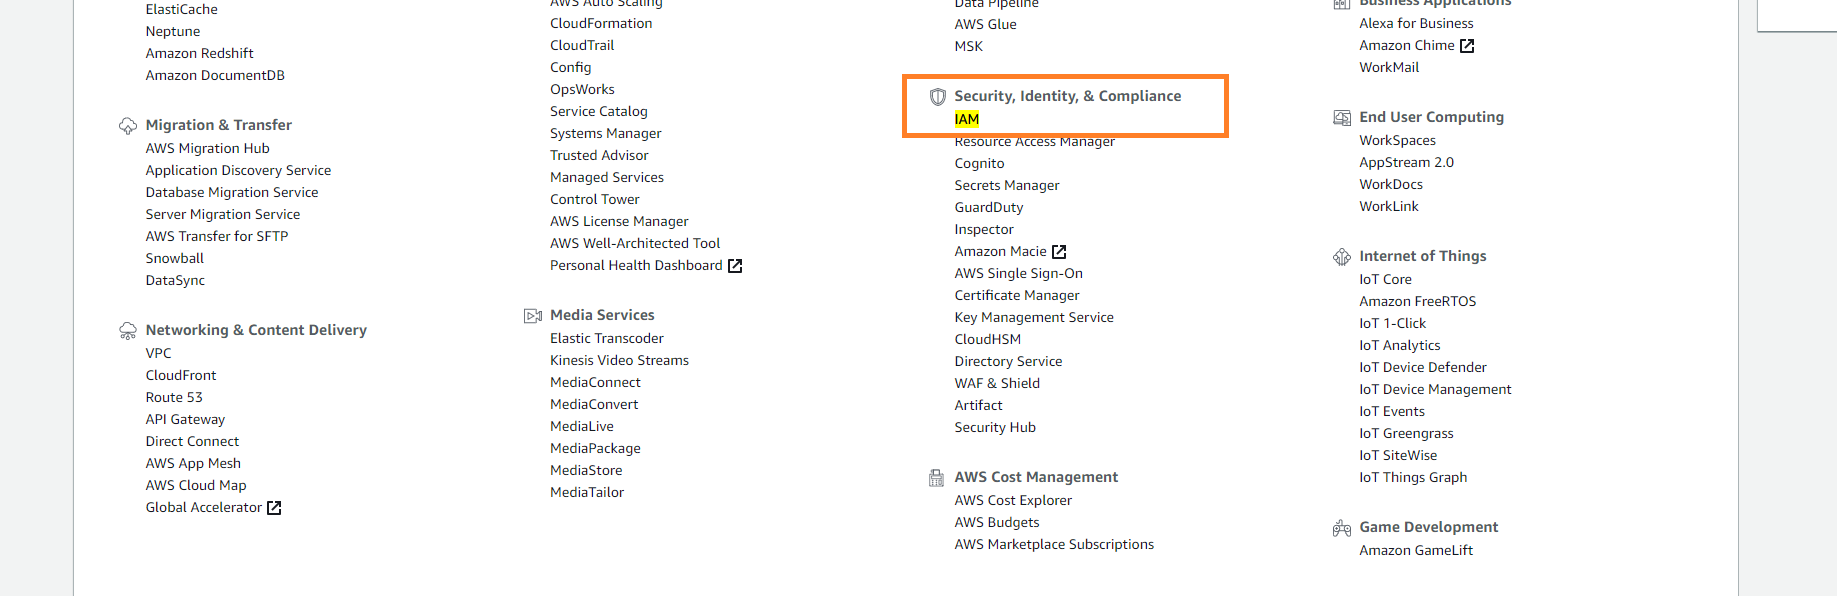
Access the AWS console.
Under Security, Identity & Compliance, click IAM.
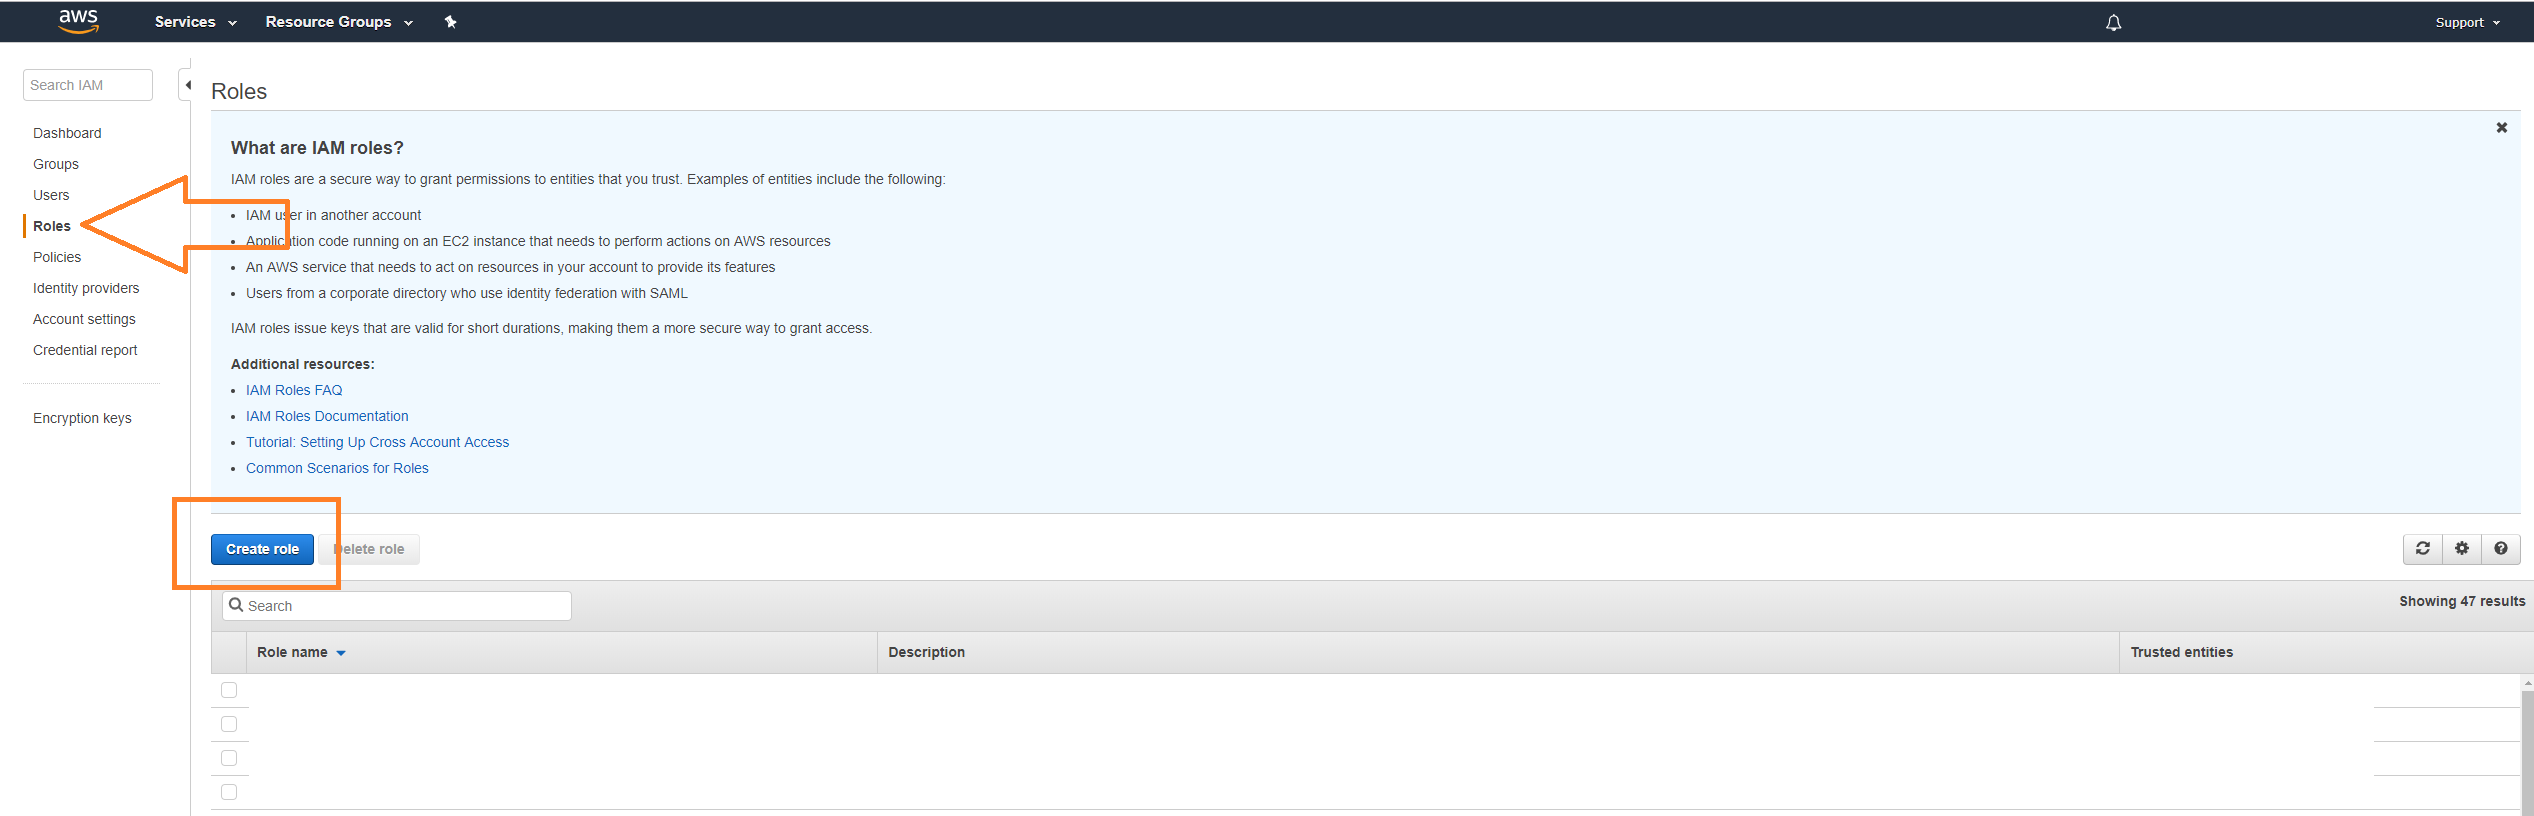
In the left-side navigation, click Roles.
Click Create role.
Under Select role type, select Another AWS account.
In Account ID, enter 679703615338.
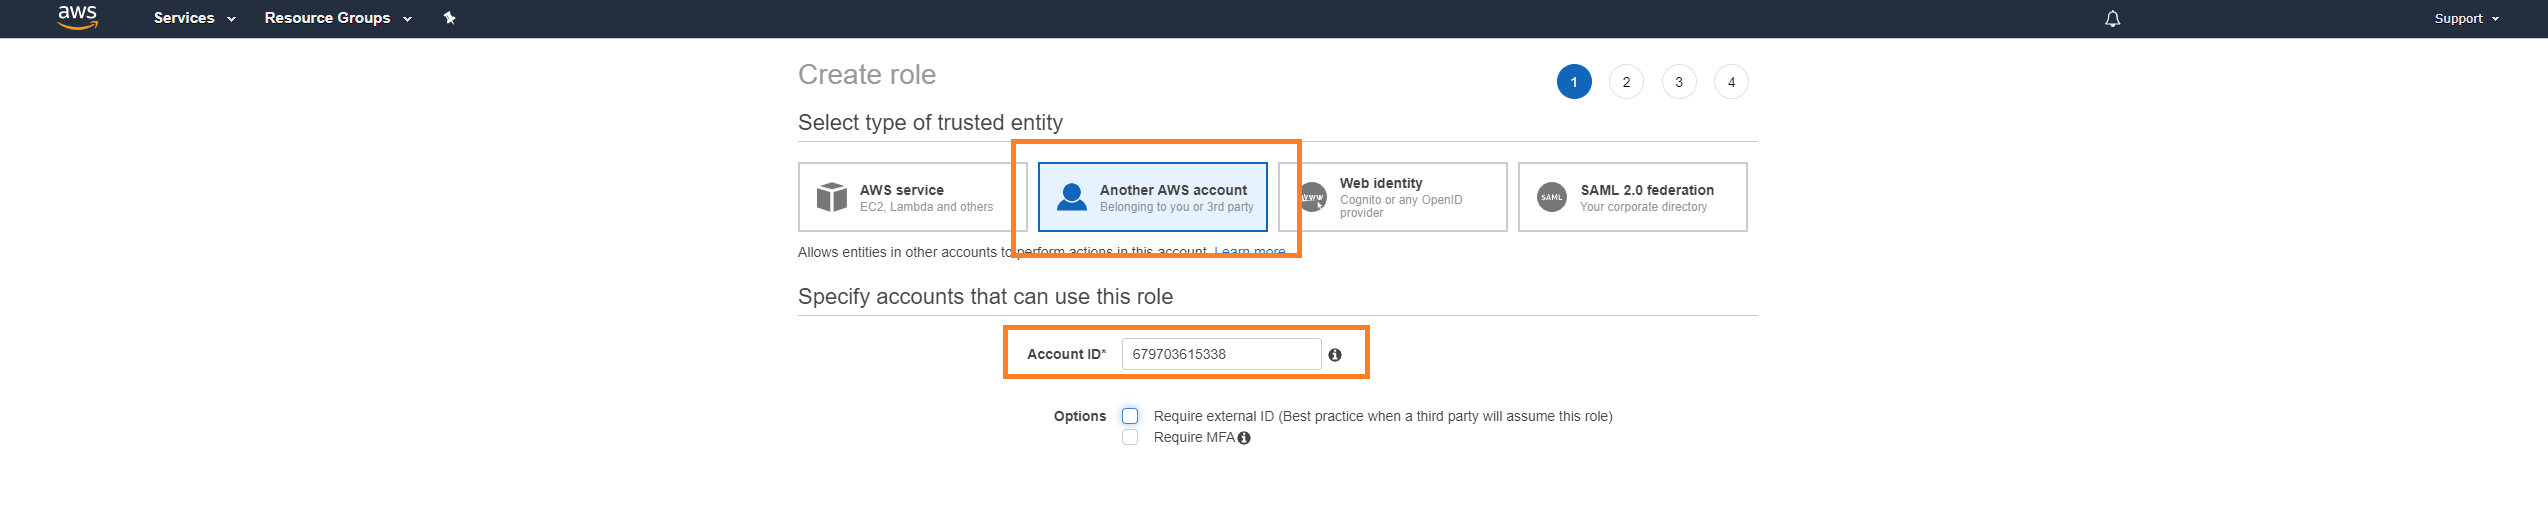
Mark Require external ID.
In field that appears, paste the External ID you copied earlier from the Nexus.
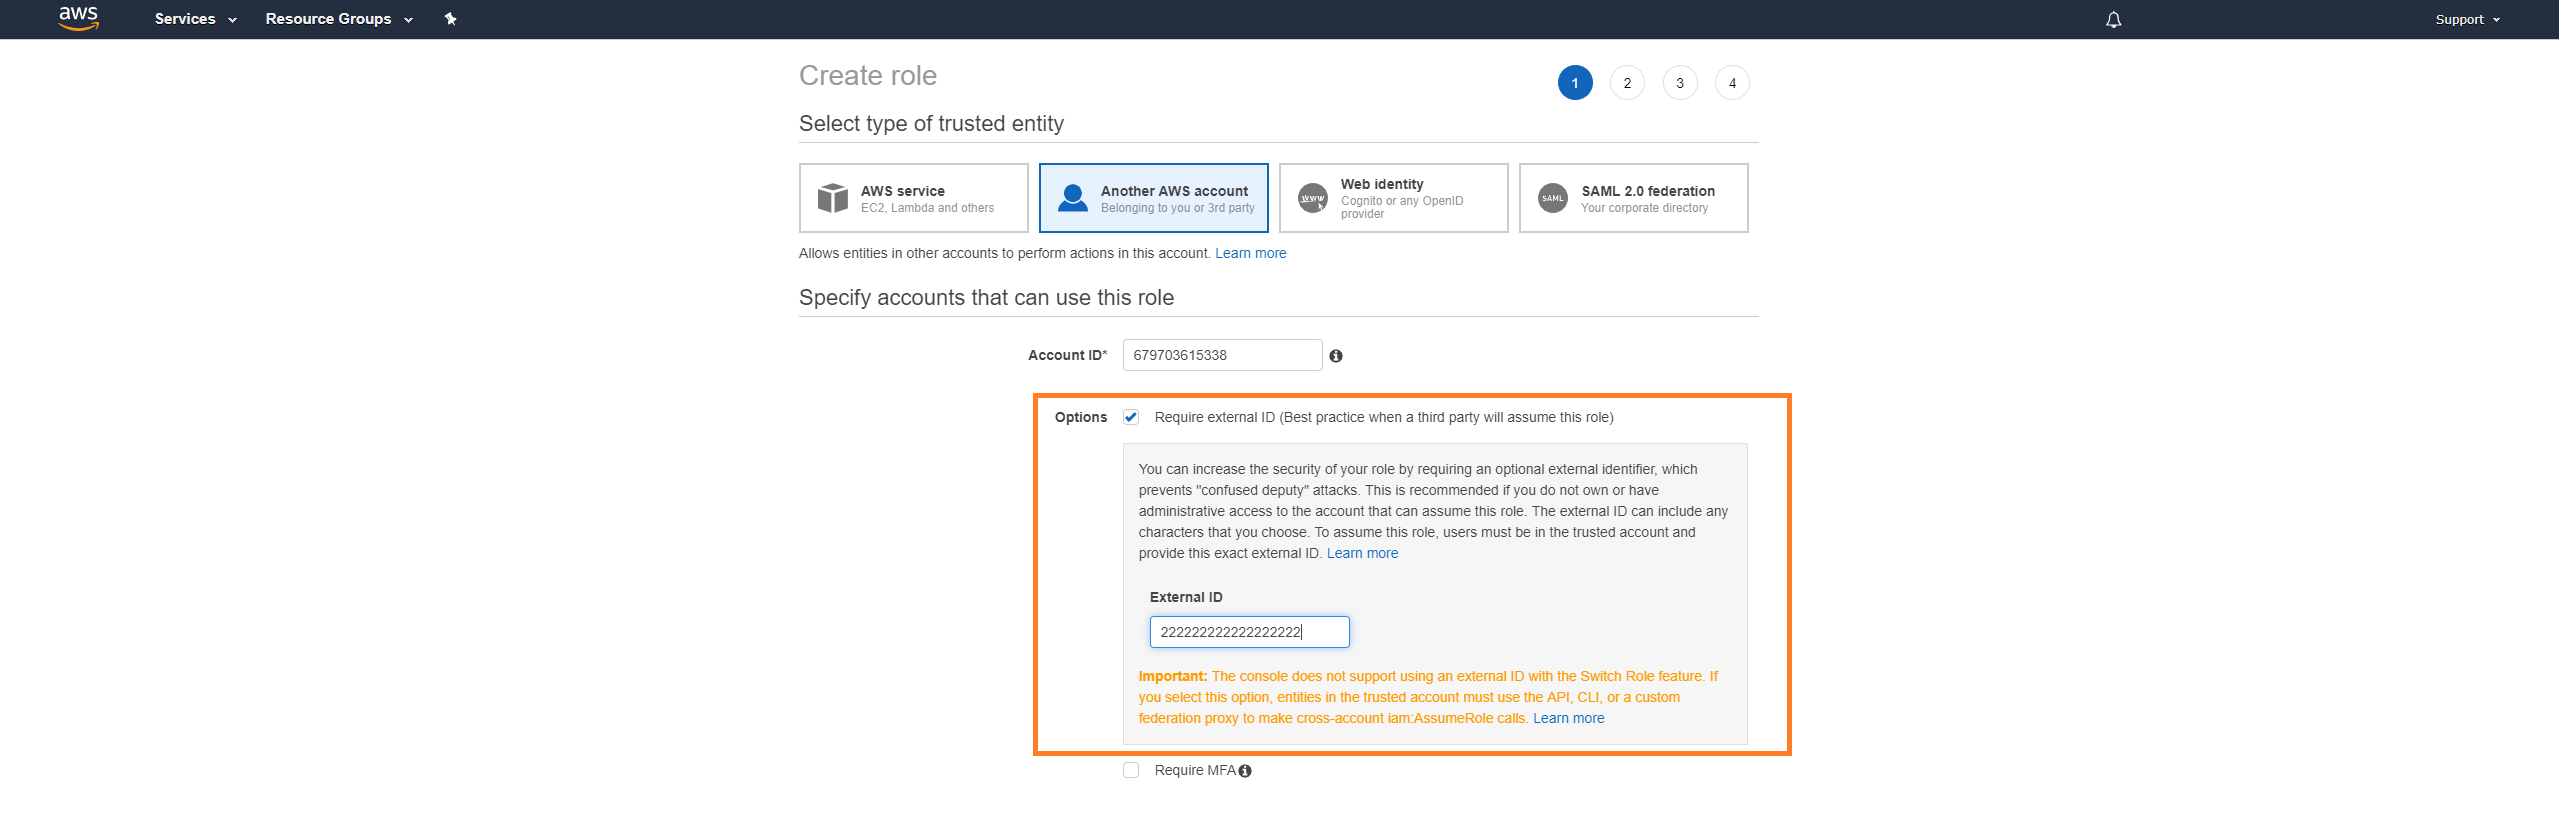
Do not mark Require MFA.
Click Next: Permissions.
Locate and mark the SecurityAudit policy.
Locate and mark the AWSSecurityHubFullAccess policy.
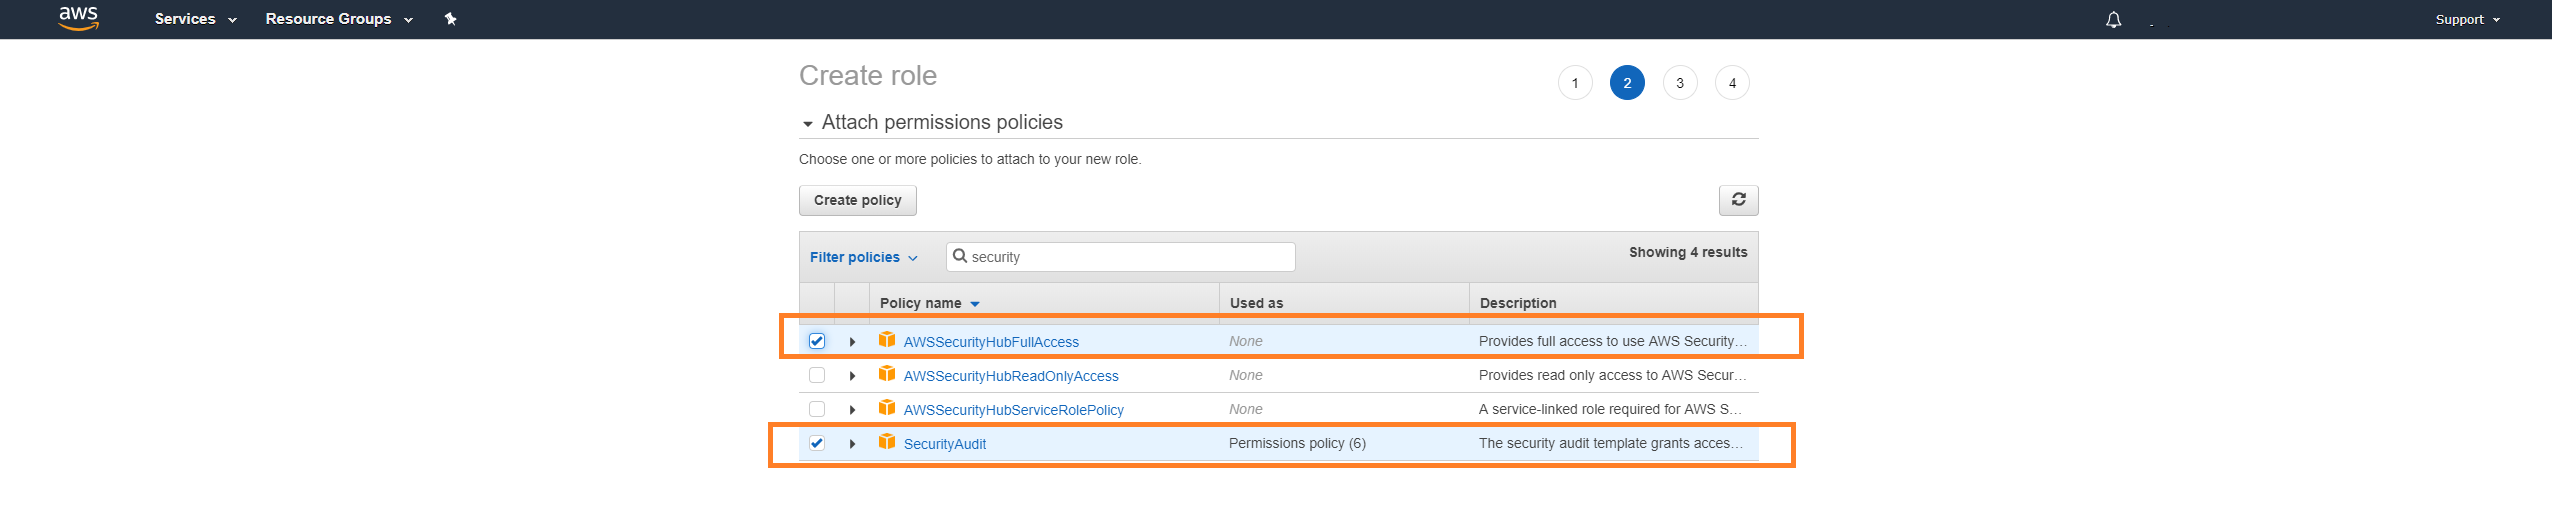
Click Next: Tags.
Click Next: Review.
In Role name, enter a descriptive name.
In Role description, enter a useful description.
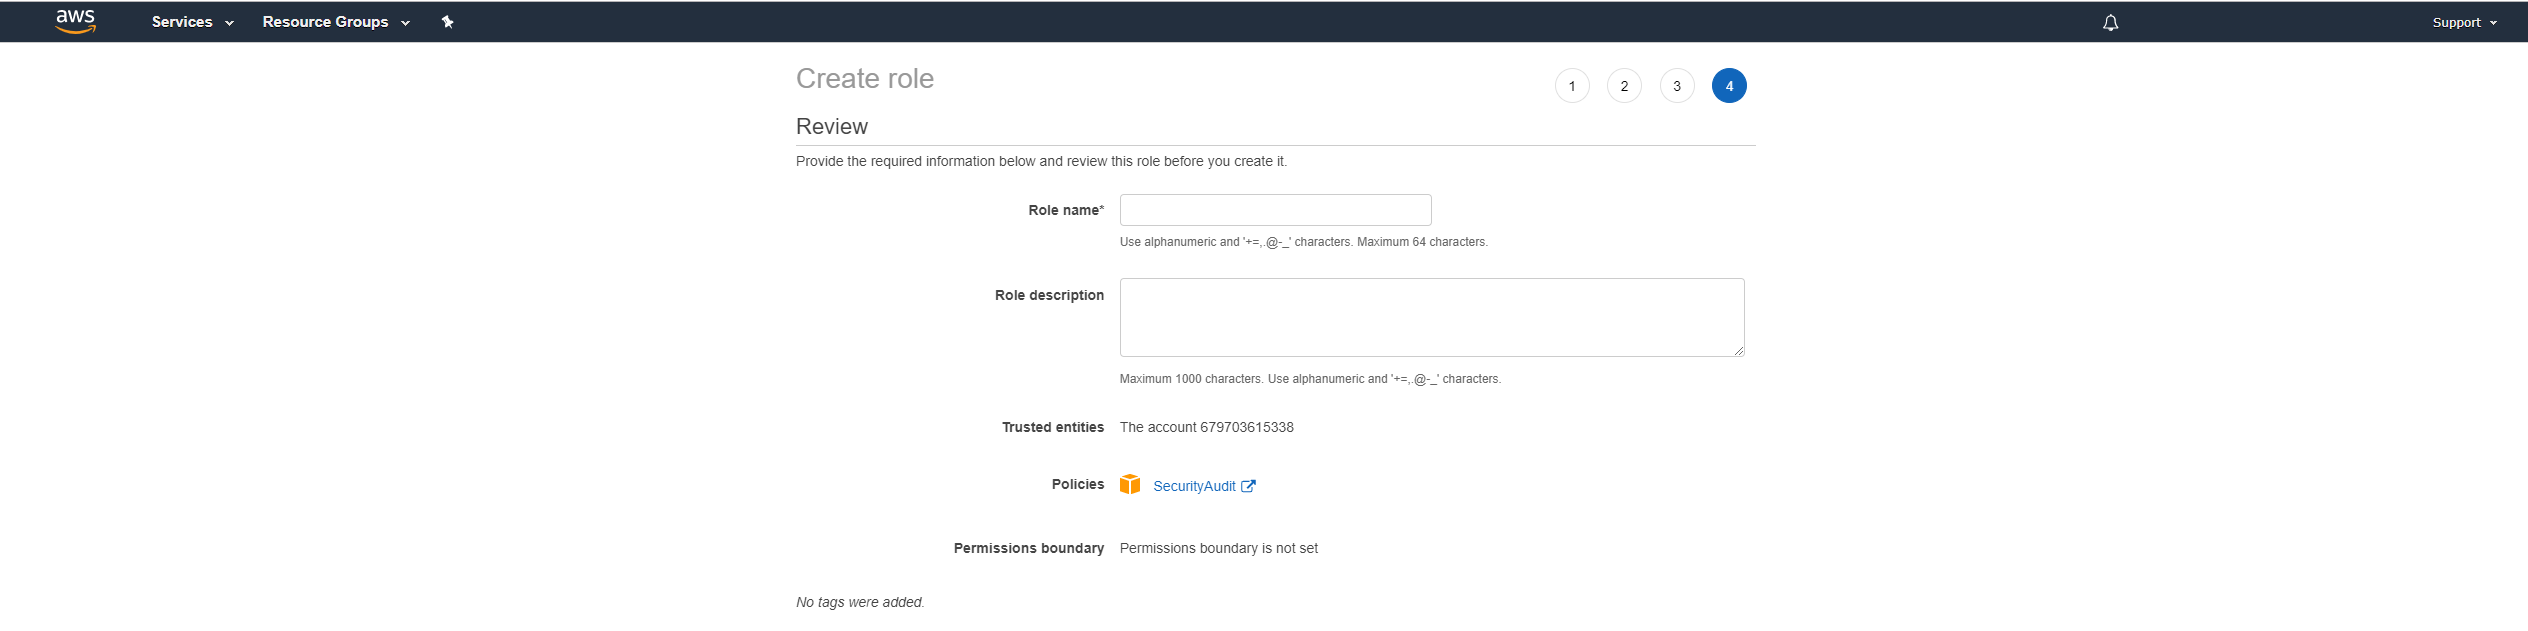
Click Create role.
Locate and select the newly created role.
Under Summary, copy the Role ARN information.
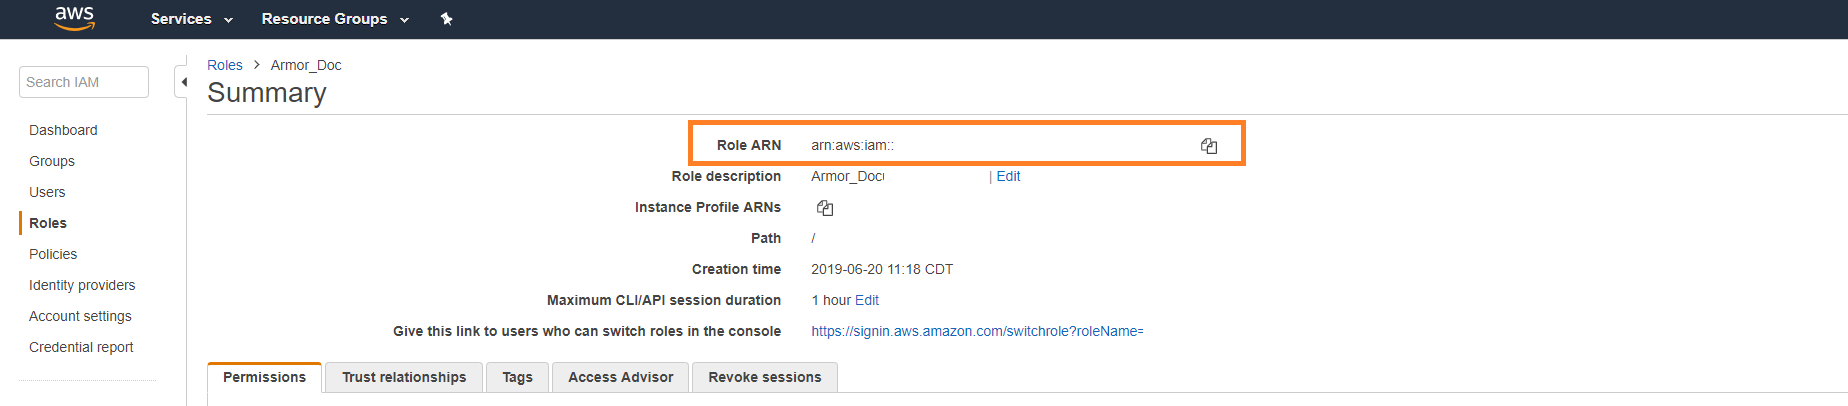
Return to the Cloud Connections screen in Nexus.
Paste the Role ARN information into the IAM Role ARN field.
Click Save Cloud Connection.
Once the newly added cloud connections gathers data, the instance will appear in the Virtual Machines screen.


Step 2: Configure Your AWS Regions
In this step, you will enable AWS Security Hub in the desired AWS regions; this action will capture the findings from Security Hub in every configured region.
Access the AWS console.
Access the Security Hub section.
In the left-side navigation, click Integrations.
Locate and select ARMOR Armor Anywhere.
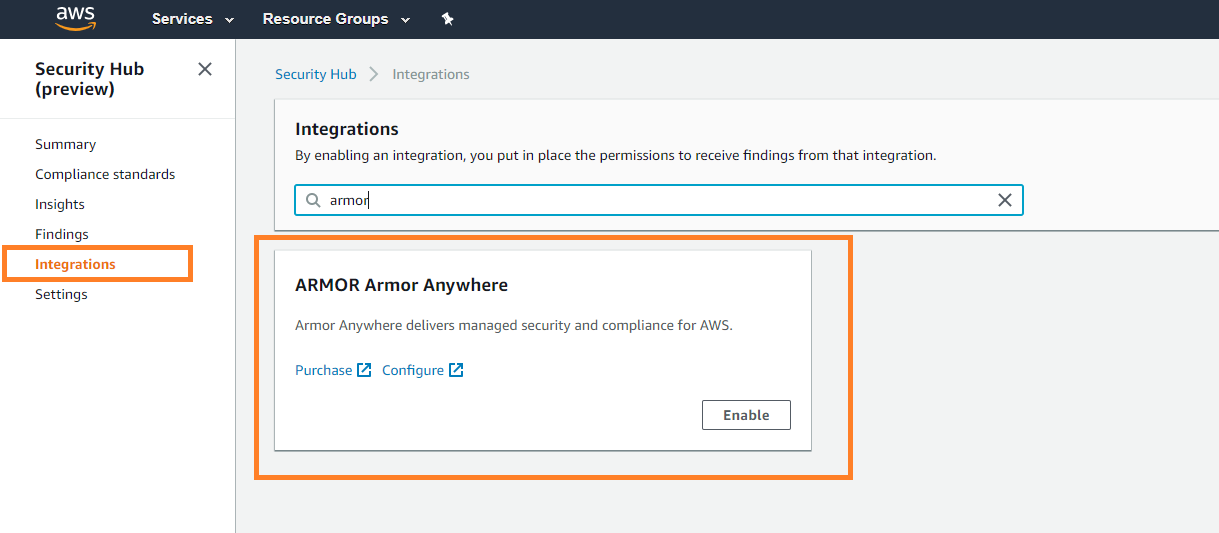
Click Enable.
In the pop-up window, click Enable.

View Your Added (connected) Public Cloud Instances
After you add your public cloud account into Nexus, you can view the corresponding instances (and their security status) in the Virtual Machines screen.
The Cloud Connection screen simply lists the synced public cloud account; the Virtual Machines screen lists all the instances listed in that public cloud account.
In Nexus in the left-side navigation, hover over Infrastructure
.Click Compute, then Virtual Machines
Column | Description |
|---|---|
Provider | The public cloud provider for the instance |
Name | The name of the instance from your public cloud account |
Created | The date the instance was created in your public cloud account |
Security Group | The security group that corresponds to your AWS instance.
|
Power | The power status of the instance, either powered on (green) or powered off (red) |
Armor Agent | The security status of the instance, in relation to the installed agent. There are three states:
|
Tags | Custom tags associated with the instance |
Additional Documentation
To learn about the basics of Cloud Connections, see Cloud Connections.