Create a Remote Log Source - Imperva Incapsula
Topics Discussed
You can use this document to send Imperva Incapsula logs to Armor's Security Information & Event Management (SIEM).
Pre-deployment Considerations
To create a remote Log Relay, you must already have:
A Log Relay server on your account
To learn how to add Log Relay to your account, see Obtain Log Relay for Remote Log Collection
Configured the system clock
Configure the IAM Role
Login into the AWS console.
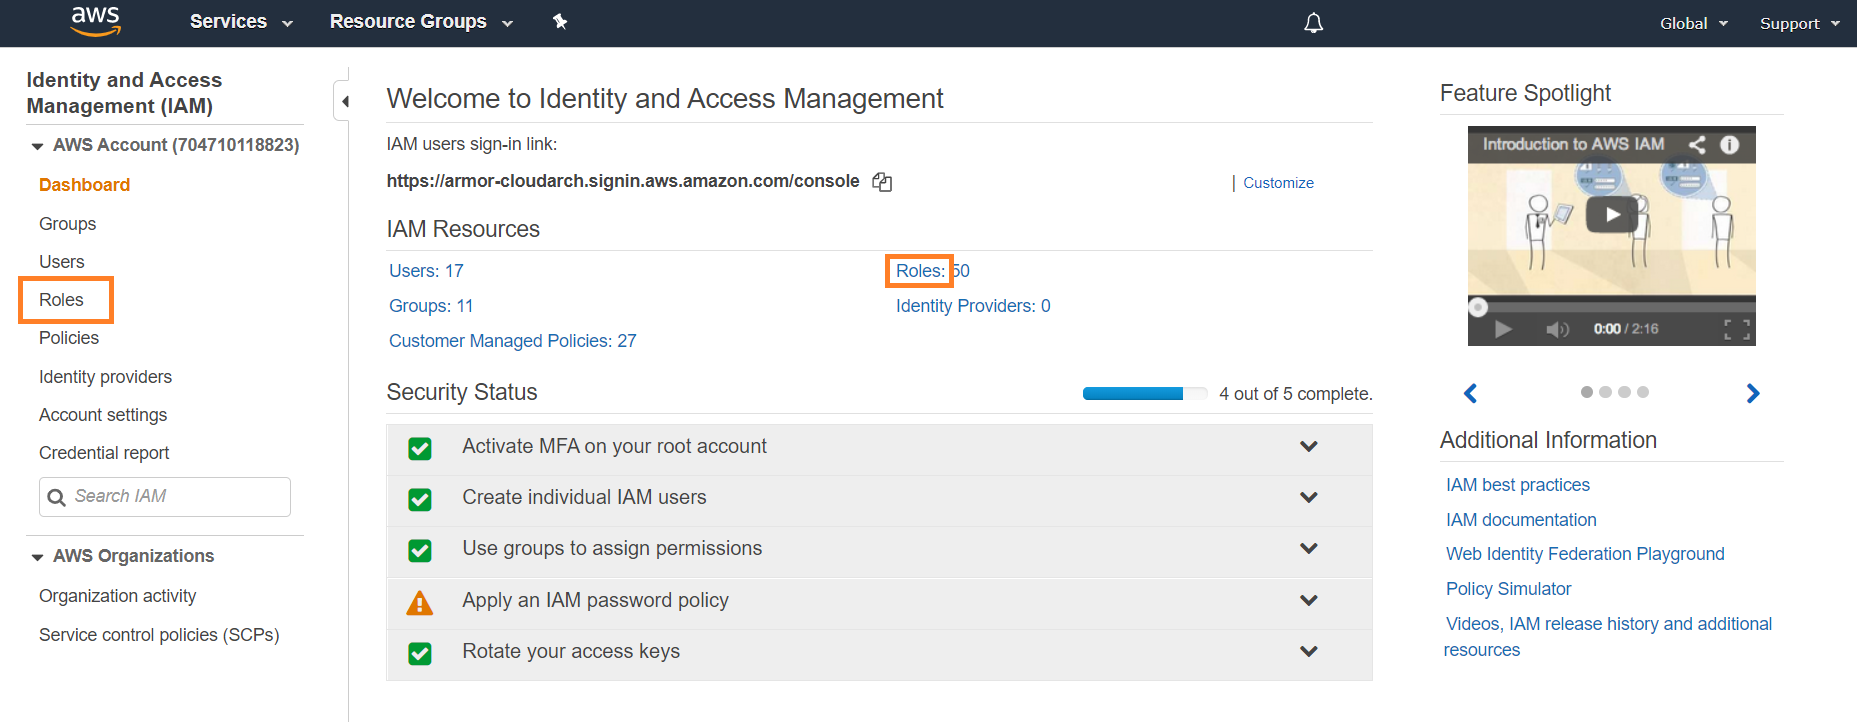
Go to the IAM service.
Click Roles.
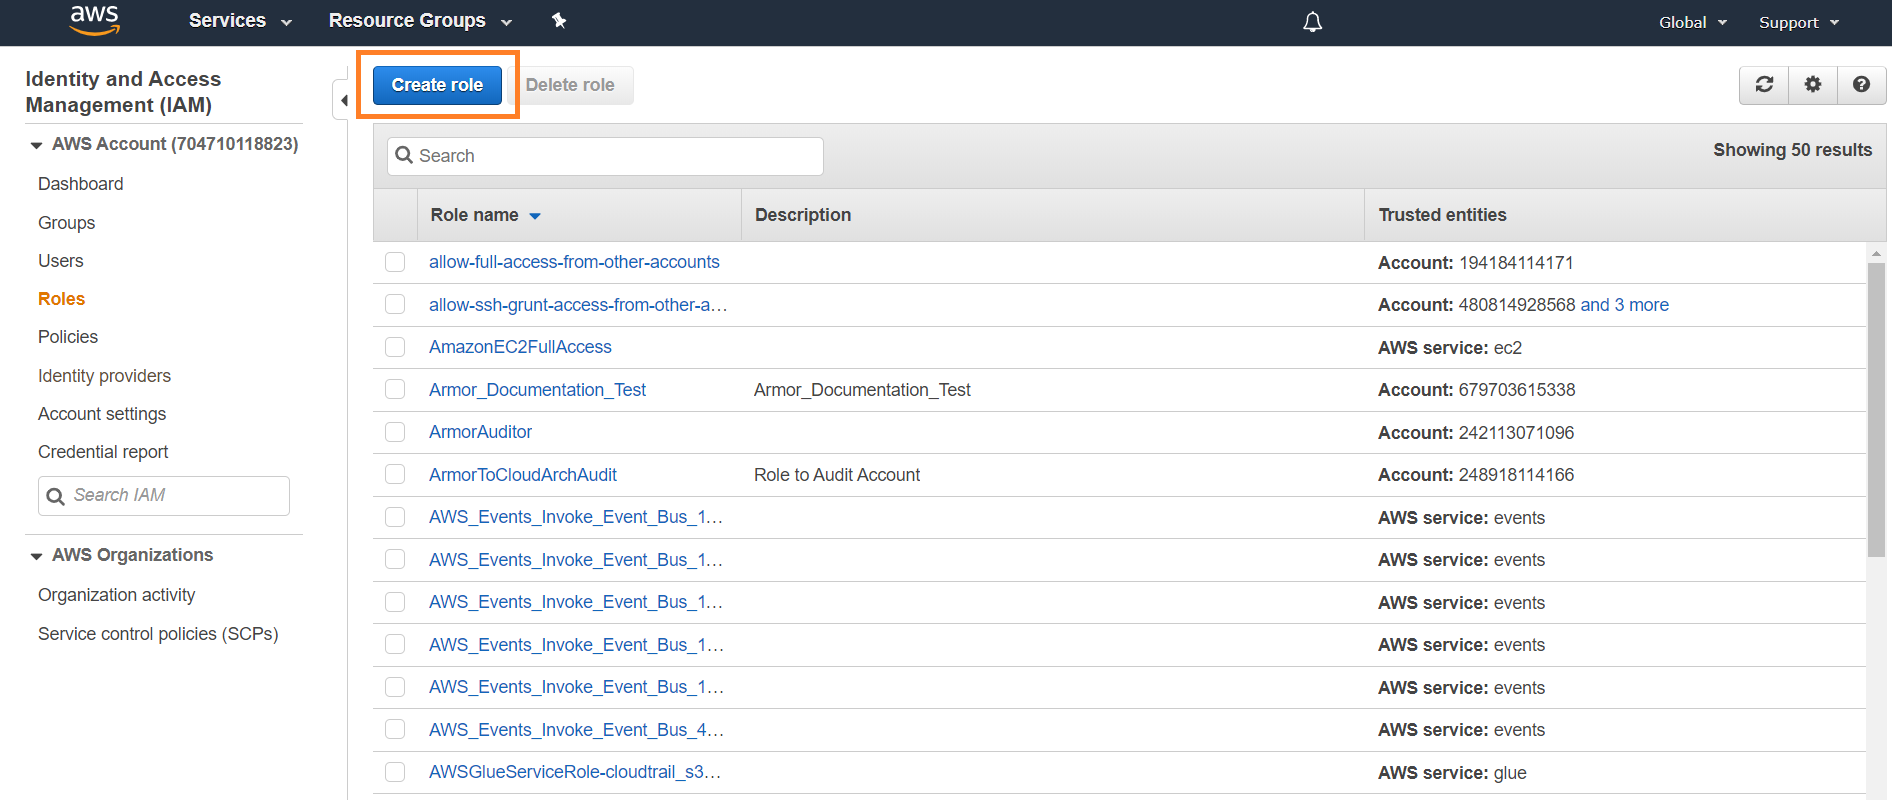
Click Create role.
Select AWS service, then select EC2 as the service that will use this role.
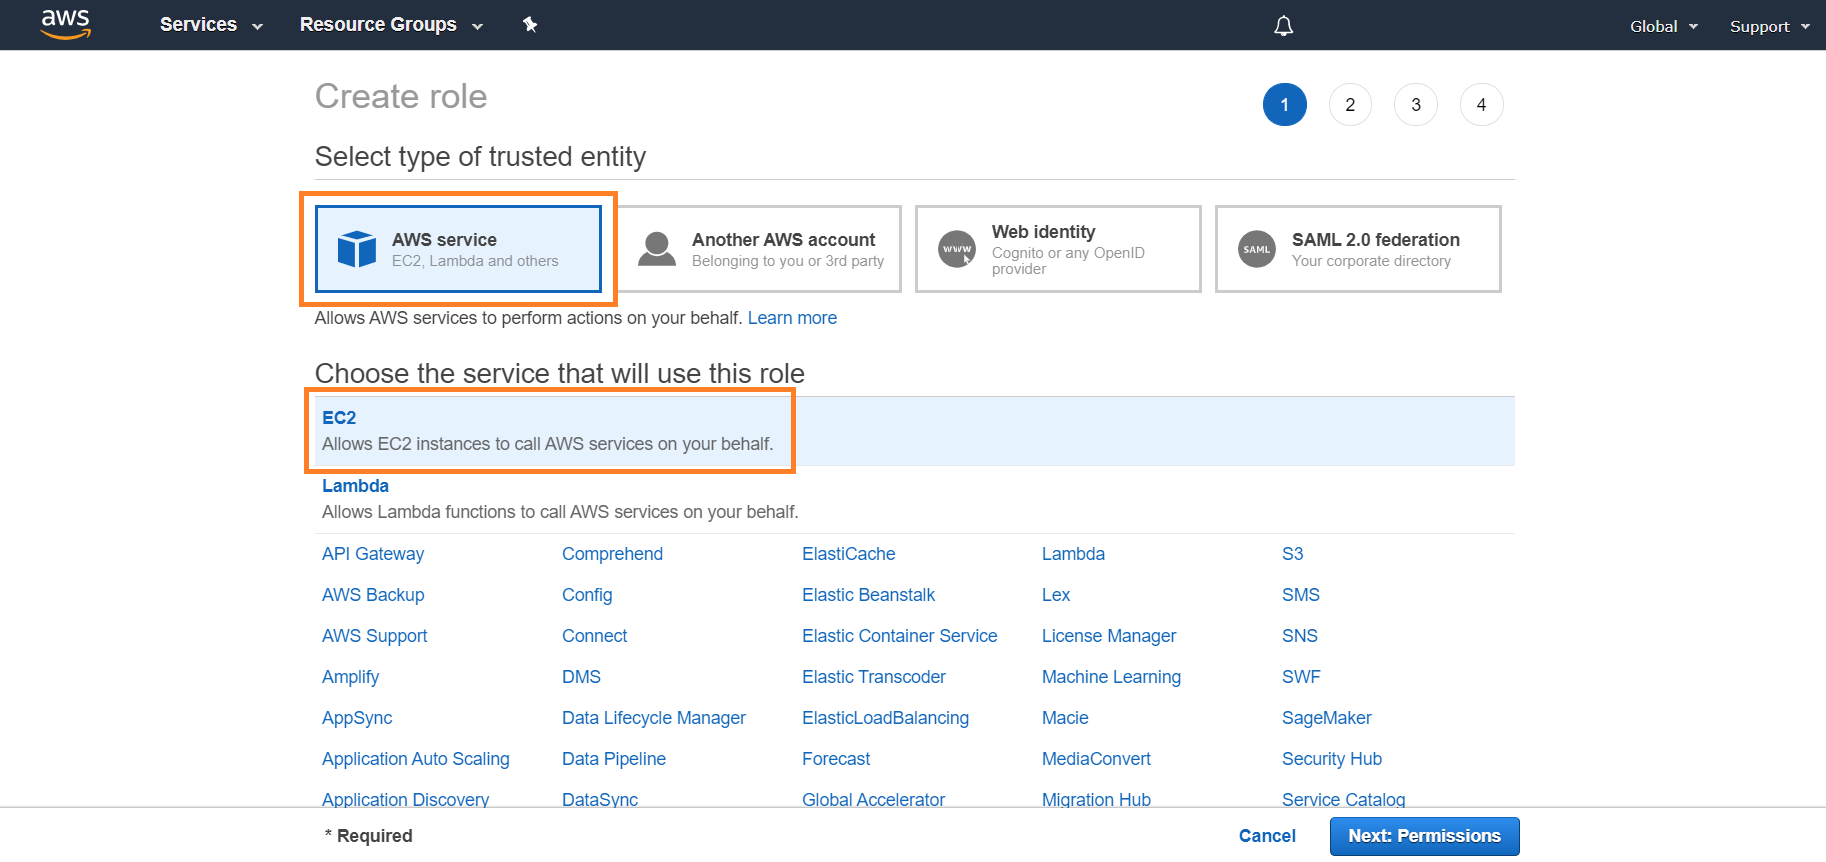
Click Next: Permissions.
Filter (search) policies on S3.
Select the AmazonS3ReadOnlyAccess policy.
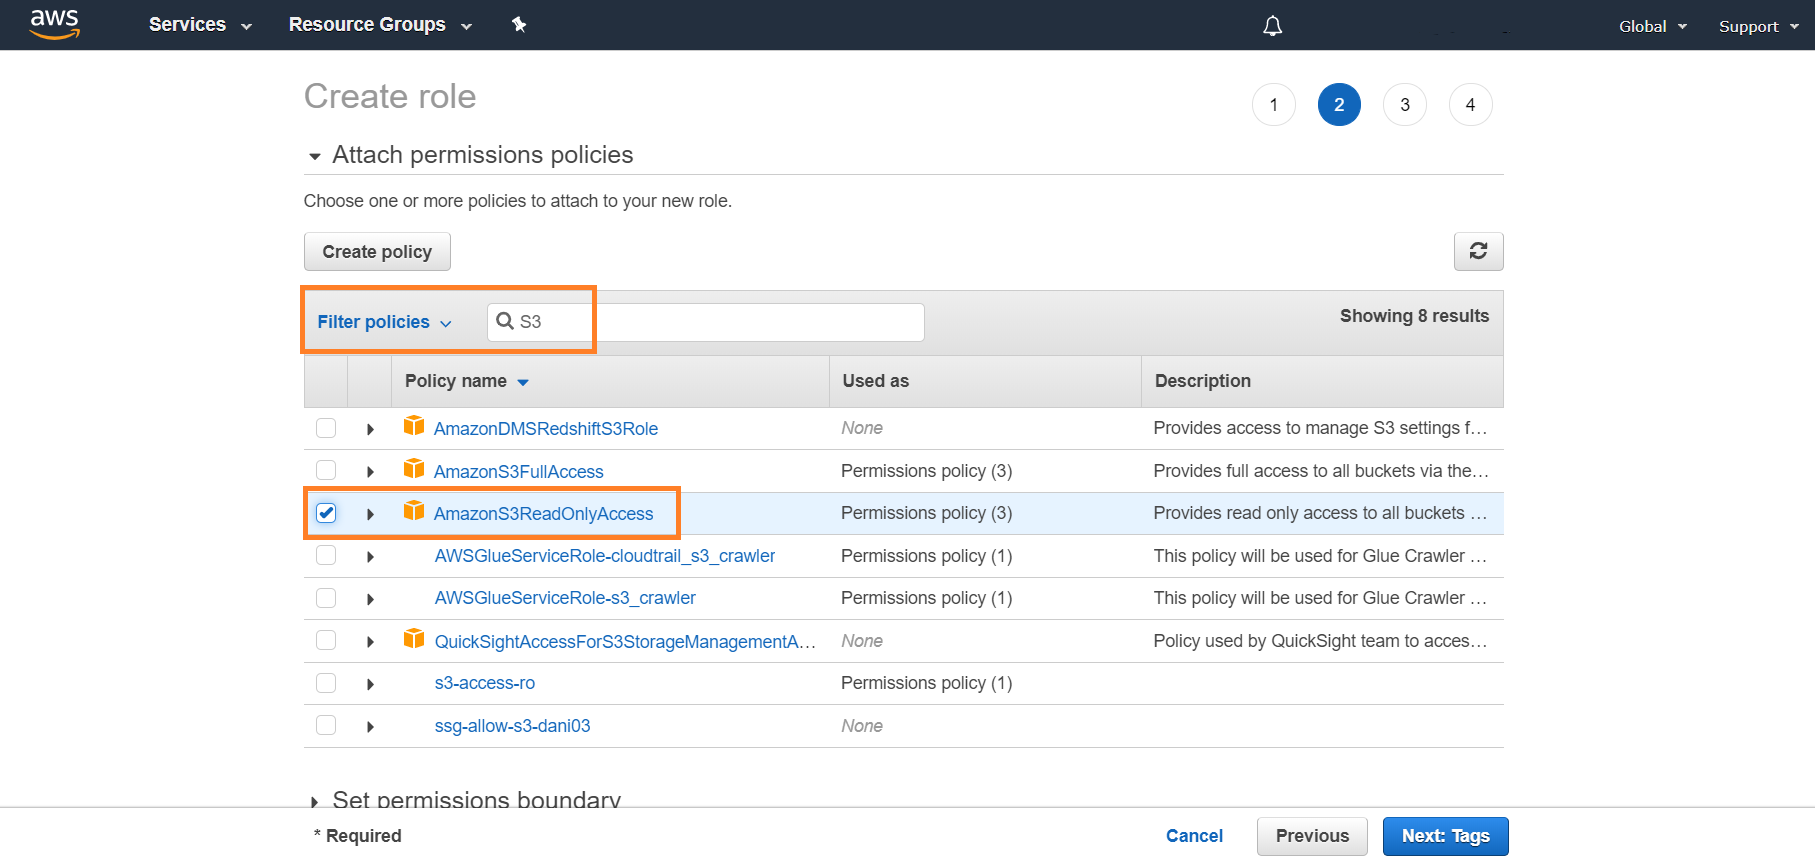
Click Next: Tags.
(Optional) Add tags.
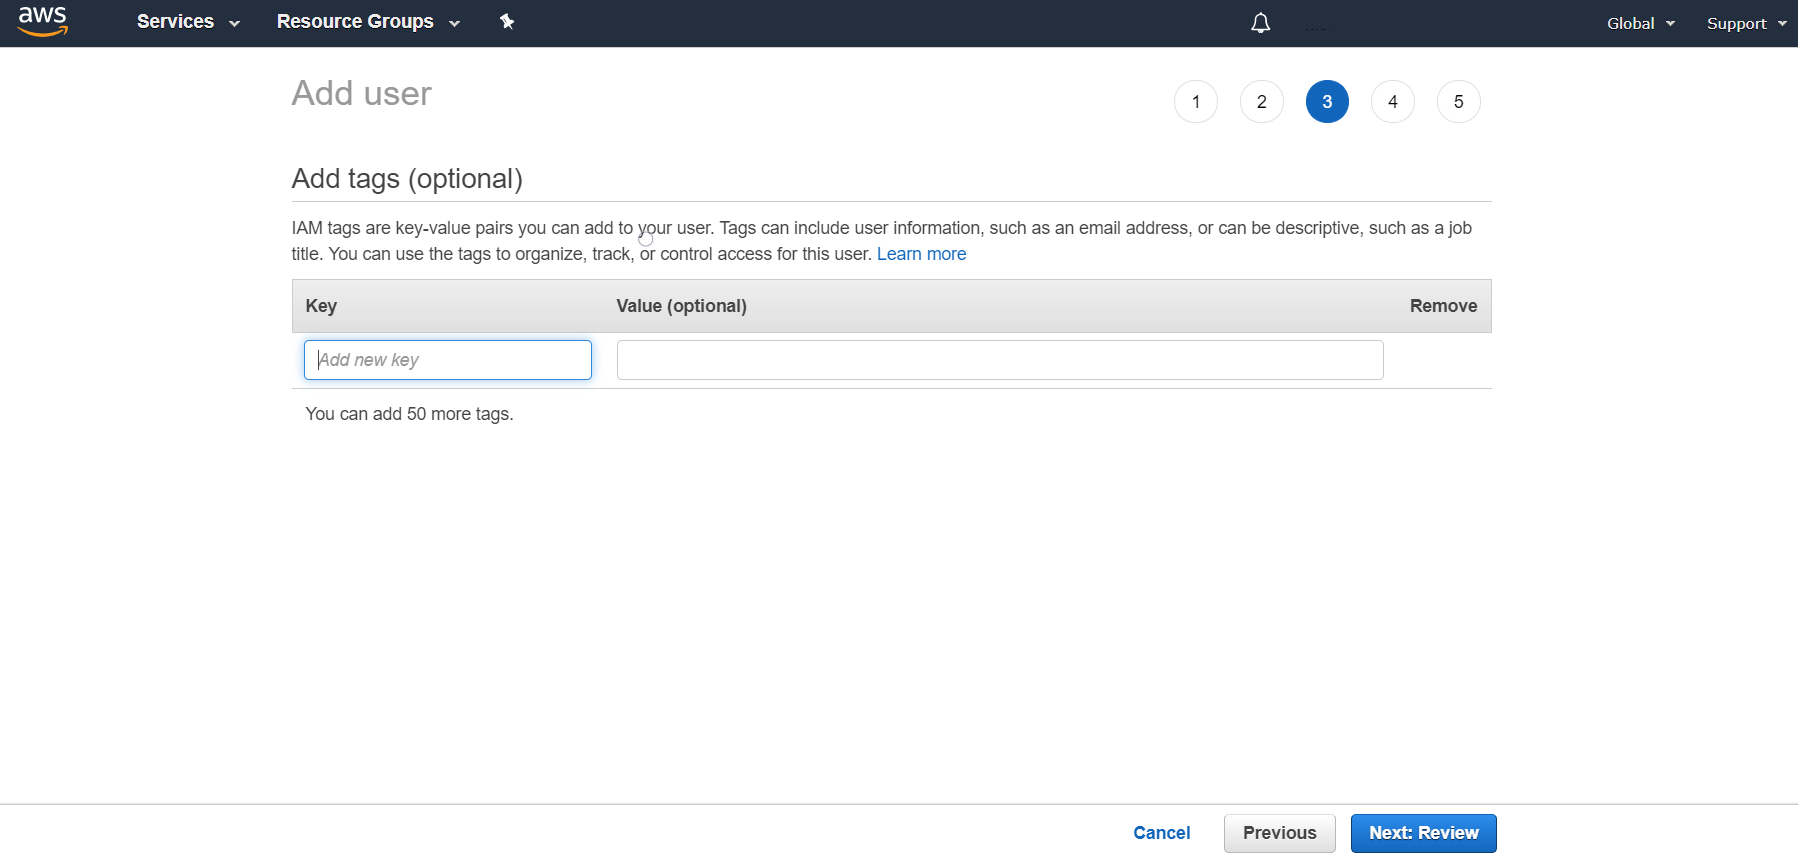
Click Next: Review.
In Role Name, enter a name that indicates what the role is being used for.
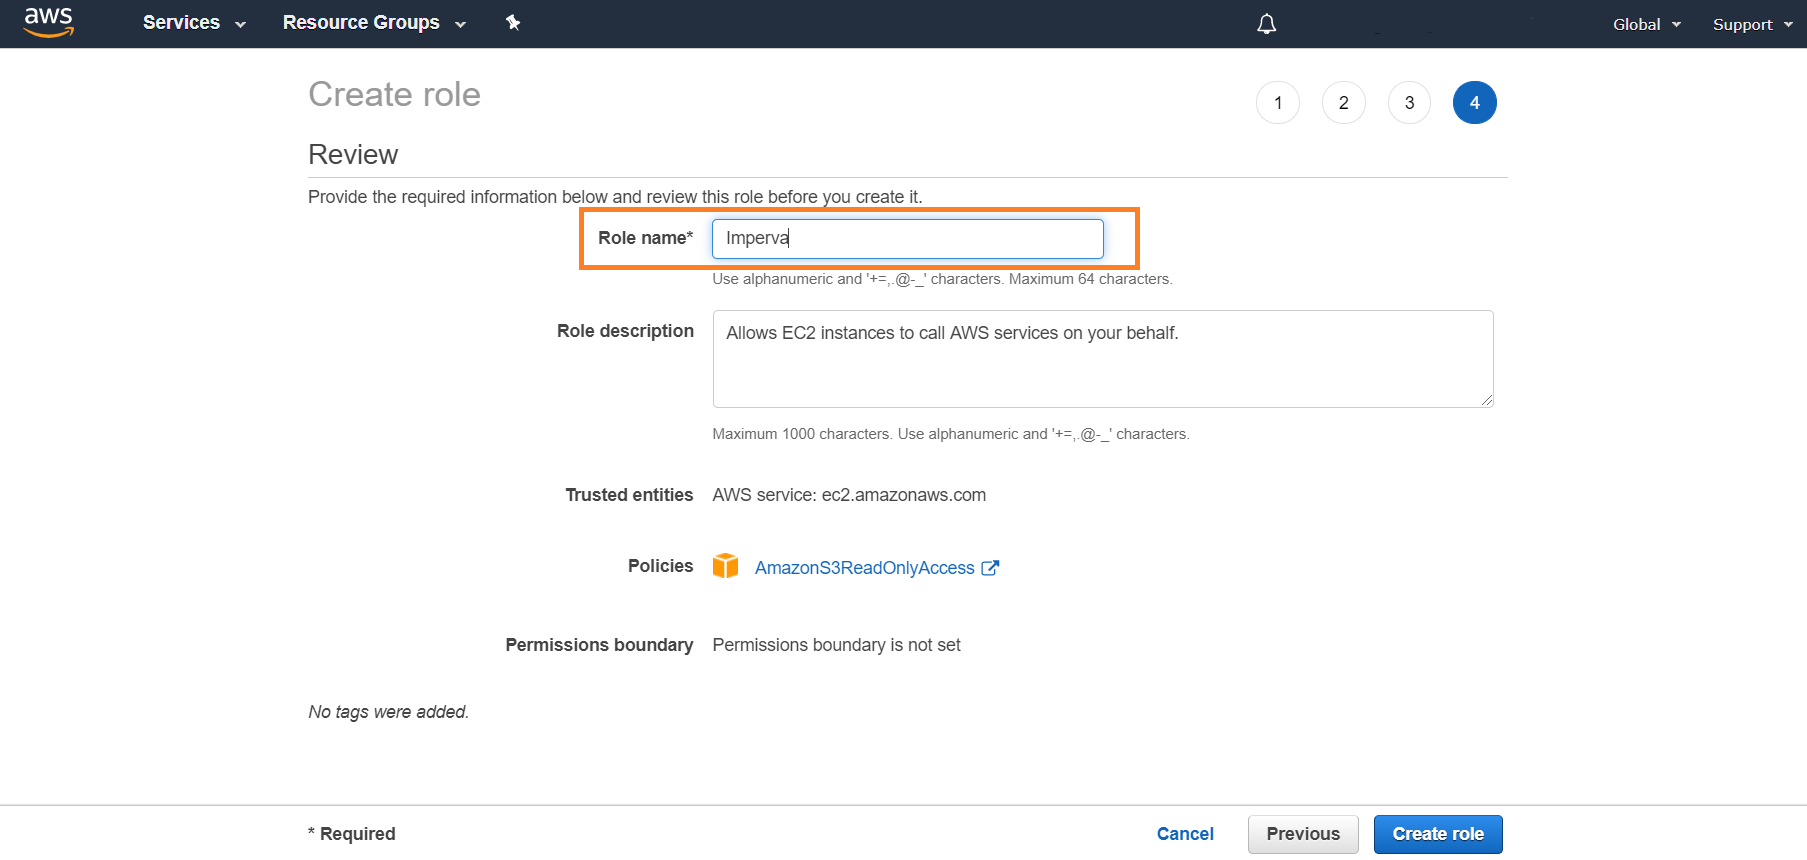
Click Create role.


Login into the AWS console.
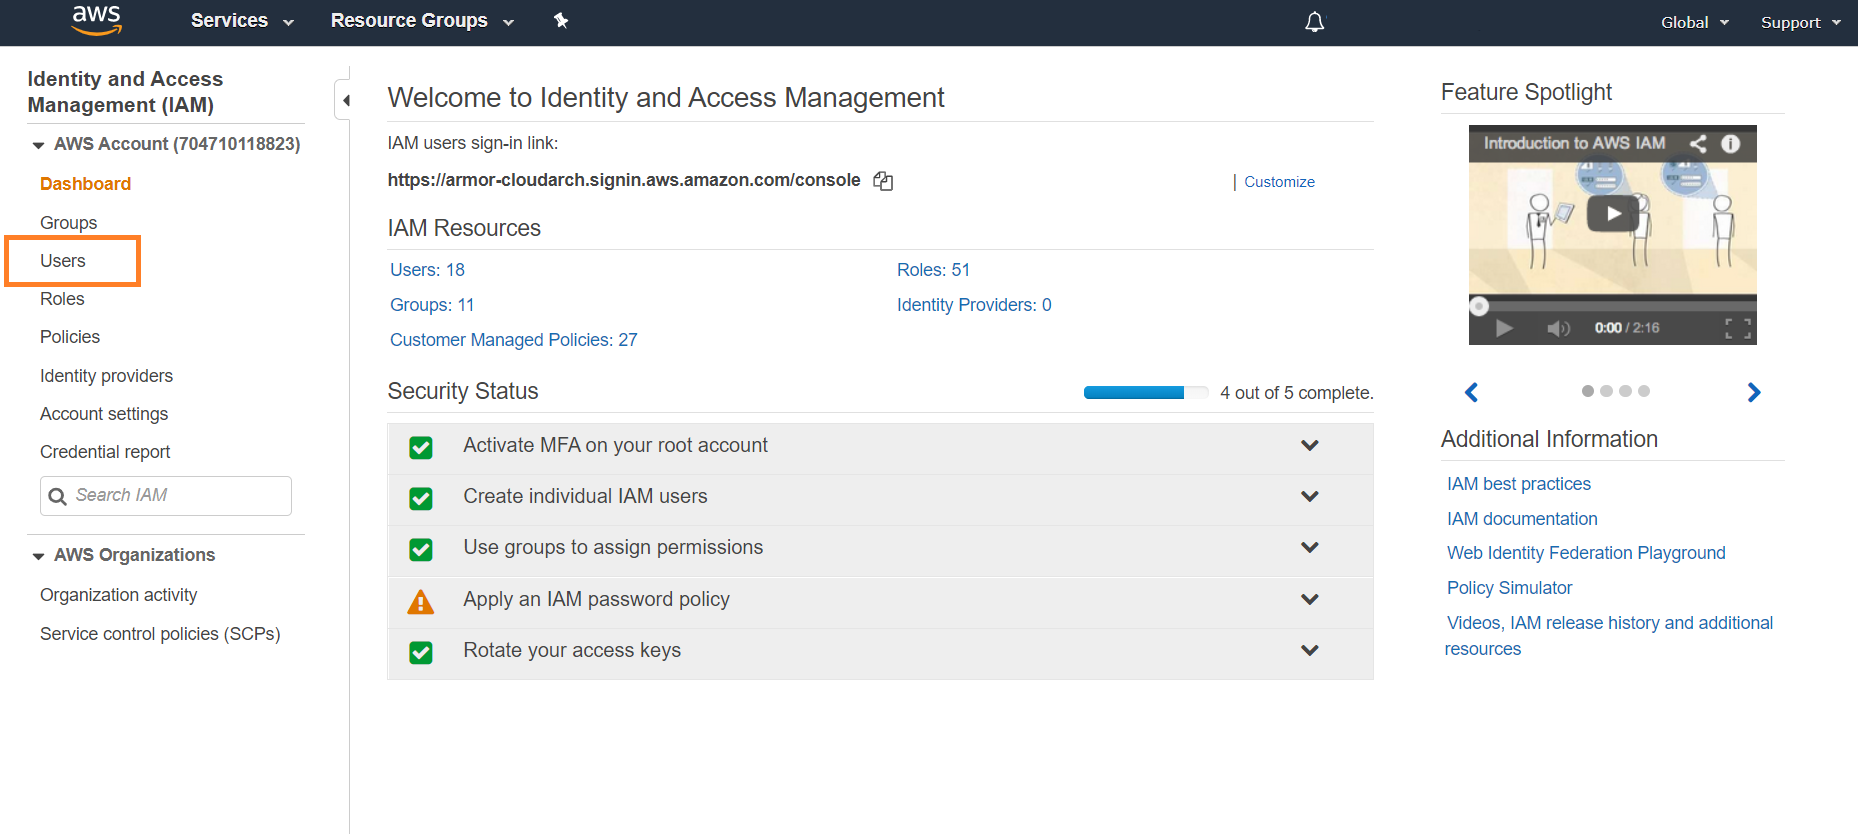
Go to the IAM service.
Click Users.
Click Add User.
Enter the user name.
For access type, select Programmatic access.
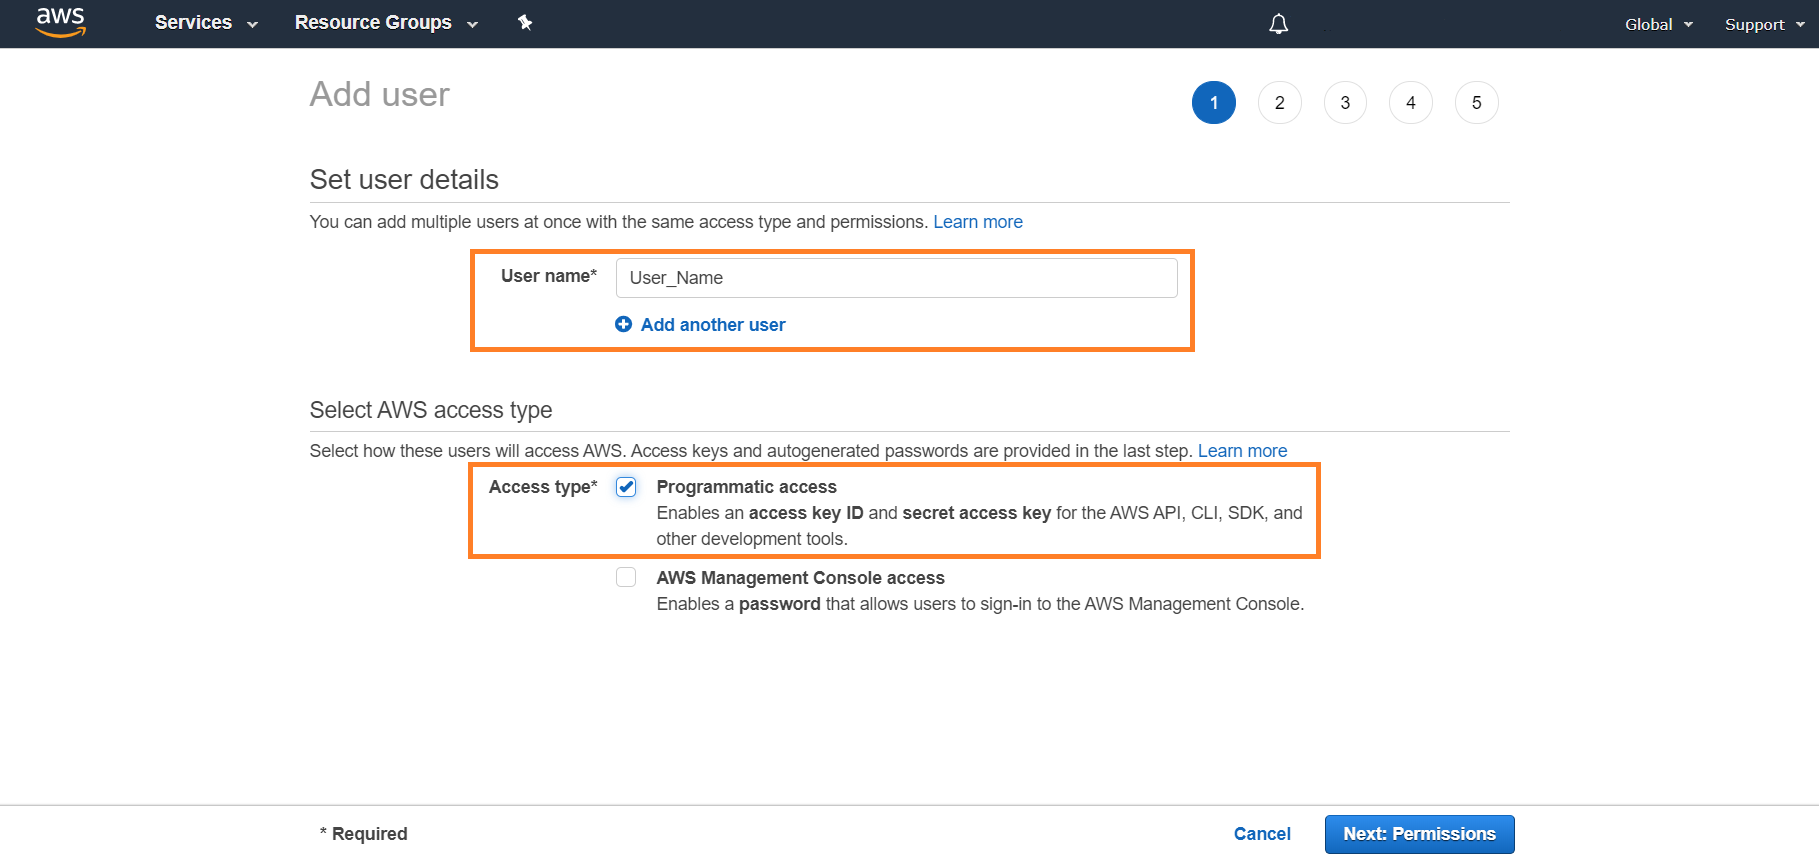
Click Next: Permissions.
Select Attach existing policies directly.
Filter (search) policies on S3.
Select the AmazonS3ReadOnlyAccess policy.
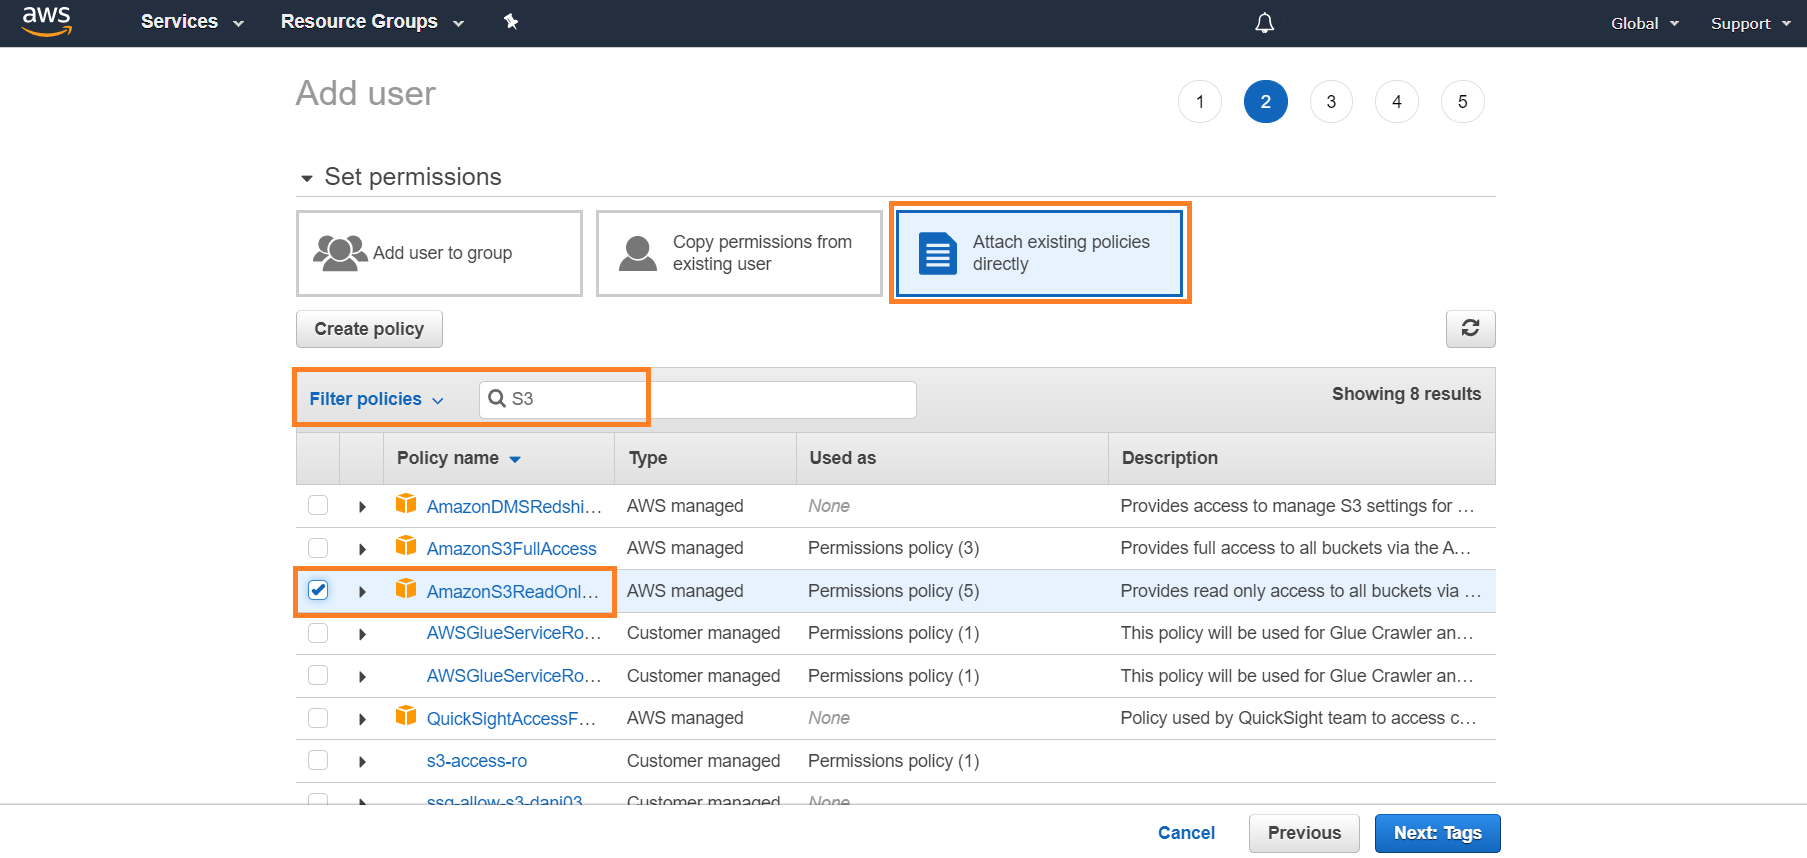
Click Next: Tags.
(Optional) Add tags.
Click Next: Review.
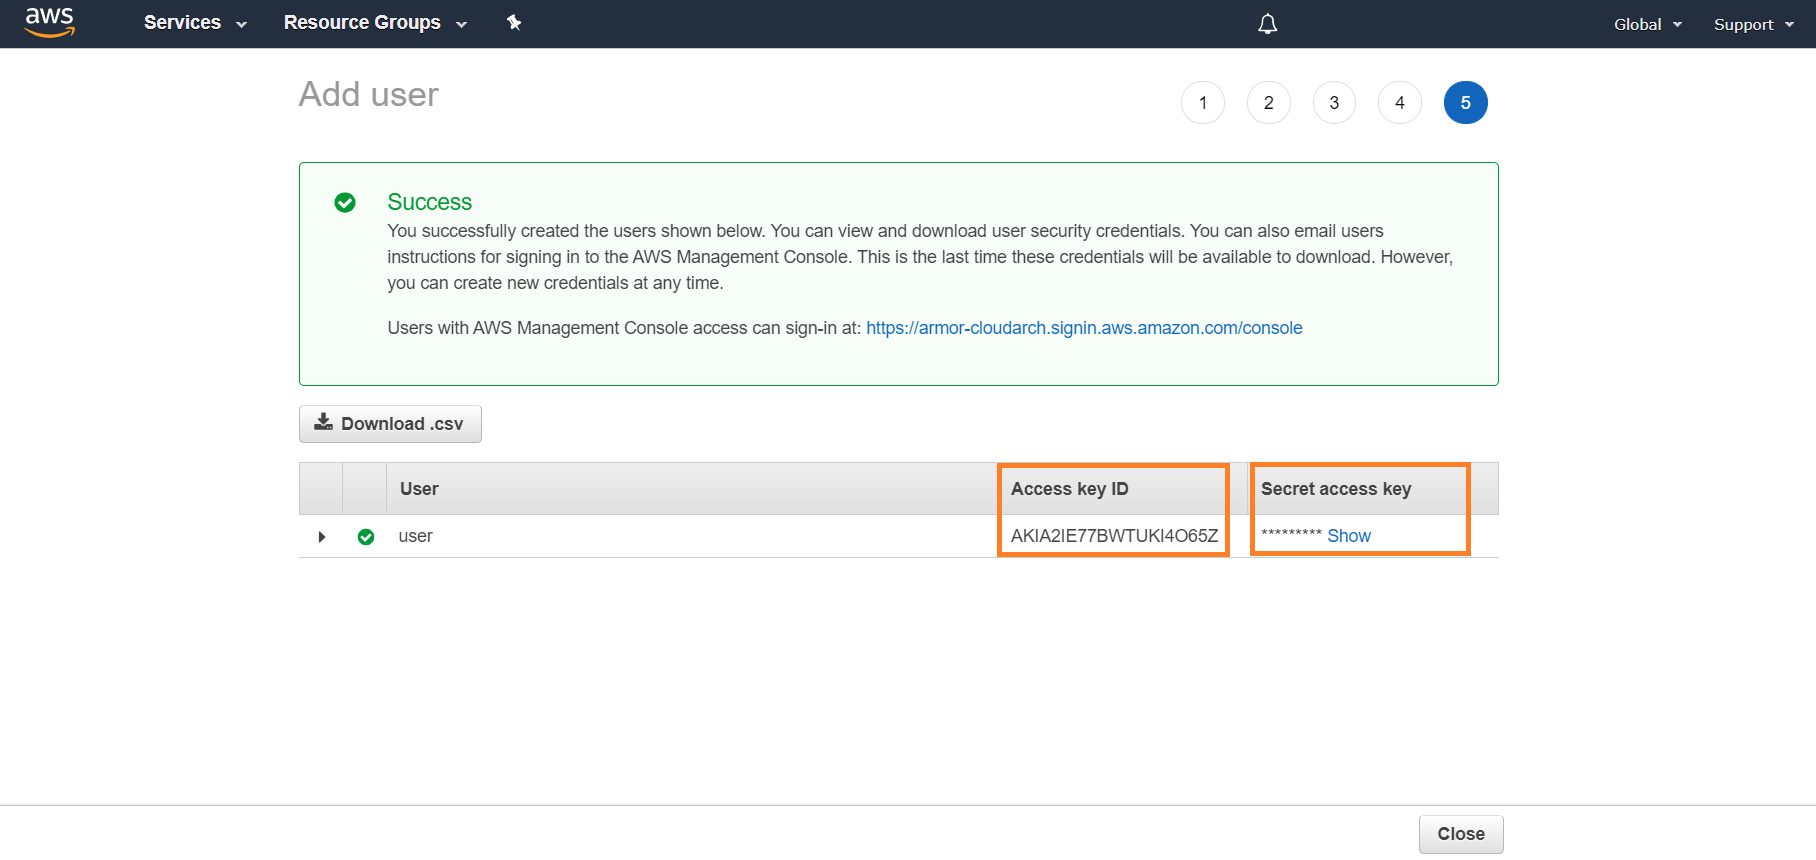
Click Create user.
Copy the Access key ID and Secret access key, or download the user security credentials.
Log into your log relay server.
Run the following command to get the home path of the armor-logstash
CODEng: getent passwd armor-logstashSample results: armor-logstash:x:1002:1002::/opt/armor/logstash-6.7.0:/bin/bash.
Copy the home path: /opt/armor/logstash-6.7.0.
Navigate to this path: cd /opt/armor/logstash-6.7.0.
Create the AWS folder: mkdir .aws.
Create the credentials file in the new directory by running the following command:
CODEnano .aws/credentialsAdd the following (default) to the file:
CODE[default] # Your access key id aws_access_key_id = XXXXXXXXXXXXXXXXXXXX # Your secret access key aws_secret_access_key = XXXXXXXXXXXXXXXXXXXXXXXXXXXXXXSave the file.
Restart logstash.
systemctl restart armor-logstash


Assign a Role to the EC2 Instance
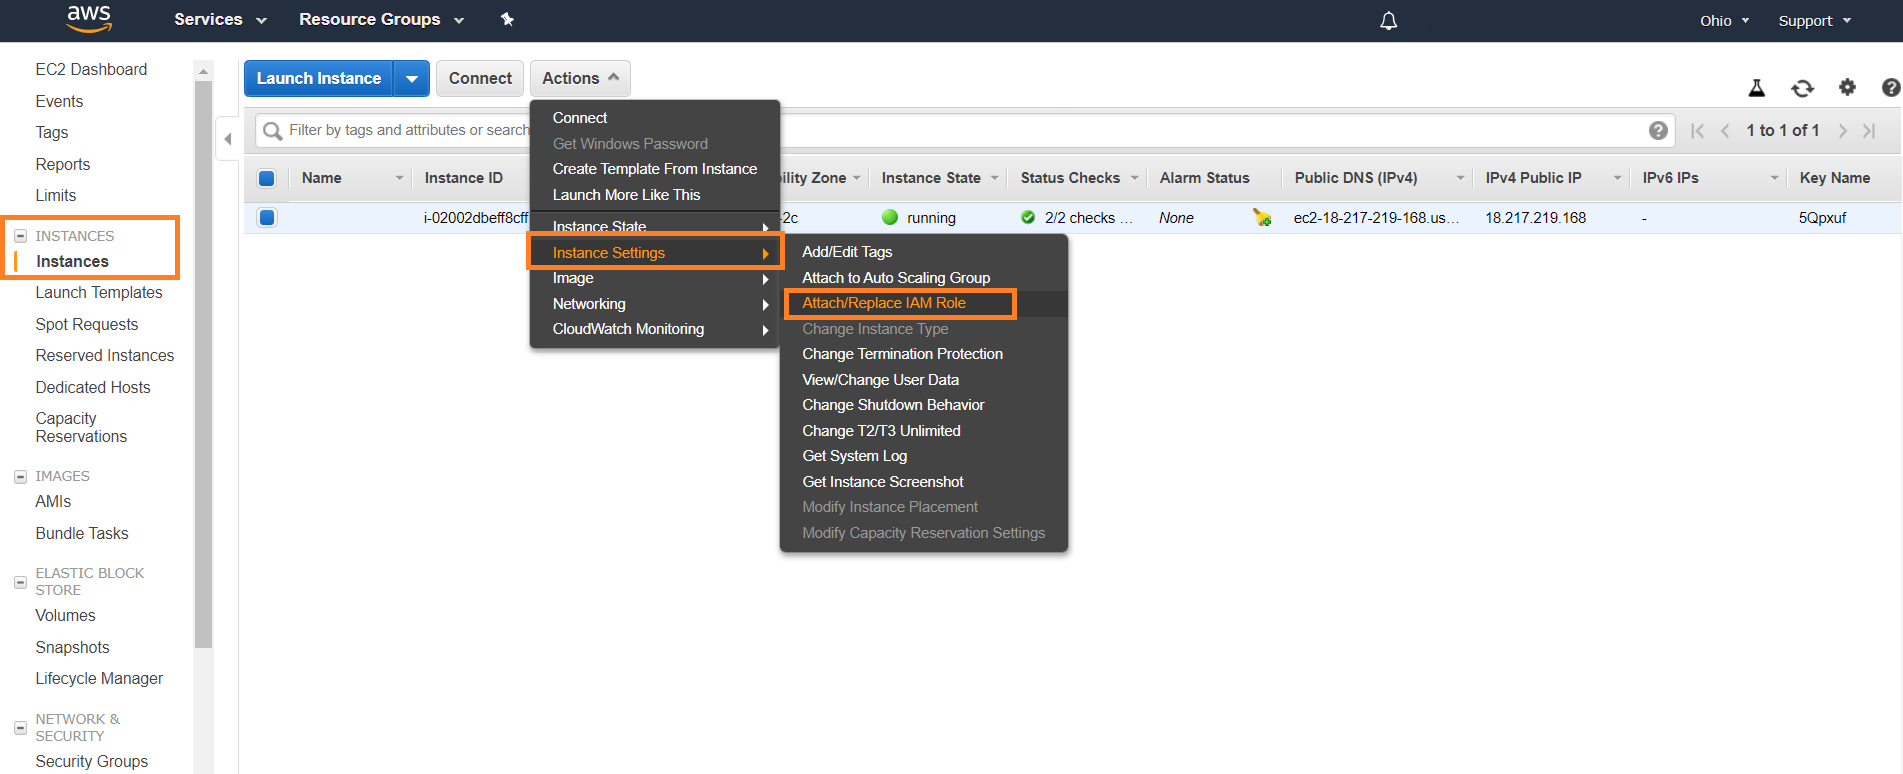
In the AWS console, go to the EC2 service.
Click Instances to find the EC2 instance that is the log relay, then click the box next to the instance.
Select Actions > Instance Settings > Attach/Replace IAM Role.
In IAM role, select the role created.
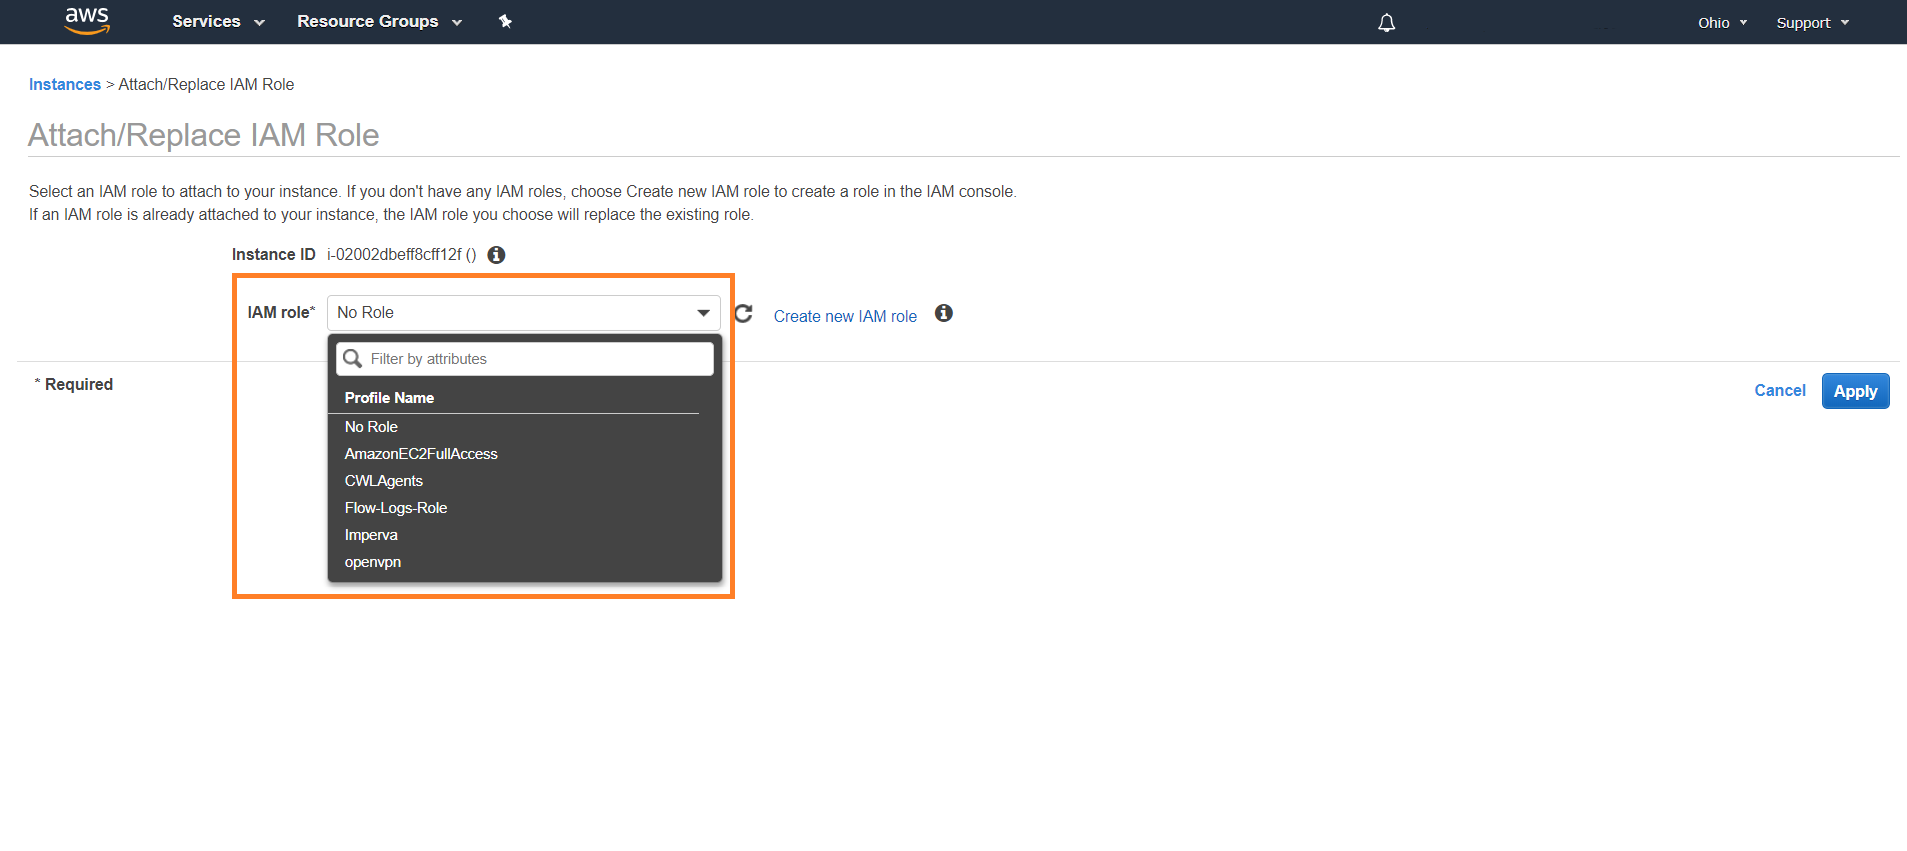
Click Apply.


Import Imperva Incapsula Logs from S3
Log into your log relay server.
Navigate to the /opt/armor/log-relay/conf.d folder.
Create a new file using the following naming pattern: <pipeline_name>.<friendly_id>.env.
For example: pipeline-s3.incapsula.env
Pipeline name = "pipeline-s3"
Friendly_id (friendly name) = "incapsula"
Add the following content to the newly created .env file. This will be used to populate the template and create the pipeline.
CODE# The name of the S3 bucket bucket_name="example-bucket-name" # The region where the S3 bucket is provisioned region="example-region" # The type of logs being collected by this source log_type="imperva-incapsula" # The codec used to read the raw log files codec="line"After you have created the .env file and made any necessary changes, you will need to restart logstash.
systemctl restart armor-logstash
Verify Logs
In Nexus, hover over Threat Management
 on the left-side nav.
Click Log Search.
Then click Log Search tab on the top of the page.
Wait for the SSO.
In the Source column, review the source name to locate the newly created Imperva Incapsula remote log source.
In the search field, you can also enter "incapsula" to locate Imperva Incapsula messages.