Azure Deployment Guide
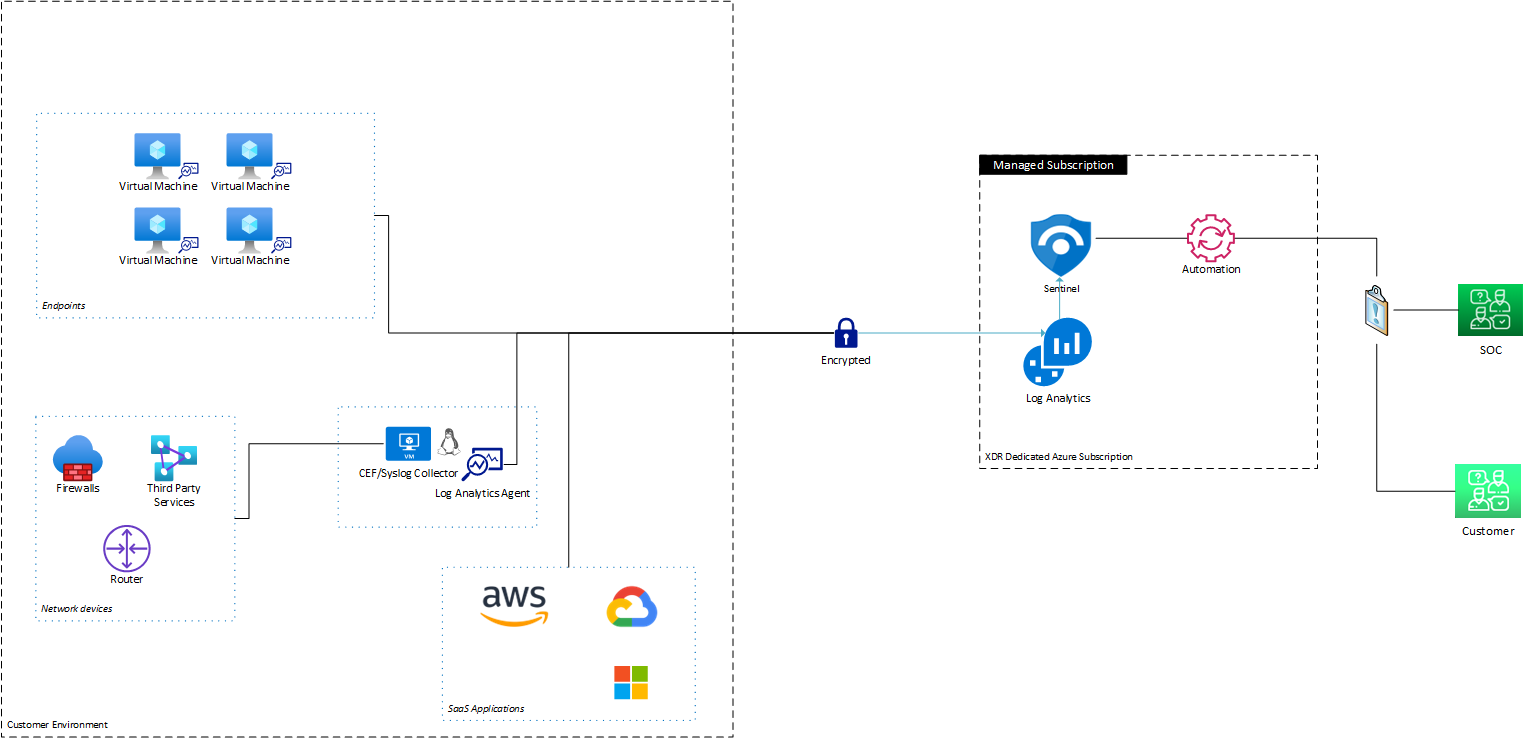
Architecture Diagram
Deployment
Operational Prerequisites
- VCS: Identify existing or create an org in version control system (Github/Gitlab) and add users involved in implementation to the org.
- Azure Subscription: It is advised to use a dedicated Azure subscription for MDR deployment to separate any other production resources from MDR resources. Suggested naming convention for new subscription: < company Name>-mdr-< environment >.
- Service principal: A service principal is required for integration between Microsoft Sentinel and playbook for automated notifications. Permissions required by service principal is
Microsoft Sentinel Contributor. Reference to MS Doc - Azure owner permissions: For initial deployment, owner permissions with Application.Read.All is required to perform role assignment for some of the azure applications to communicate amongst each other or you can create a custom role in Azure AD using instructions in these documentation.
Deployment (CLI)
System Prerequisites
You may choose to perform deployment either via your local environment or a docker image. Please ensure that you have the correct system prerequisites based on your chosen method of deployment.
Re-deployment Prerequisites
In the event of a re-deployment, ensure that the following Azure resources has been removed prior to deployment. Resource group
terraform-remote-state,security-dashboards,security-log-analytics,

- Azure Policy
Add resource activity and audit logs to perform self monitoring

Login to Azure
Start by logging into the Azure via the CLI and setting your Azure subscription.
# Login to Azure
az login

# Set the default Azure subscription into which the stack will be deployed
az account set --subscription <SUBSCRIPTION_ID>

# Check that the correct Azure subscription has been selected
az account list --out table
Link the Partner Account
Start by ensuring the Azure account is configured to be managed:
# List the existing management partner
az managementpartner show

# use the required partner id based on the region:
APAC: 6086379
EMEA: 6631329
NA: 2518669

# If a management partner is not configured
az managementpartner create --partner-id <partner id>

# If it is set to any other entity
az managementpartner update --partner-id <partner id>
Bootstrap Environments
Create Azure subscriptions for each deployment environment (i.e. dev, stage, and prod). Then, using the subscription ID, run the bootstrap script for each environment.
Note: You need to be in root directory of infrastructure-live to run all the following operations.
cd ./infrastructure-live.tools/azure/bootstrap-environment.sh \
--environment <ENVIRONMENT> \
--subscription <SUBSCRIPTION_ID> \
--location <LOCATION> \
--unique-name-prefix <PREFIX># Sample
.tools/azure/bootstrap-environment.sh \
--environment prod \
--subscription <SUBSCRIPTION_ID> \
--location southeastasia \
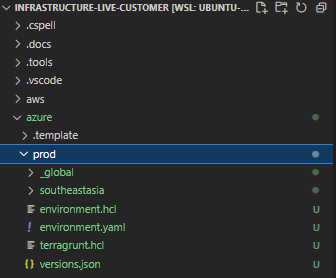
--unique-name-prefix companyaOnce you have run the bootstrap script successfully, you will be able to see the /azure/<ENVIRONMENT> folder generated
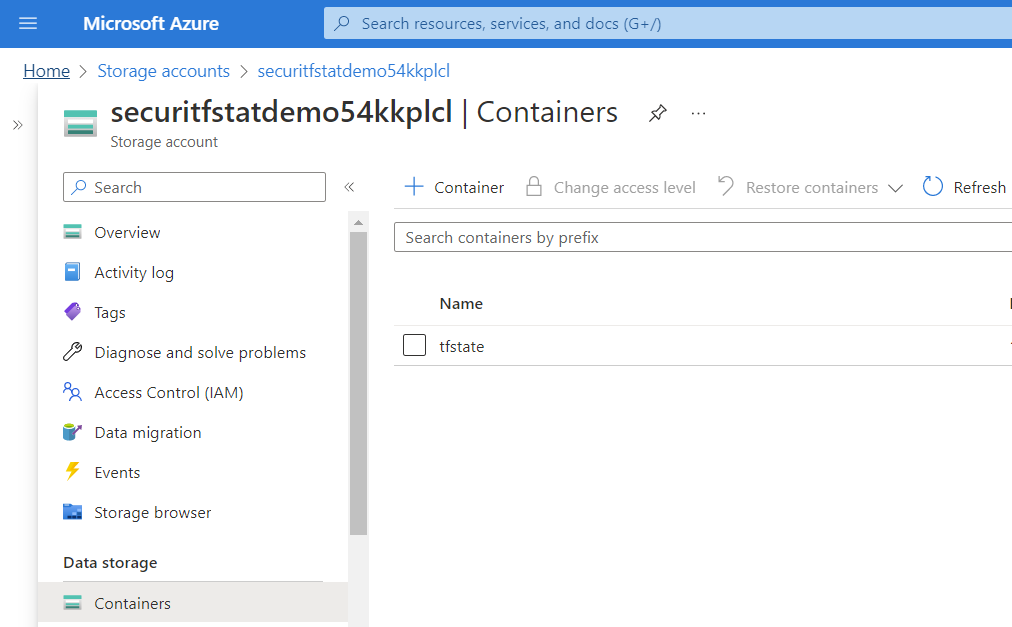
You will also be able to see the remote state called tfstate created by visiting Storage accounts in the Azure Portal
If there is an error in running the bootstrap process and the outcome was unexpected, you will need to delete the environment directory in /azure before running the bootstrap script again
rm -rf azure/<ENVIRONMENT>For a full list of arguments and their purposes, run .tools/azure/bootstrap-environment.sh --help.
Provision Resources
Once you’ve performed the initial bootstrapping of an environment, you can deploy the managed infrastructure from the included template directory. This can be done either manually or using the update-environment.sh script. This script can also be used to apply updates. The command below will deploy the environment with all resources. You may also choose to selectively provision resources
.tools/azure/update-environment.sh \
  --environment <ENVIRONMENT> \
  --location <LOCATION> \
--subscription <SUBSCRIPTION_ID># Sample
.tools/azure/update-environment.sh \
--environment prod \
--location southeastasia \
--subscription <SUBSCRIPTION_ID>During resource provisioning you will be asked for inputs at multiple stages inside a vi editor. One of the example is below:

Read the instructions in the editor and to edit the values you can press i and update the input values. Once you are satisfied with the input values, press Esc to exit editor mode and :wq (save and quit) the editor to continue with resource provisioning.
Once you have successfully run the update-environment script, you will be able to verify that the following resource groups for remote-state, log-analytics & dashboards have been created in Azure Portal
Sentinel would also have been configured
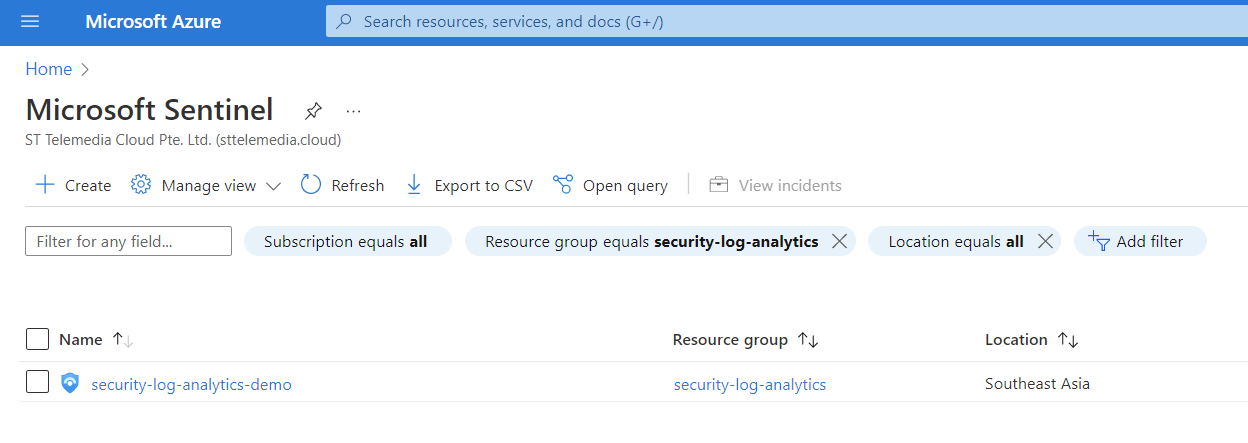
In Sentinel, you will find our rules, workbooks and automation deployed. For more information about custom content, see SIEM Content Management
If there is an error in running the update-environment script and the outcome was unexpected, you will need to delete the Sentinel resource groups security-dashboards and security-log-analytics before running the script again
Update VCS
It is important to commit and push changes after running the update script, or after making any manual changes to code or configurations, within your organisation’s repository (i.e. infrastructure-live).
Once the changes are applied using update script. You can run below mentioned commands to push the performed changes.
git checkout -b feature/update-v<Version-Tag>

git add <select files changed>

git commit -m "<Add a description of performed changes>"

git push -u origin feature/update-v<Version-Tag>
After committing your changes and pushing your branch, you can raise a Support request to have review the changes with you.