Create a Remote Log Source - Check Point
Topics Discussed
You can use this document to add a remote log collector to a Check Point remote device (log source).
Pre-Deployment Considerations
Before you begin, review the following requirements:
Log Relay
For remote log collection, you must have a Log Relay server on your account.
To learn how to add Log Relay to your account, see Obtain Log Relay for Remote Log Collection.
Assumptions
You have a functioning Check Point box online, and configured with policies that are needed
You have a Log Relay device online
You are not blocking traffic on port TCP and UDP port 10003 between the Check Point and the Log Relay
Pre-Configure the Check Point Box
You must first make sure that a log exporter is installed on the Check Point box that you are using. Instructions for log exporter installations are as follows:
Check Point version R80.20
Log Exporter is included in Check Point version R80.20
Check Point version R80.10
Install Check Point version R80.10 on a R80.10 Multi-Domain Log Server, Security Management Server, Log Server, or SmartEvent Server.
Log Exporter can be installed on version R80.10 Jumbo Hotfix Take 56 and later.
The hotfix must be installed after the Jumbo is installed.
If you want to upgrade Jumbo, uninstall the hotfix, upgrade Jumbo, and then reinstall the hotfix.
For more information about the Jumbo installation, see the Installation topic on the Check Point website (https://supportcenter.checkpoint.com/supportcenter/portal?eventSubmit_doGoviewsolutiondetails=&solutionid=sk122323#Installation).
Check Point version R77.30
Install version R77.30 on a Multi-Domain Server, Multi-Domain Log Server, Security Management Server, Log Server or SmartEvent Server.
Log Exporter can be installed on version R77.30 Jumbo Hotfix Take 292 and later.
The hotfix must be installed after the Jumbo is installed.
If you want to upgrade Jumbo, uninstall the hotfix, upgrade Jumbo, and then reinstall the hotfix.
For more information about the Jumbo installation, see the Installation topic on the Check Point website (https://supportcenter.checkpoint.com/supportcenter/portal?eventSubmit_doGoviewsolutiondetails=&solutionid=sk122323#Installation).
Configure the Check Point Device
Log into the Check Point box via Secure Shell (SSH).

Enter the "expert" command to access Expert mode, then follow the onscreen prompts to enter your credentials:

Enter the following command to configure the log exporter to send the logs to the log relay:
CODEcp_log_export add name <exporter name> enabled true target-server <log relay ip address> target-port 10003 protocol tcp format leef read-mode semi-unifiedIn <exporter name>, insert the name that you wish to use for the log exporter, with no spaces.
For example: Armor_Exporter
In <log relay ip address>, insert the IP address of the log relay box.
An example of the full command is shown below:

The exporter will not start immediately.
To start the exporter, enter the following command:
CODEcp_log_export restart name <exporter name>In <exporter name>, insert the name of the exporter that was used in step 3a.
An example of the full command is shown below:
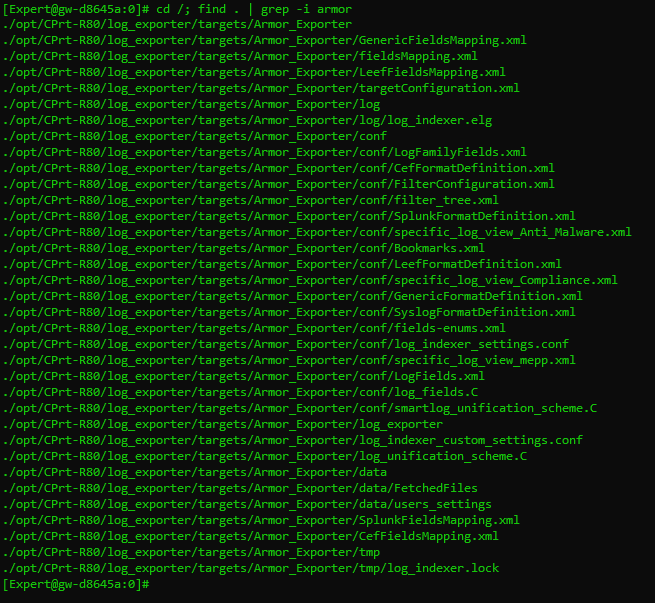
Navigate to the directory that was created when you created the log exporter.
To find this directory, run the following command:
CODEcd /; find . | grep -i <exporter name>Replace the LeefFieldsMapping.XML file with the following .xml file: leeffieldmapping.xml.
Navigate to the conf directory, and replace the LeefFormatDefinition.XML file with the following .xml file: LeefFormatDefinition.xml.
An example of the full command is shown below:
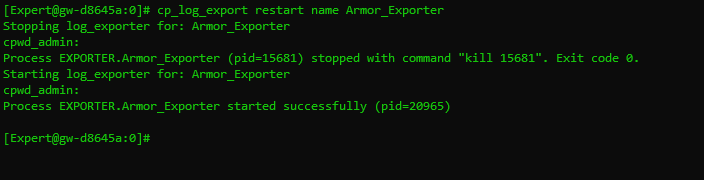
Restart the Check Point Log Exporter by running the following command:
CODEcp_log_export restart name <log_exporter_name>An example of the full command is shown below:
In the Check Point web GUI, go to System Management, then System Logging.
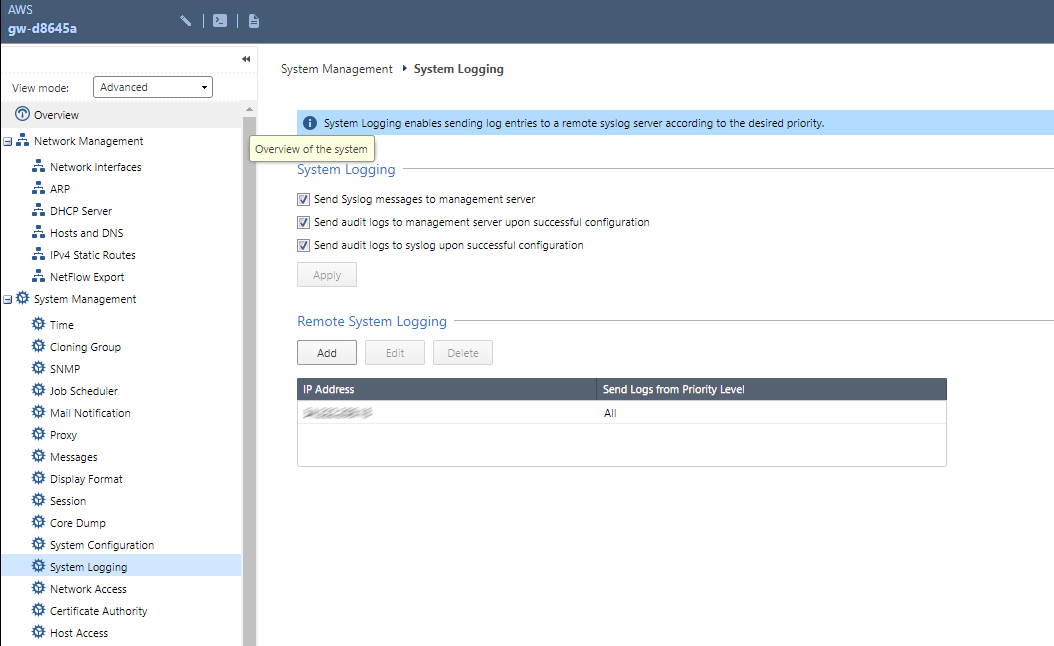
Select the Send Syslog messages to management server checkbox.
In the Remote System Logging box, add the IP address of the log relay.
Keep Send Logs from Priority Level set to All.

Troubleshooting
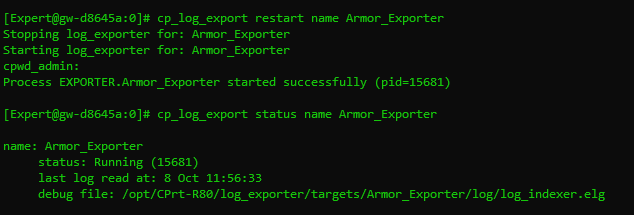
To check the status of the log exporter device after the configuration changes:
Log into the Check Point box via Secure Shell (SSH).
Go into expert mode.
Run the following command:
CODEcp_log_export stats name <log_exporter_name>
If the status is "Running", then the configuration was successful, and the log exporter should be sending logs to the log relay.
If the status is "Not Running" after the configuration changes, verify the changes that were made to the LeefFormatDefinition.XML file in step 5c.
Simply comment out the extra fields in the eventID section of the XML. Do not make any other changes.
Verify Connection in Nexus
In Nexus, hover over Threat Management
 on the left-side nav.
Click Log Search.
Then click Log Search tab on the top of the page.
Wait for the SSO.
In the Source column, review the source name to locate the newly created Check Point remote log source.
In the search field, you can also enter "check point" to locate Check Point messages.