Create a Remote Log Source - SonicWall
Topics Discussed
You can use this document to add a remote log collector to a SonicWall remote device (log source).
Pre-Deployment Considerations
Before you begin, review the following requirements:
Log Relay
For remote log collection, you must have a Log Relay server on your account.
To learn how to add Log Relay to your account, see Obtain Log Relay for Remote Log Collection.
Assumptions
The SonicWall device is running 6.5.X.X
Your device is already configured and running the policies that are needed
You already have a log relay box set up and configured correctly
The security policies for any AWS security groups or firewalls allow traffic on port 10078 to reach the log relay
Configure the SonicWall Device
Log into the SonicWall console.
Review the top right corner of the screen, and confirm that Mode is set to Configuration.
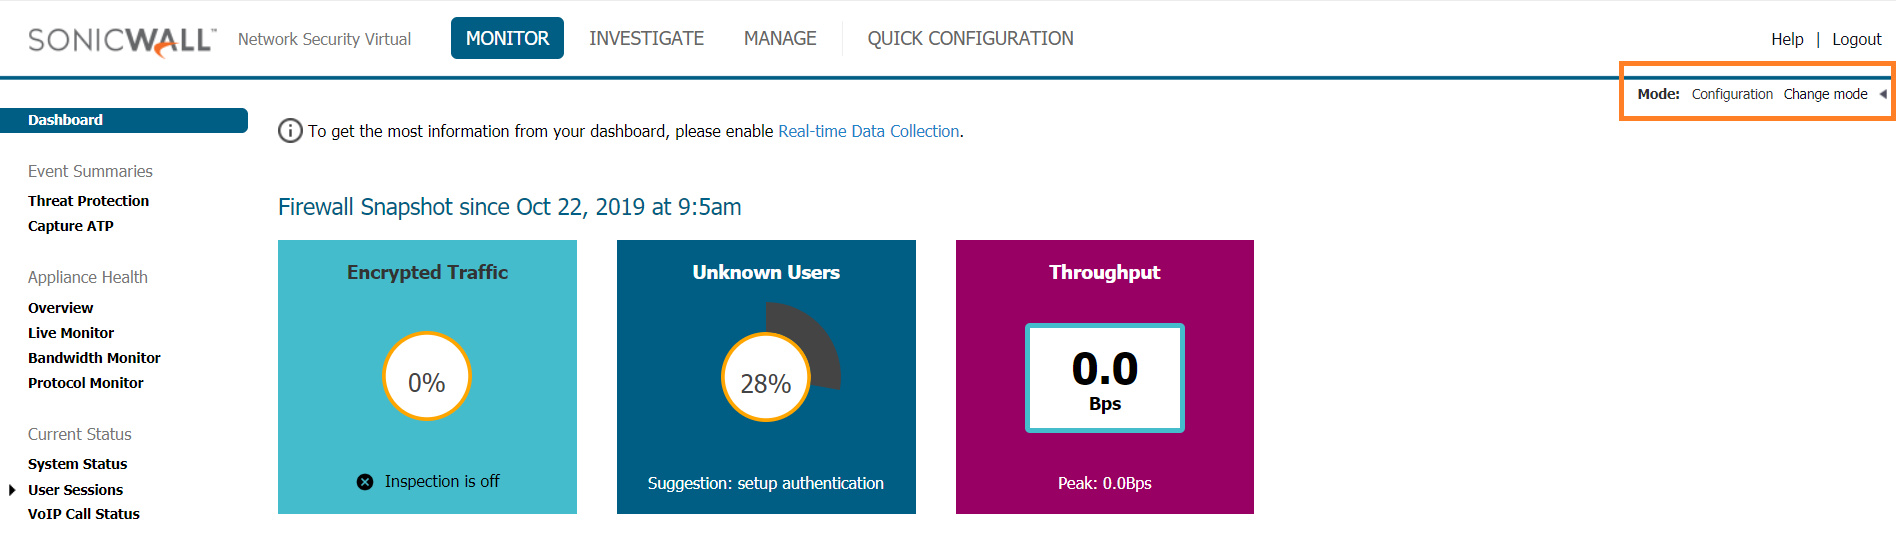
If Non-Config displays, then click the arrow, then click Change mode.
Click Manage.
Under Logs & Reporting, click Log Settings, then click SYSLOG.
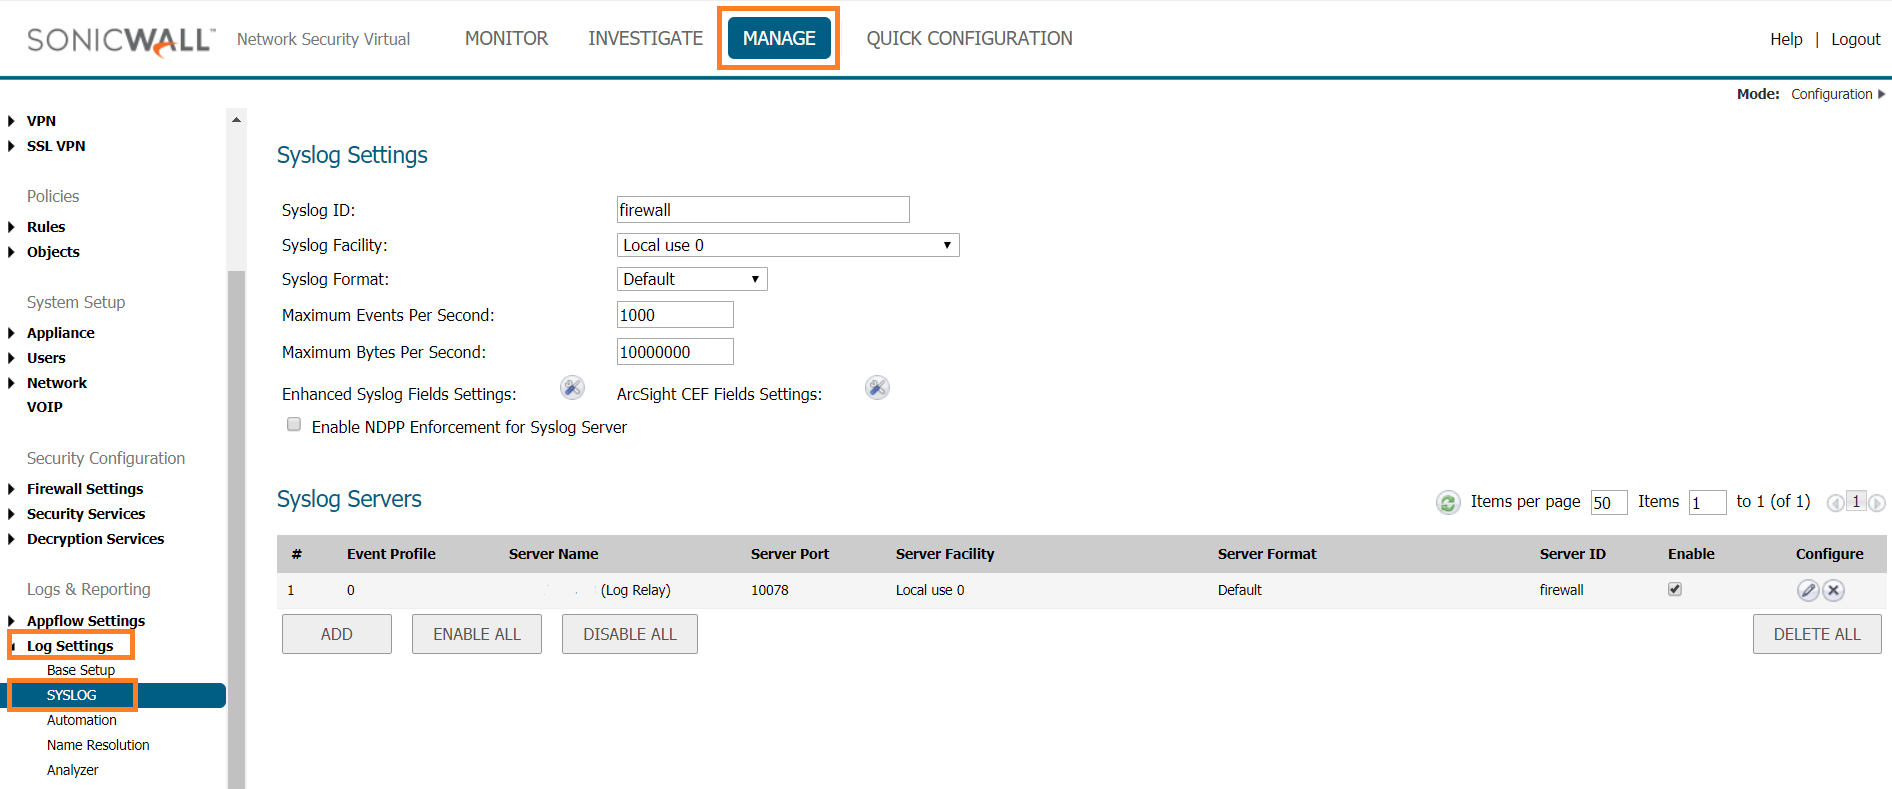
Enter the Syslog Settings as follows:
In Syslog ID, enter the desired identifier.
This ID will show up in all syslog logs.
In Syslog Facility, select Local use 0.
In Syslog Format, select Default.
In Maximum Events Per Second, enter 1000.
In Maximum Bytes Per Second, enter 10000000.
In the Syslog Servers section, click Add.
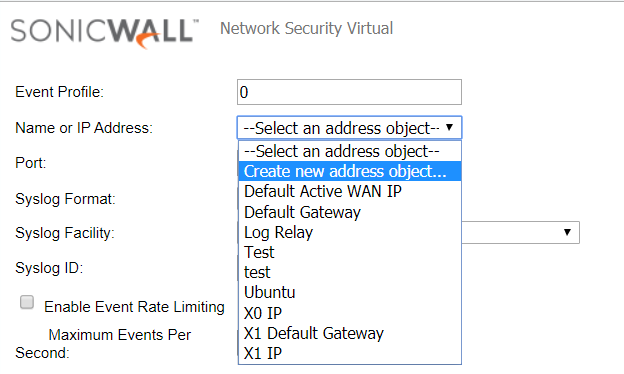
In Event Profile, enter the desired name for the syslog forwarding profile.
This will be used again later.
In Name or IP Address, select Create new address object.
In Name, enter Log Relay.
In Zone Assignment, select DMZ.
In Type, select Host.
In IP Address, enter the IP address of your log relay box.
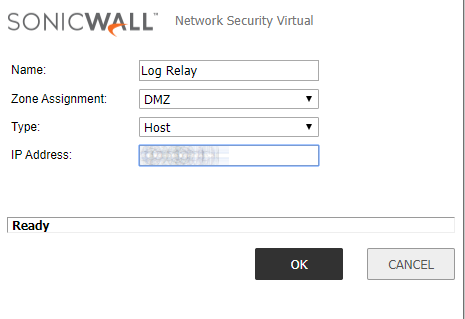
Click OK.
In Port, enter 10078.
In Syslog Format, select Default.
In Syslog Facility, select Local Use 0.
In Syslog ID, enter the same Syslog ID that was entered in step 5a.
Leave the Enable Event Rate Limiting and Enable Data Rate Limiting boxes unchecked.
Do not select a Local interface or Outbound Interface for the VPN Tunnel.
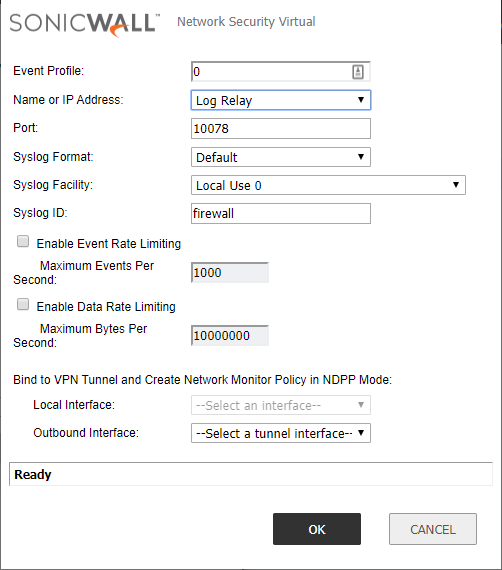
Click OK.
Click Manage,
Under Logs & Reporting, click Log Settings, then click Base Setup.
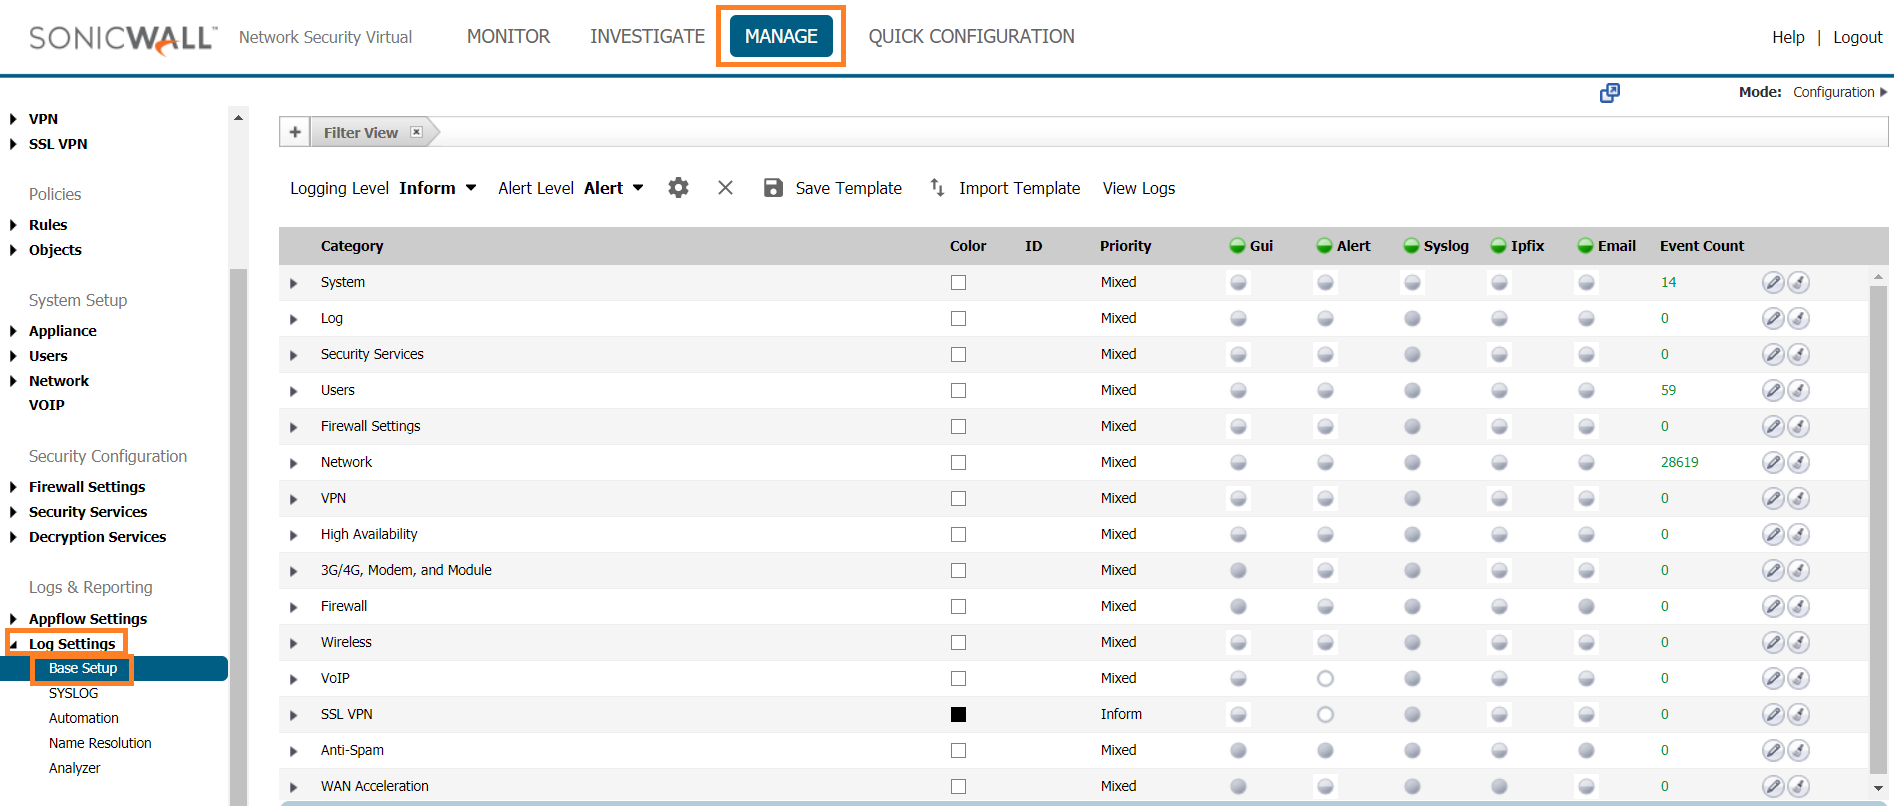
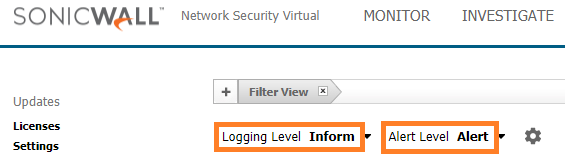
Confirm that Logging Level is set to Inform.
Confirm that Alert Level is set to Alert.
In the Category column, select Network, then select Network Access.
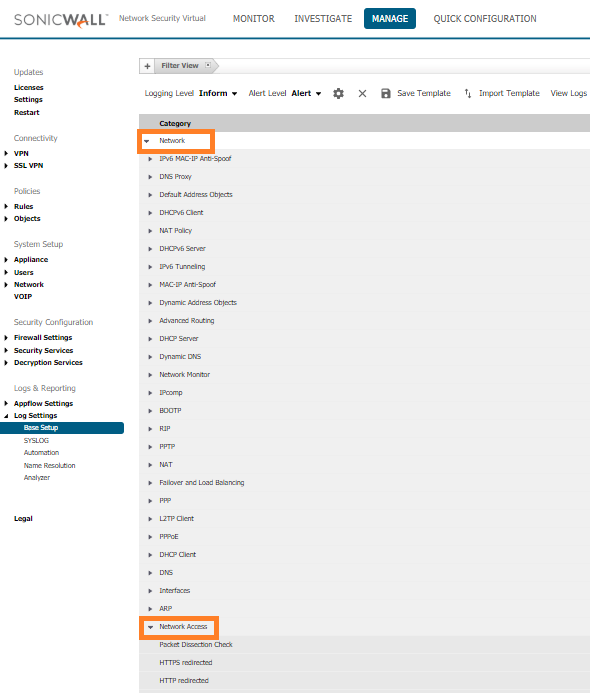
For the Connection Closed sub-category, set the Priority to Debug.
For Connection Opened sub-category, set the Priority to Debug.
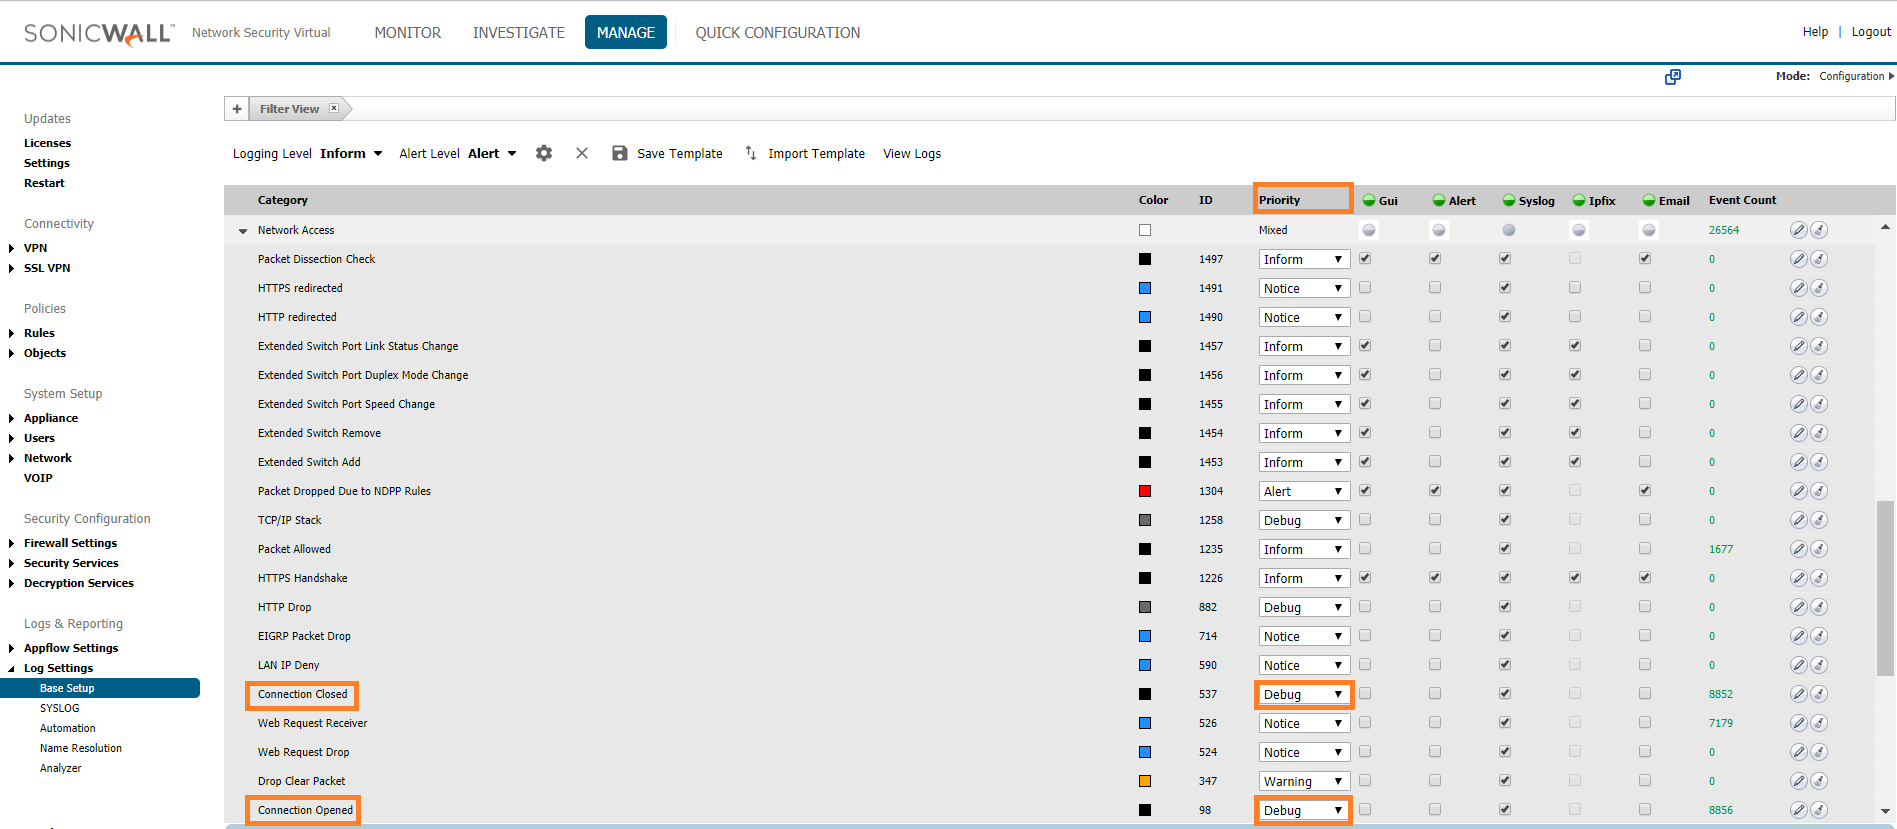
Locate the Syslog column, then click the green circle to the left of the column until it is fully shaded in dark green.

This will enable forwarding of all syslog logs.|
Click Accept.


Verify Connection in Nexus
In Nexus, hover over Threat Management
 on the left-side nav.
Click Log Search.
Then click Log Search tab on the top of the page.
Wait for the SSO.
In the Source column, review the source name to locate the newly created SonicWall remote log source.
In the search field, you can also enter "sonicwall" to locate SonicWall messages.